Chapter 3: First Dialog Step
Almost every book on every programming language starts with this one. Let’s just put “Hello, World!” on the screen. Nevertheless, here is the funny part: we don’t want this greeting to be on the screen. Instead, we want our Amazon Echo or Google Assistant to say it.
Moreover, we also want to ask a user a question.
On this page
- Step One: Understanding Dialog Steps
- Step Two: Making a Voice Assistant Speak
- Step Three: Ask a Question
Step One: Understanding Dialog Steps
As we learned in the first chapter of this voice development course, the primary job of the Fulfilment WebHook is to provide a logical flow of the conversation between a voice assistant and a user.
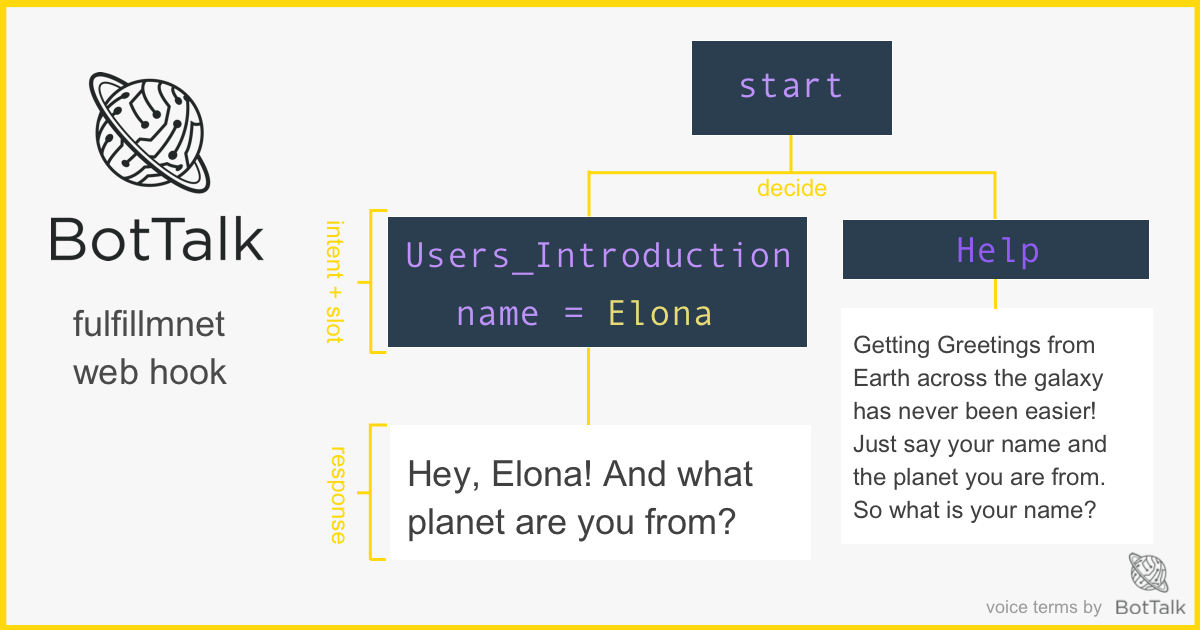
BotTalk implements this flow as a series of connected dialog steps. In this chapter, you discover how to create the first step in the conversational flow. You learn how to make a voice assistant greet the user and ask a question:
Assistant: Welcome to Greetings from Earth. What is your name?
When you launch your scenario in the editor, there is much code that was generated for you by BotTalk: the name of your scenario, invocation phrases, the locale, etc. Don’t be afraid. We’ll get to the nitty-gritty details of scenario settings later. For now, you want your assistant to say a simple phrase greeting the user, remember?
On line 13 of the BotTaslk editor find the steps: section. Everything that is located below this line is the actual logic of your Alexa Skill or Google Action.
BotTalk automatically generates several logical steps for you. Amazon and Google require the voice developer to include these steps in every Alexa Skill and Google Action. Otherwise, the voice application is not certified.
The first step is conveniently called Initial step:
- name: Initial step
  actions:
    - sendText: 'Welcome text'
    - getInput:
  next:
    AMAZON.CancelIntent: Exit
    AMAZON.StopIntent: Exit
    AMAZON.HelpIntent: Help
Each step must have a name, one or more actions that instruct your voice assistant what to do, and the next section, which contains the logical connections to the next steps, depending on the intent that came from a user.
The next section is optional. However, if you skip it, BotTalk finishes the conversation at this step. In fact, that is how the Exit step structured:
- name: Exit
  entrypoint: true
  actions:
    - sendText: 'Here is a bye-bye text'
*Sidenote: if you feel uncomfortable with some of the voice terms in this chapter, it might be a good idea to head over to How voice assistants work chapter of this course. There we introduce the basic terminology using visual infographics and many examples.
Step Two: Making a Voice Assistant Speak
What you want a voice assistant to do in the first step is to greet your user.
You implement that in BotTalk by using the sendText action. Go ahead an replace a standard “Welcome text” with your custom greeting:
    - name: Initial step
      actions:
        - sendText: 'Welcome to Greetings from Earth. '
        - getInput:
      next:
        AMAZON.CancelIntent: Exit
        AMAZON.StopIntent: Exit
        AMAZON.HelpIntent: Help
As you might remember from the first chapter, the Amazon’s / Google’s cloud service converts the text BotTalk is sending with the sendText action into speech using a process called Text-to-Speech (TTS).
Step Three: Ask a Question
Great, now you got a voice assistant talking, the next step would be to ask a user a question. You do that by using an action getInput.
Let’s make some changes to the first step:
    - name: Initial step
      actions:
        - sendText: >
            Welcome to Greetings from Earth.
            What is your name?
        - getInput:
      next:
        AMAZON.CancelIntent: Exit
        AMAZON.StopIntent: Exit
        AMAZON.HelpIntent: Help
The first thing you might have noticed - we put the greater than sign > after sendText action. Usually, your script would break, if you put in the new lines in the sendText action.
The > sign would help you out if you want to write longer texts to maintain the overview. It’s also helpful if you want to reduce clutter and get rid of those annoying quote signs.
Now, after we’ve sent the text to the User - we want to make our Assistant listen. That’s what getInput does. On your devices, you normally see some visual cue - on Alexa that is a blue ring or line. While on Google Home that would be blinking white dots.
That’s how the Human knows - ok, here is where I come in - it’s time for me to say something.
Next Steps
You have already achieved so much in your voice development primer course. You learned how to make a voice assistant talk and ask questions!
Wouldn’t it be nice to hear it?
Conveniently enough, BotTalk has a built-in tester, that allows you to test (hear) your voice scenarios right there in the browser. Head to the next chapter to learn how!