Chapter 6: Deploy Alexa Skills and Actions on Google
Now you’ve got your scenario ready; it’s time to listen to it on the real device!
In this chapter, you learn how to deploy (publish) your BotTalk scenario as an Alexa Skill and an Action on Google. You also learn, how you can test the voice application on either platform in the simulator. Finally, you learn how to distribute the development version of your Alexa Skill and Google Action among beta testers - colleagues and friends.
On this page
- How to Deploy an Alexa Skill to Amazon
- Testing an Alexa Skill in Amazon Developer Console
- How to Deploy an Action on Google to Dialogflow
- Testing a Google Action in Actions on Google Simulator
- How to test an Alexa Skill on Amazon Echo Device
- Testing a Google Action on Google Home and in Google Assistant App
- Next steps
How to Deploy an Alexa Skill to Amazon
Go to the Deploy tab in the top of the editor, where you can see two options. You can deploy, or publish, your scenario as Amazon Alexa Skill or as Google Assistant Action:
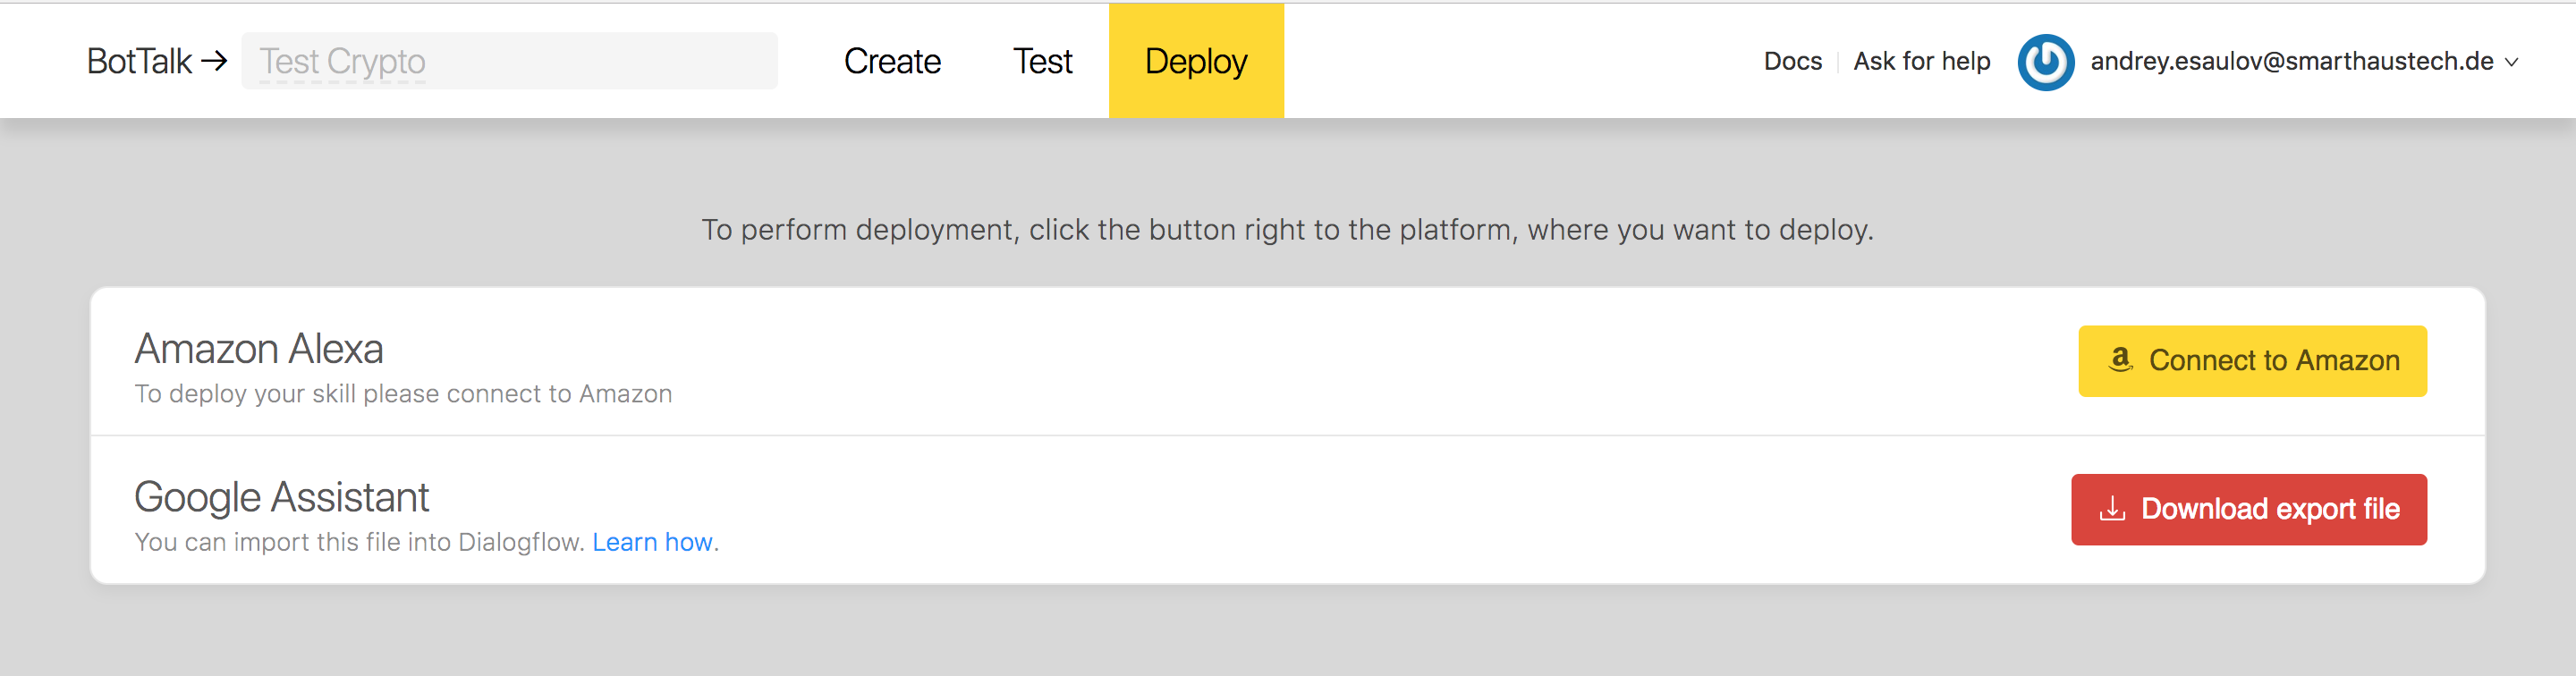
Of course, you can do both as well, but we start with Amazon Alexa first.
For you to be able to publish the Skills for Alexa, you’re required to become a registered Amazon Developer: Amazon Developer Registration. This process is free of charge - and takes only 3 minutes to complete. Please note, that BotTalk is not able to deploy your skill if you don’t have Amazon Developer Account.
After you created your Amazon Developer Account head back to your scenario on BotTalk, go to the Deploy section and click on the Connect to Amazon button.
BotTalk redirects you to the Amazon authorization page, where you can log in with your Amazon Developer Account:

Amazon OAuth service asks you to authorize BotTalk application. This authorization is required for BotTalk to publish and update the Skills you created. BotTalk DOES NOT store your Amazon email/password!!!
After you authorize BotTalk, you are redirected to the dashboard. Where you need to choose the scenario you created once again (sorry for this inconvenience, but there was no other way to solve the OAuth process of Amazon):
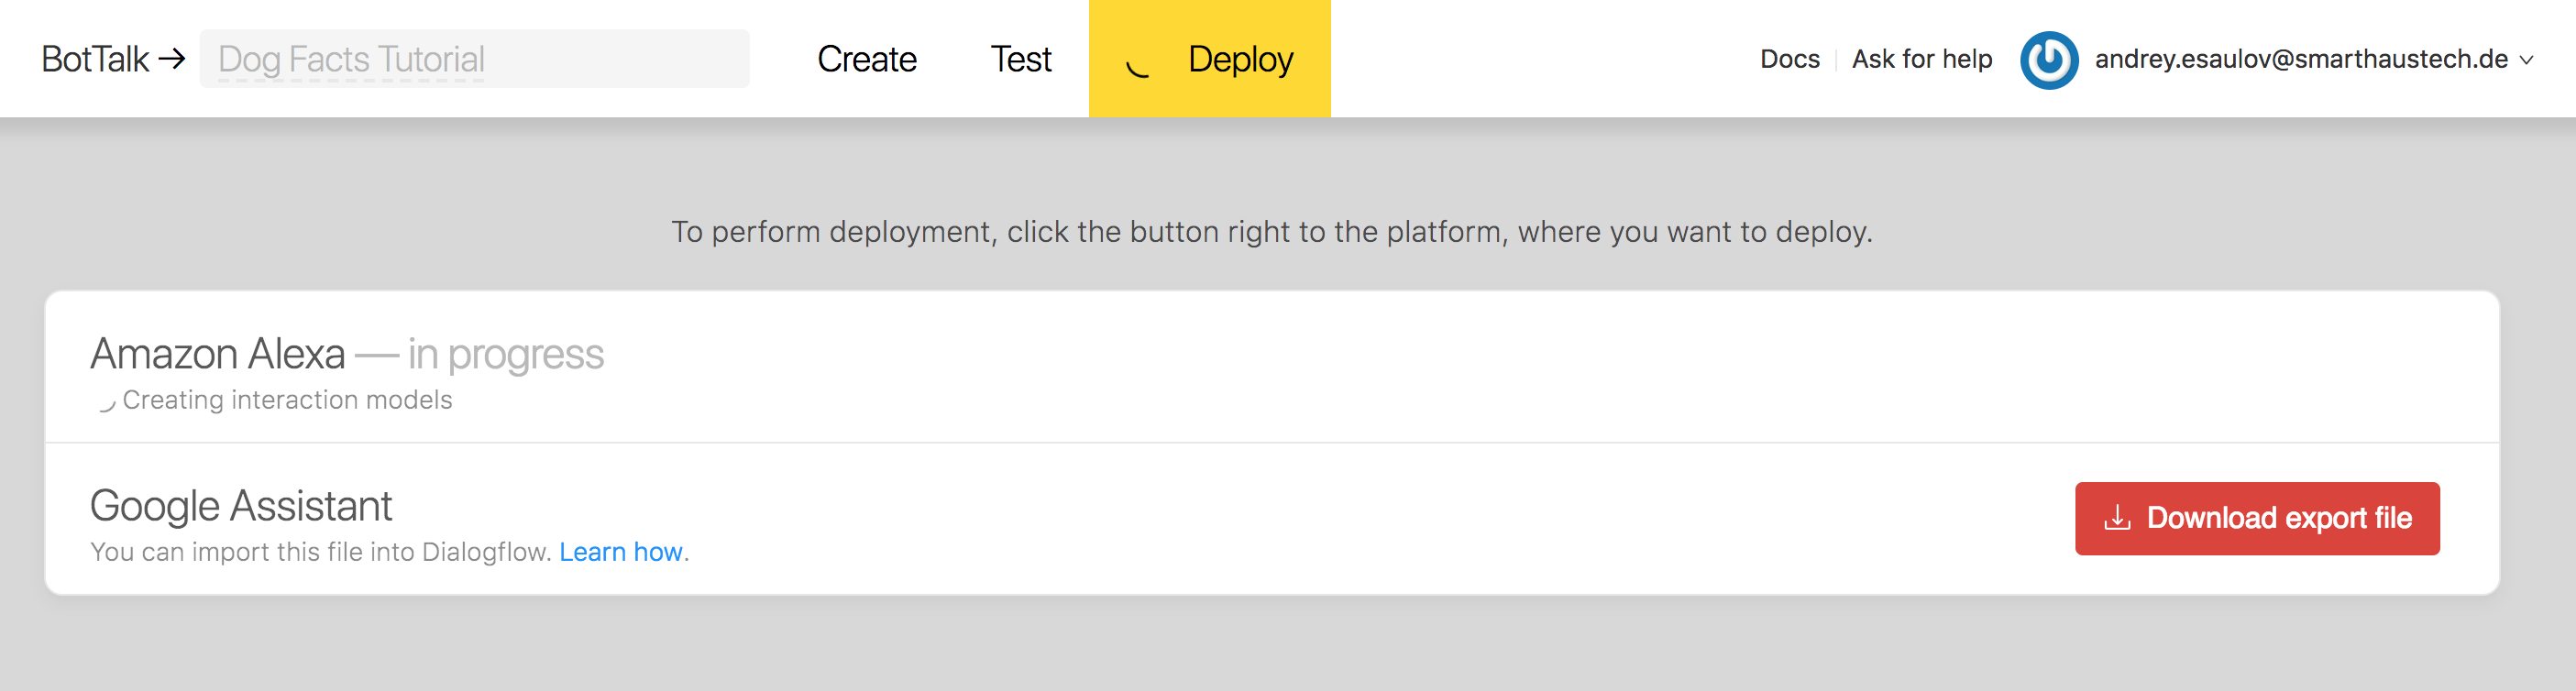
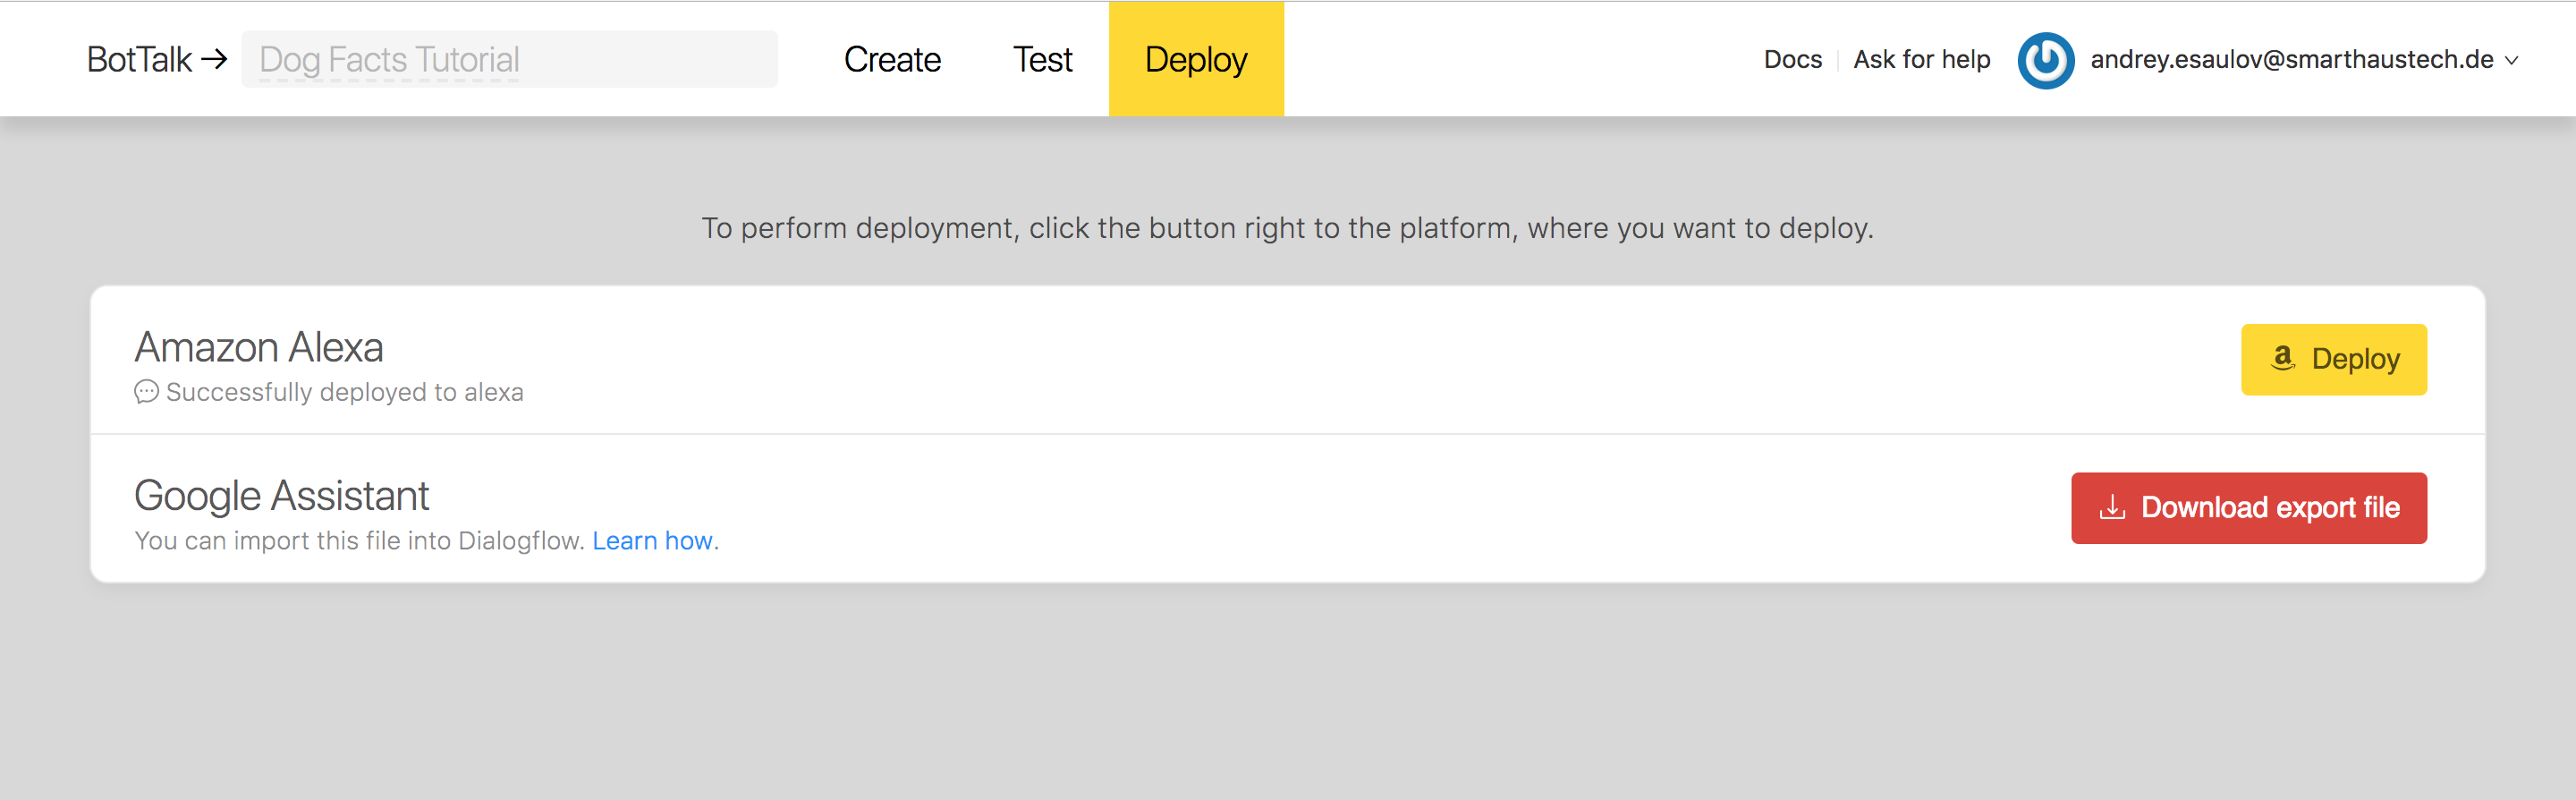
After choosing the scenario and going to Deploy section once again, you can see the button that used to be called Connect to Amazon now has changed to Deploy:

Go ahead and click on that button to start the deployment process:
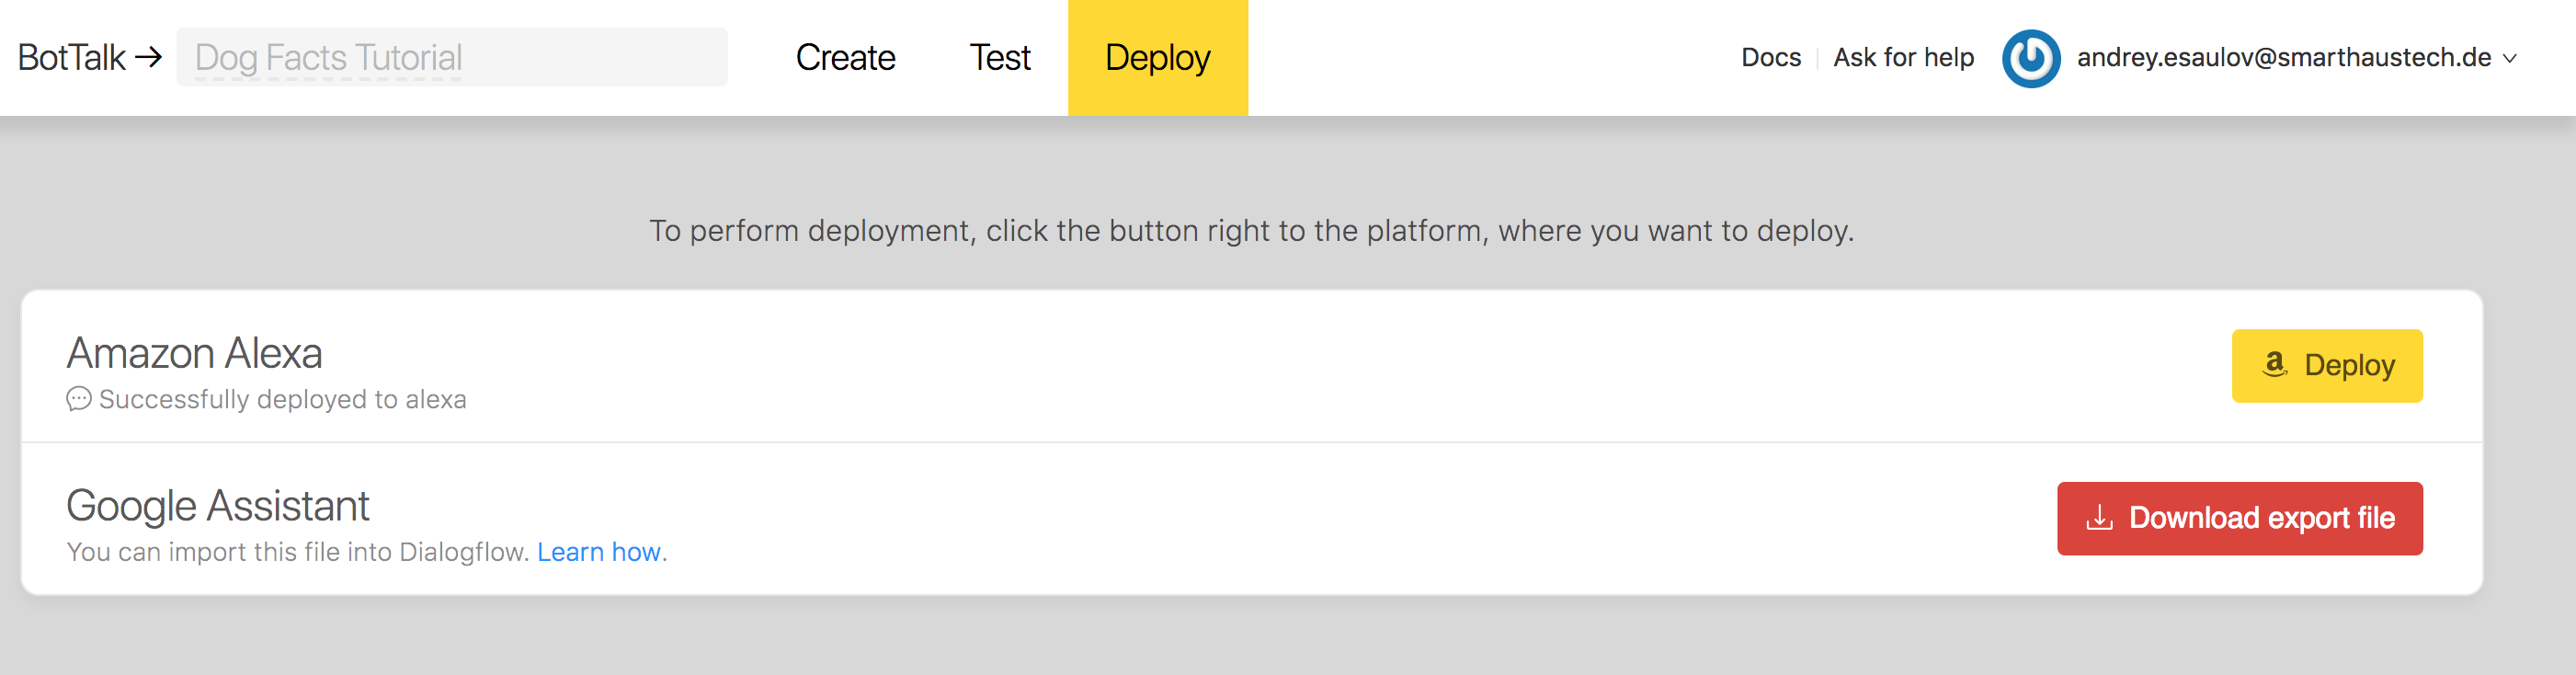
It takes a couple of minutes for the deployment to build your skill. After the deployment is done you see the confirmation: Successfully deployed to Alexa:
Testing an Alexa Skill in Amazon Developer Console
To test that the deployment worked, head over to the Amazon Developer Services and sign in as Amazon Developer.
After this choose Amazon Alexa from the dashboard (left top corner):
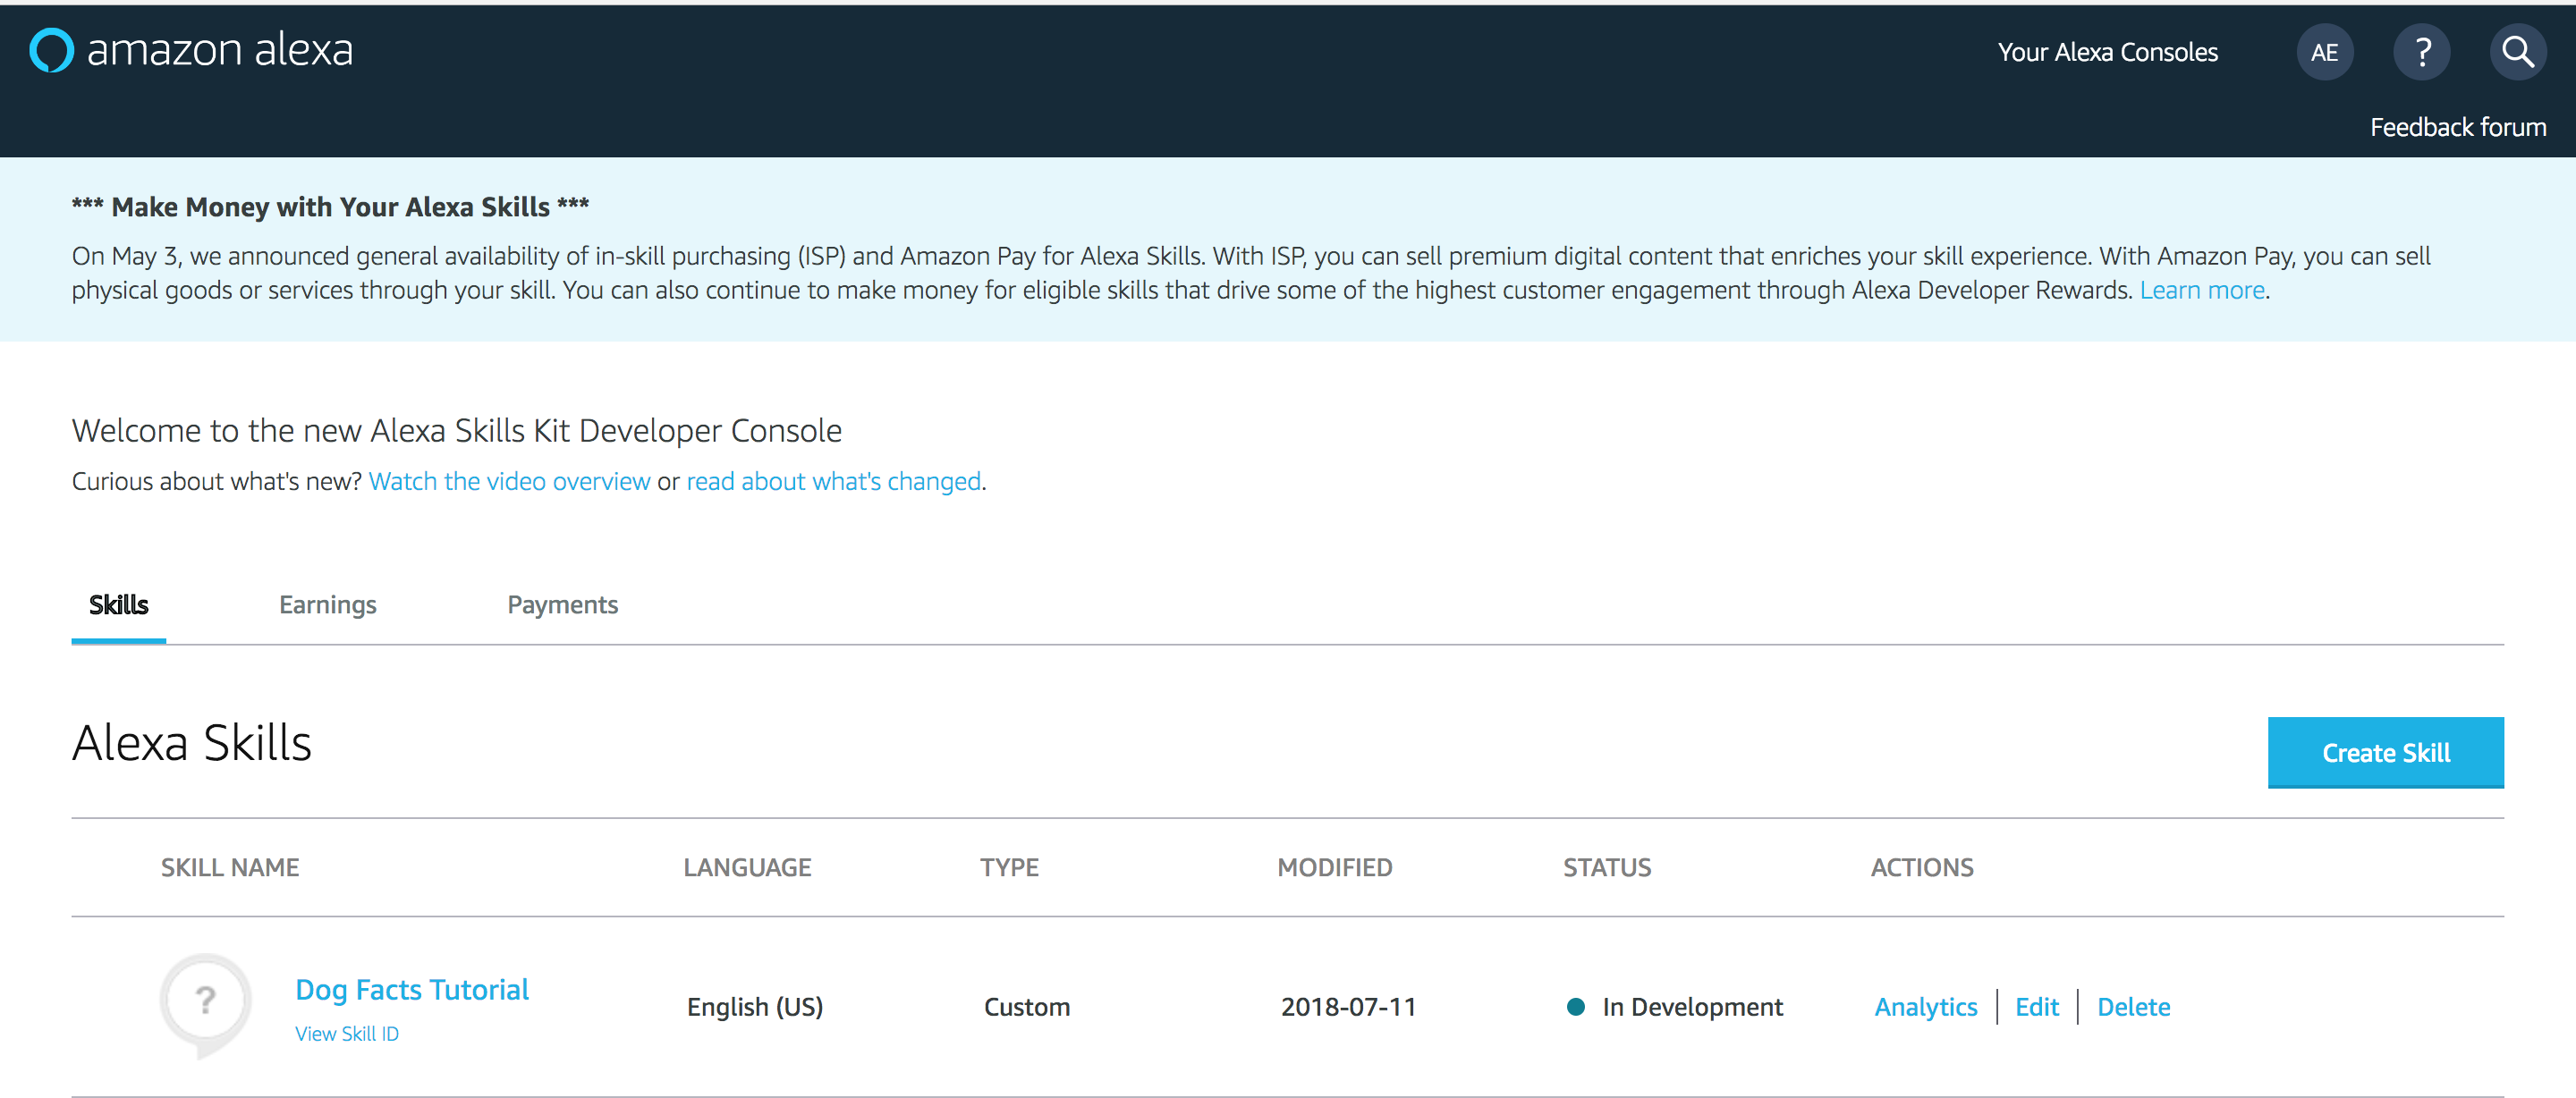
Then head to Your Alexa Consoles menu (right top corner). Click on the Skills section:
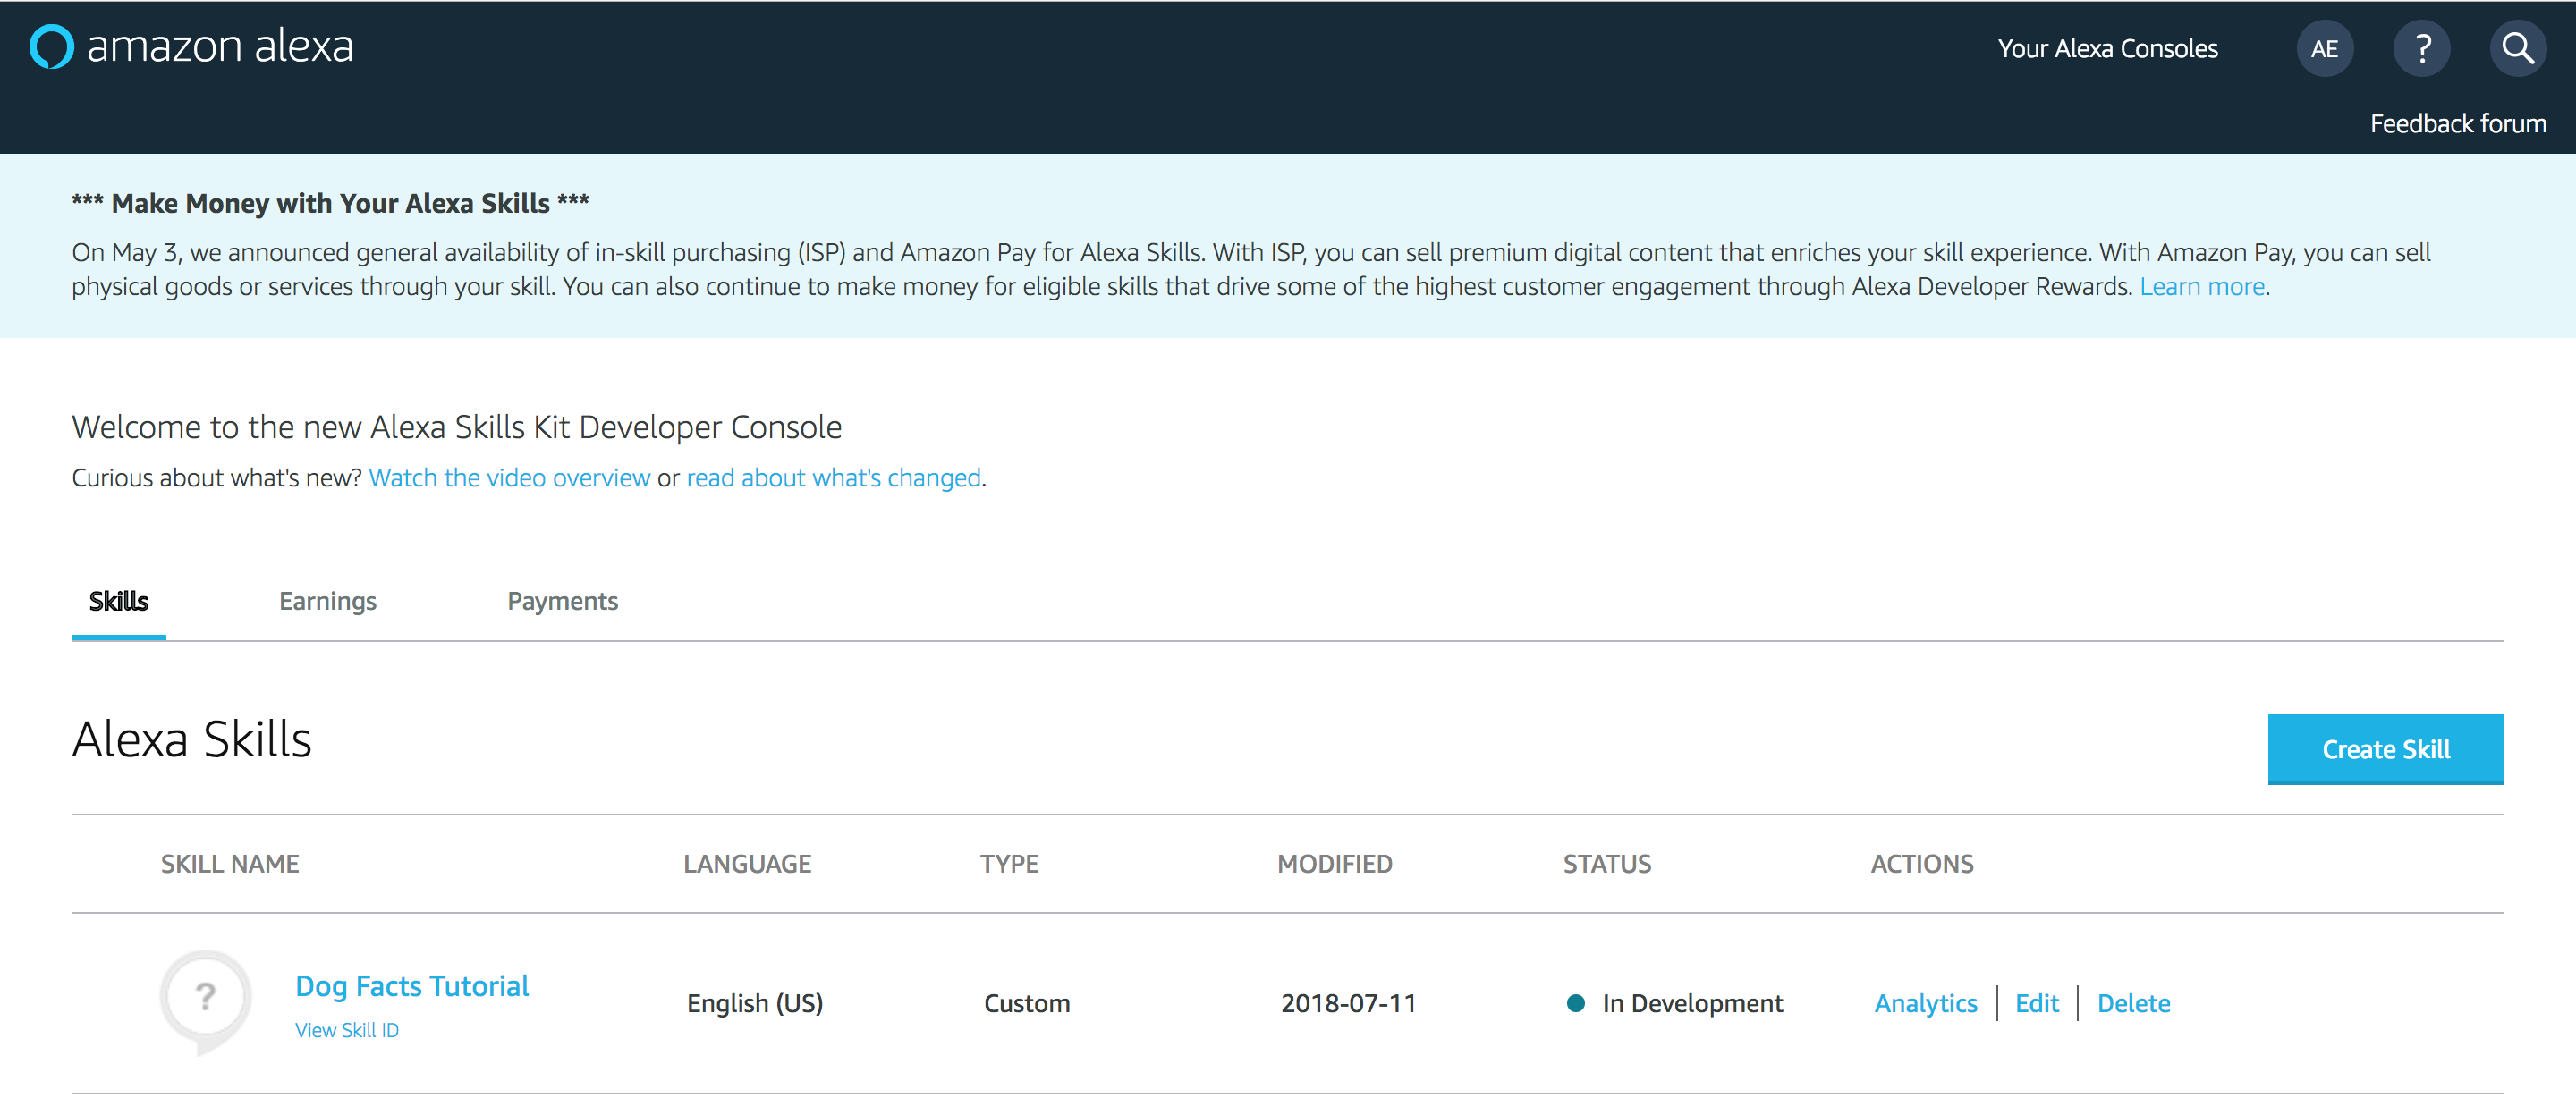
You see the skill you’ve just deployed from BotTalk displayed in the list as the first item:
To test the skill, click on the Edit link in the ACTIONS section to see the Alexa Skill Build Dashboard:

From here head to the Test tab at the top of the screen. The Alexa Simulator opens:
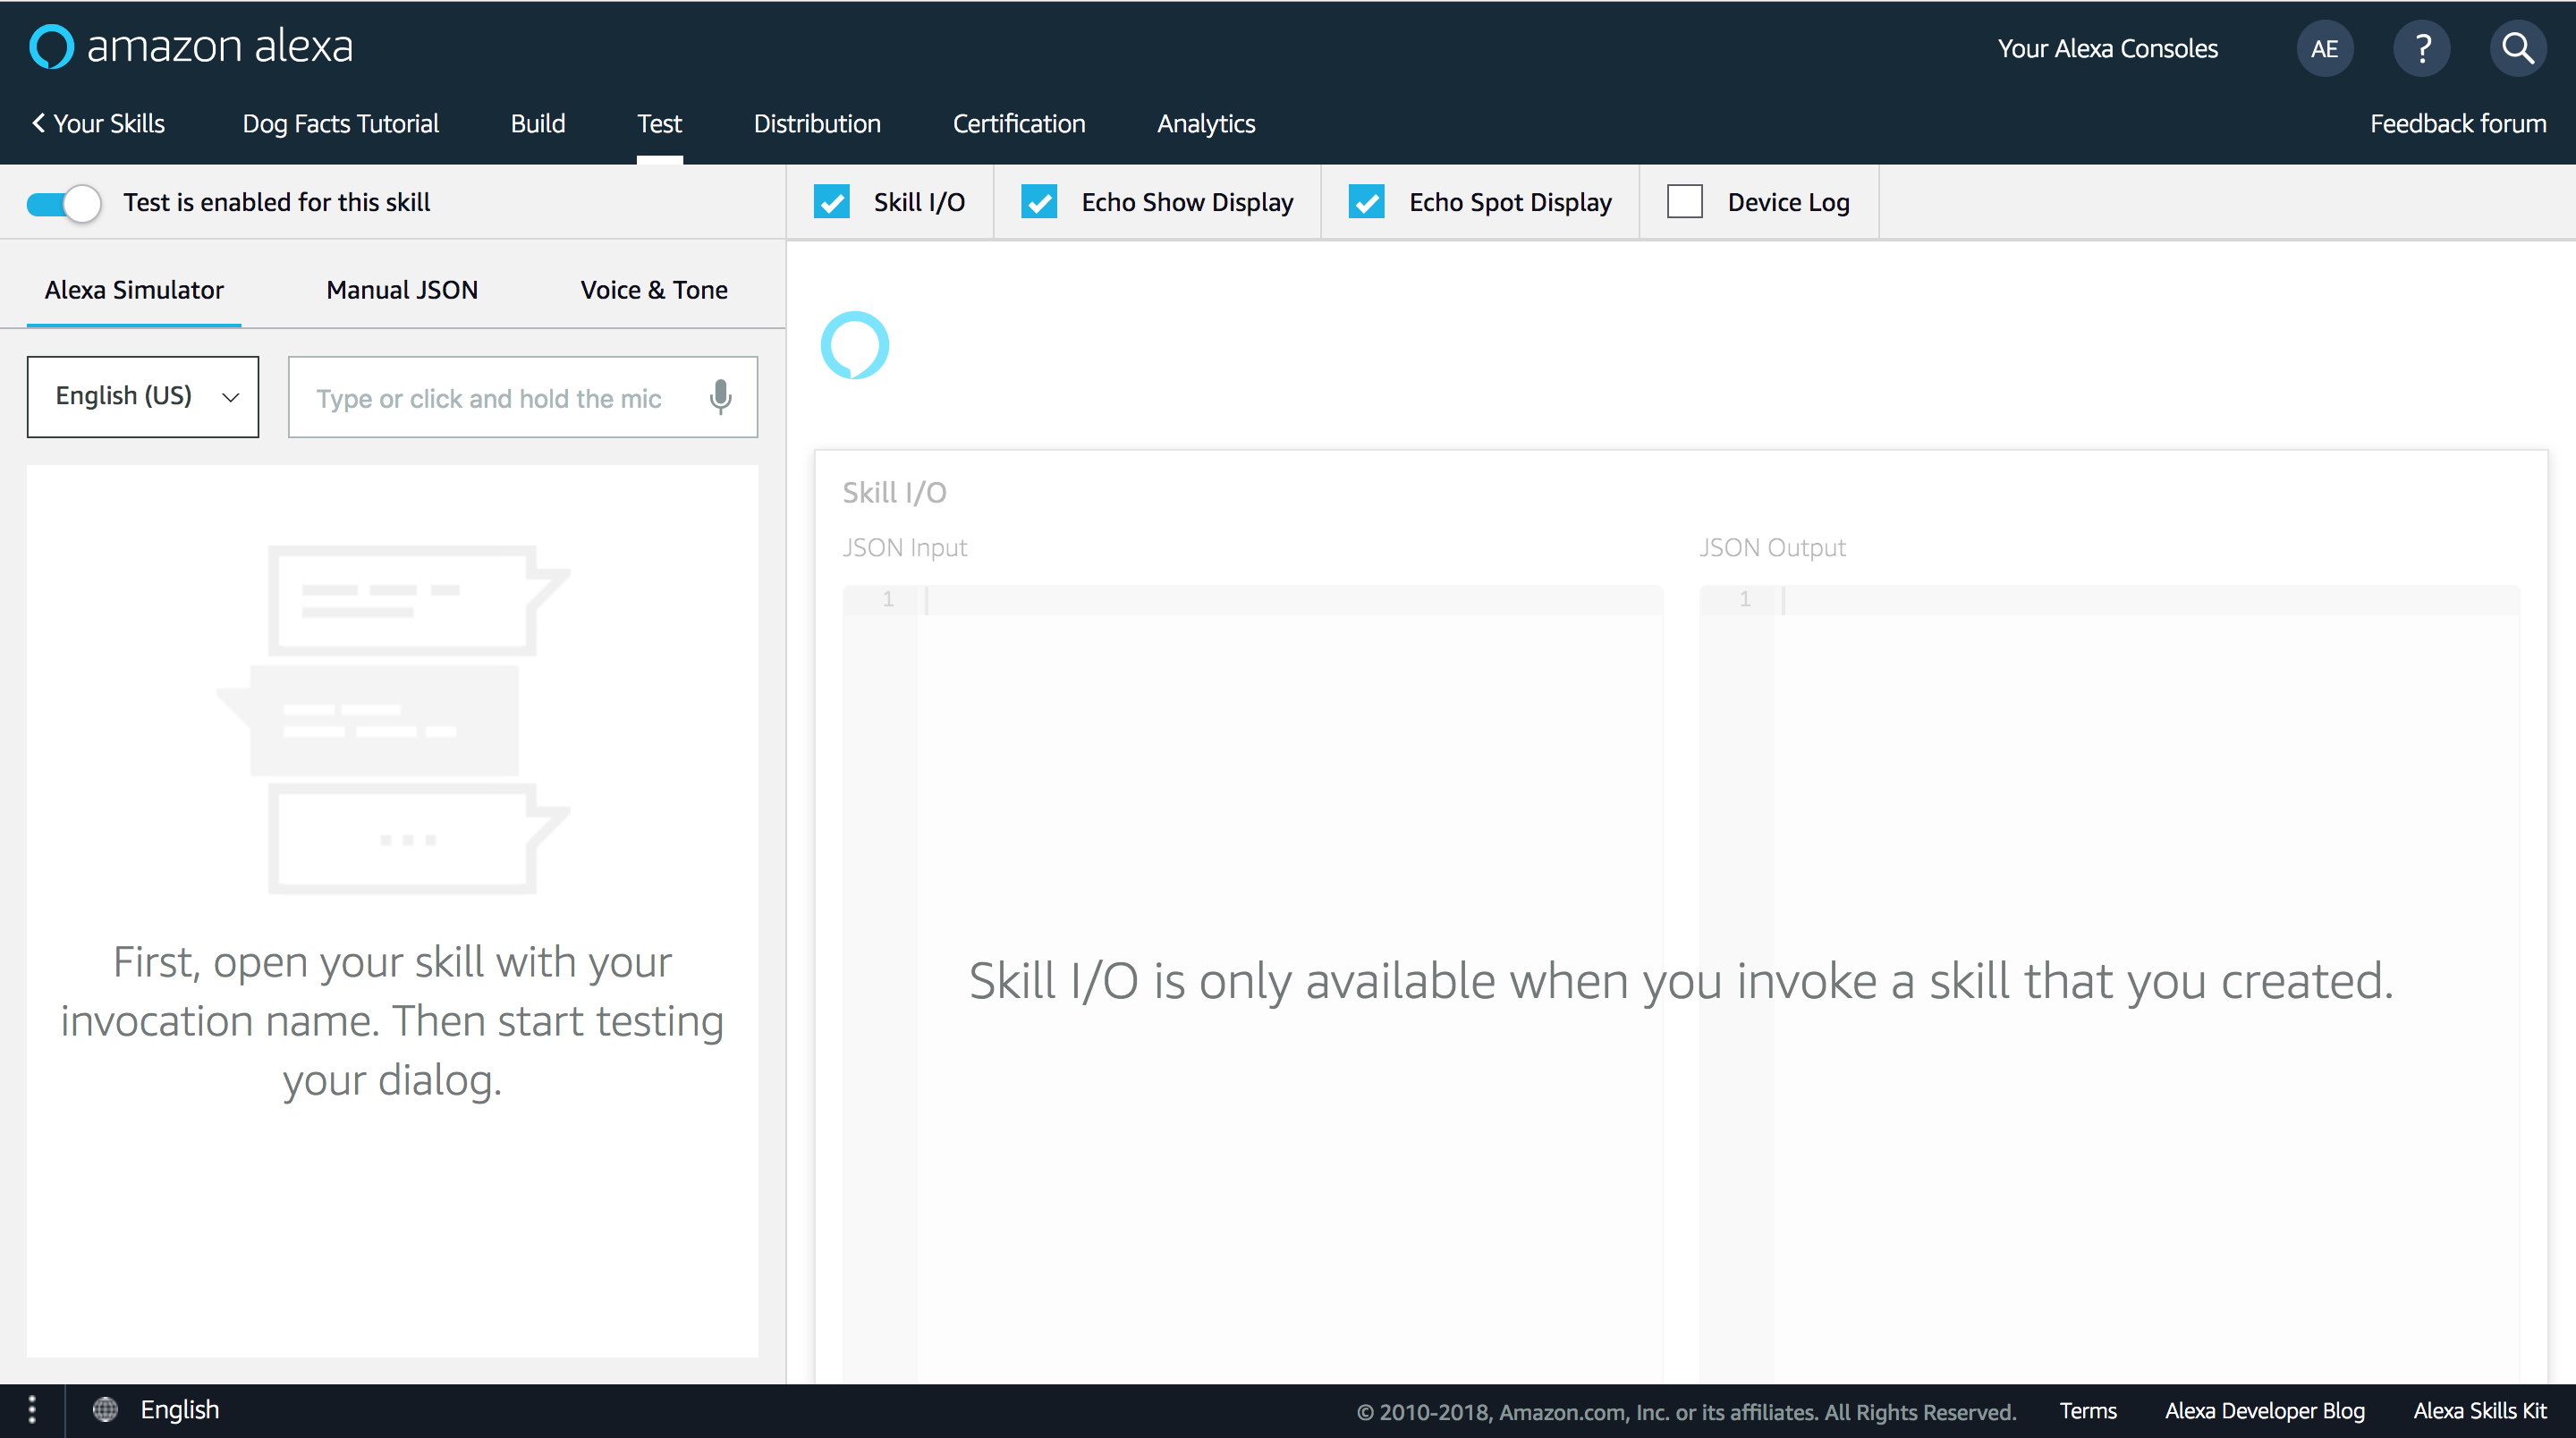
There you can start your newly created skill either by typing in the input field or by clicking on the microphone icon and saying: open greetings from earth.
Please not that if named your scenario differently - you would need to choose that name instead.
You can answer the questions that Alexa Simulator asks you - and overall interact with the simulator as you would with the physical device.
Congratulations, you’ve got your first Alexa Skill developed on BotTalk! However, why stop here? Let’s also create an Action on Google. The great news is - you don’t have to change anything in the code!
How to Deploy an Action on Google to Dialogflow
To deploy your scenario from BotTalk to Google Assistant you need to create an account on Dialogflow. Dialogflow is owned by Google and is essentially the counterpart of Amazon Alexa Console.
You can either register an account here or log in with your existing Google account:
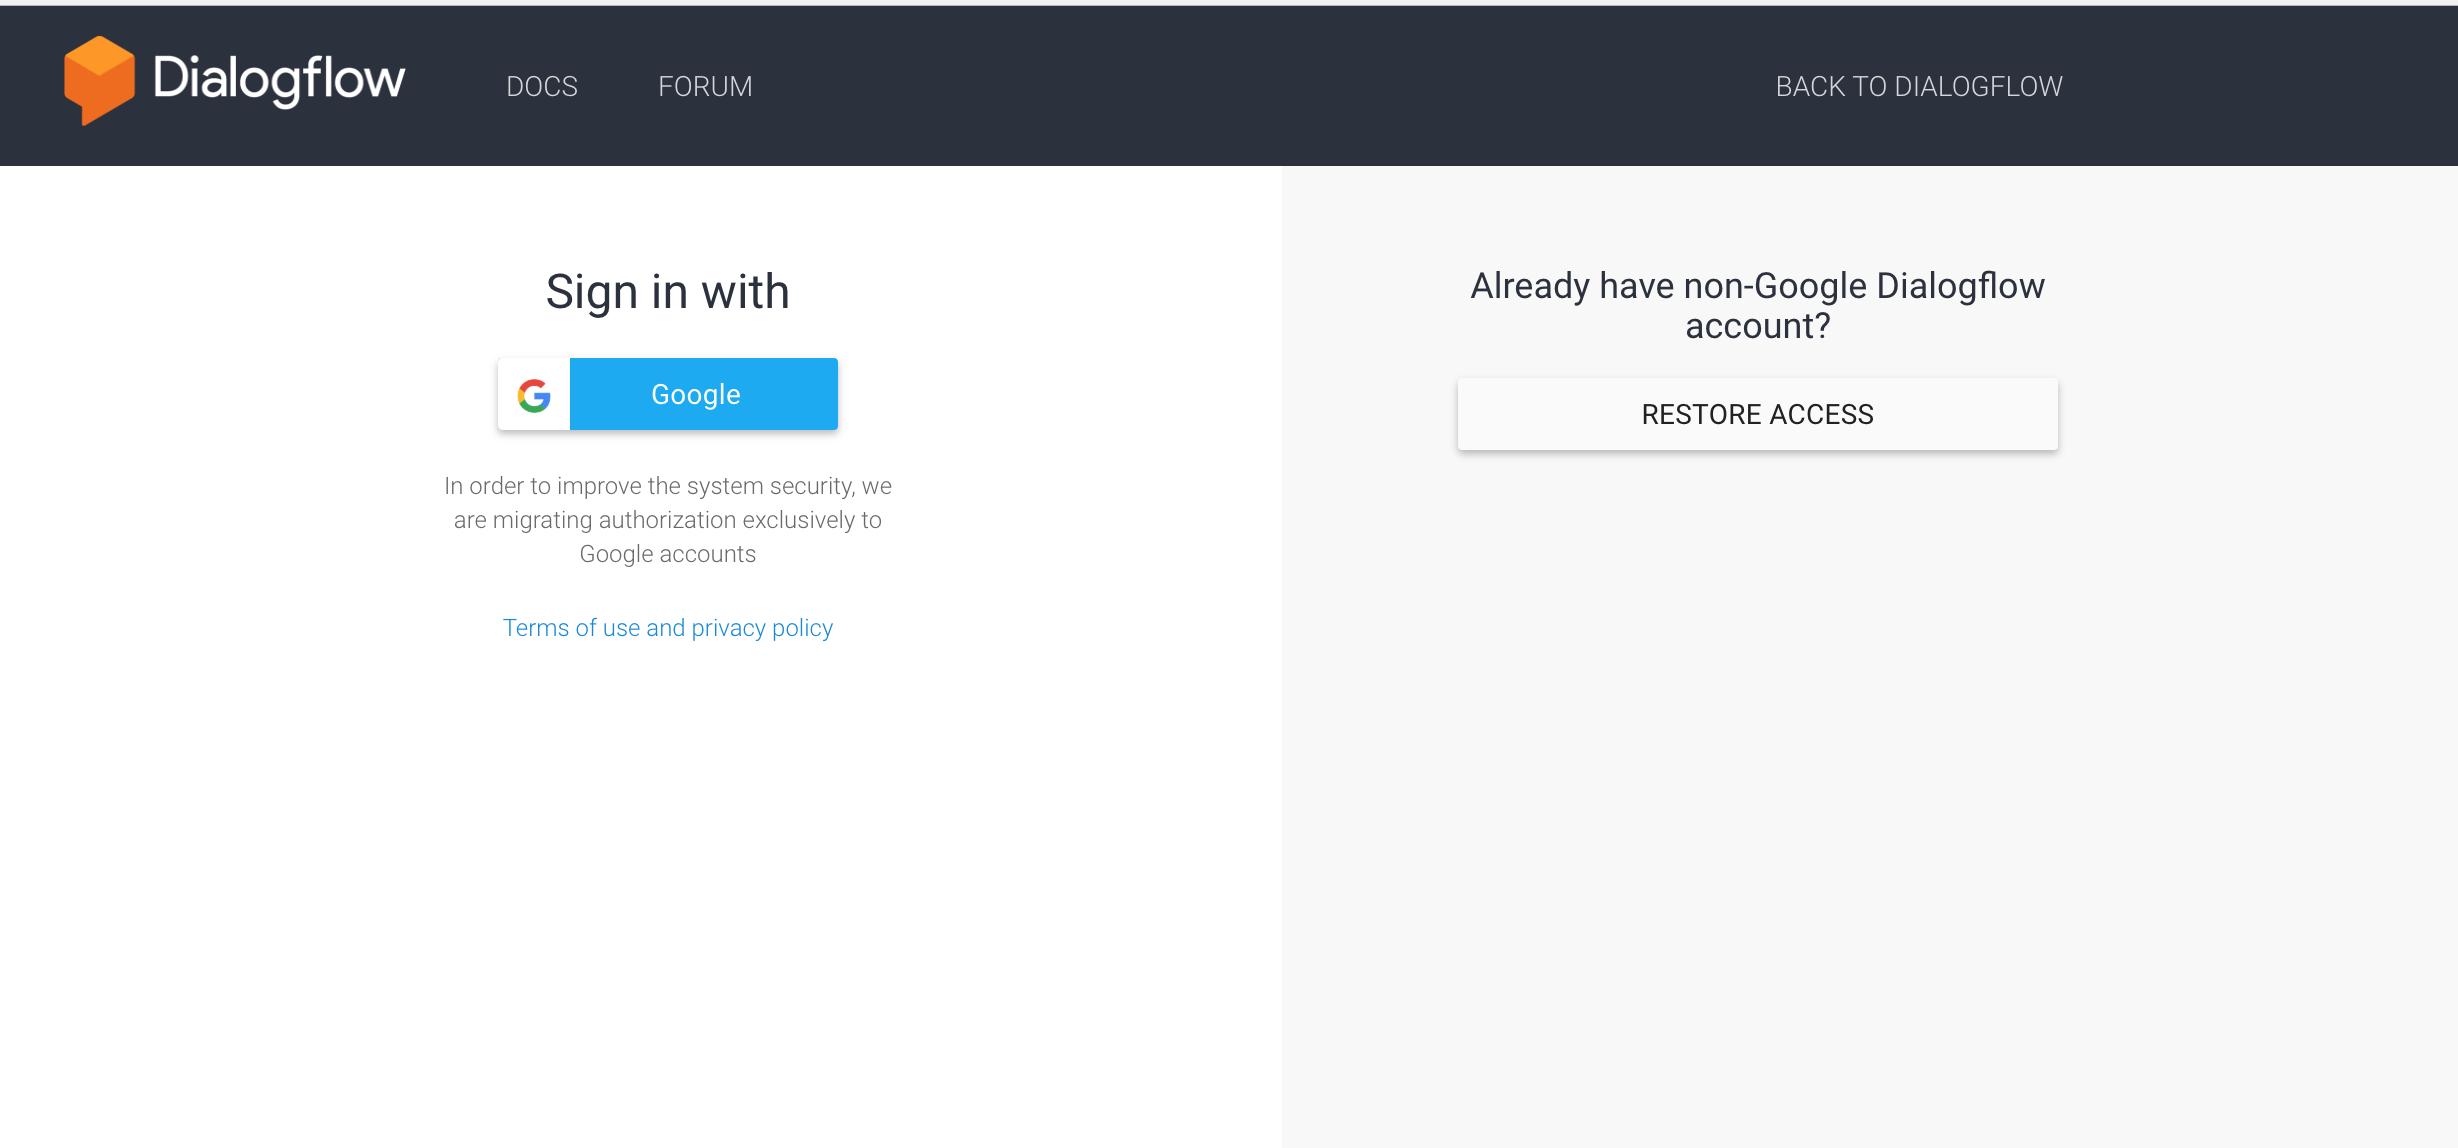
After you create an account, your Dialogflow dashboard looks something like that:
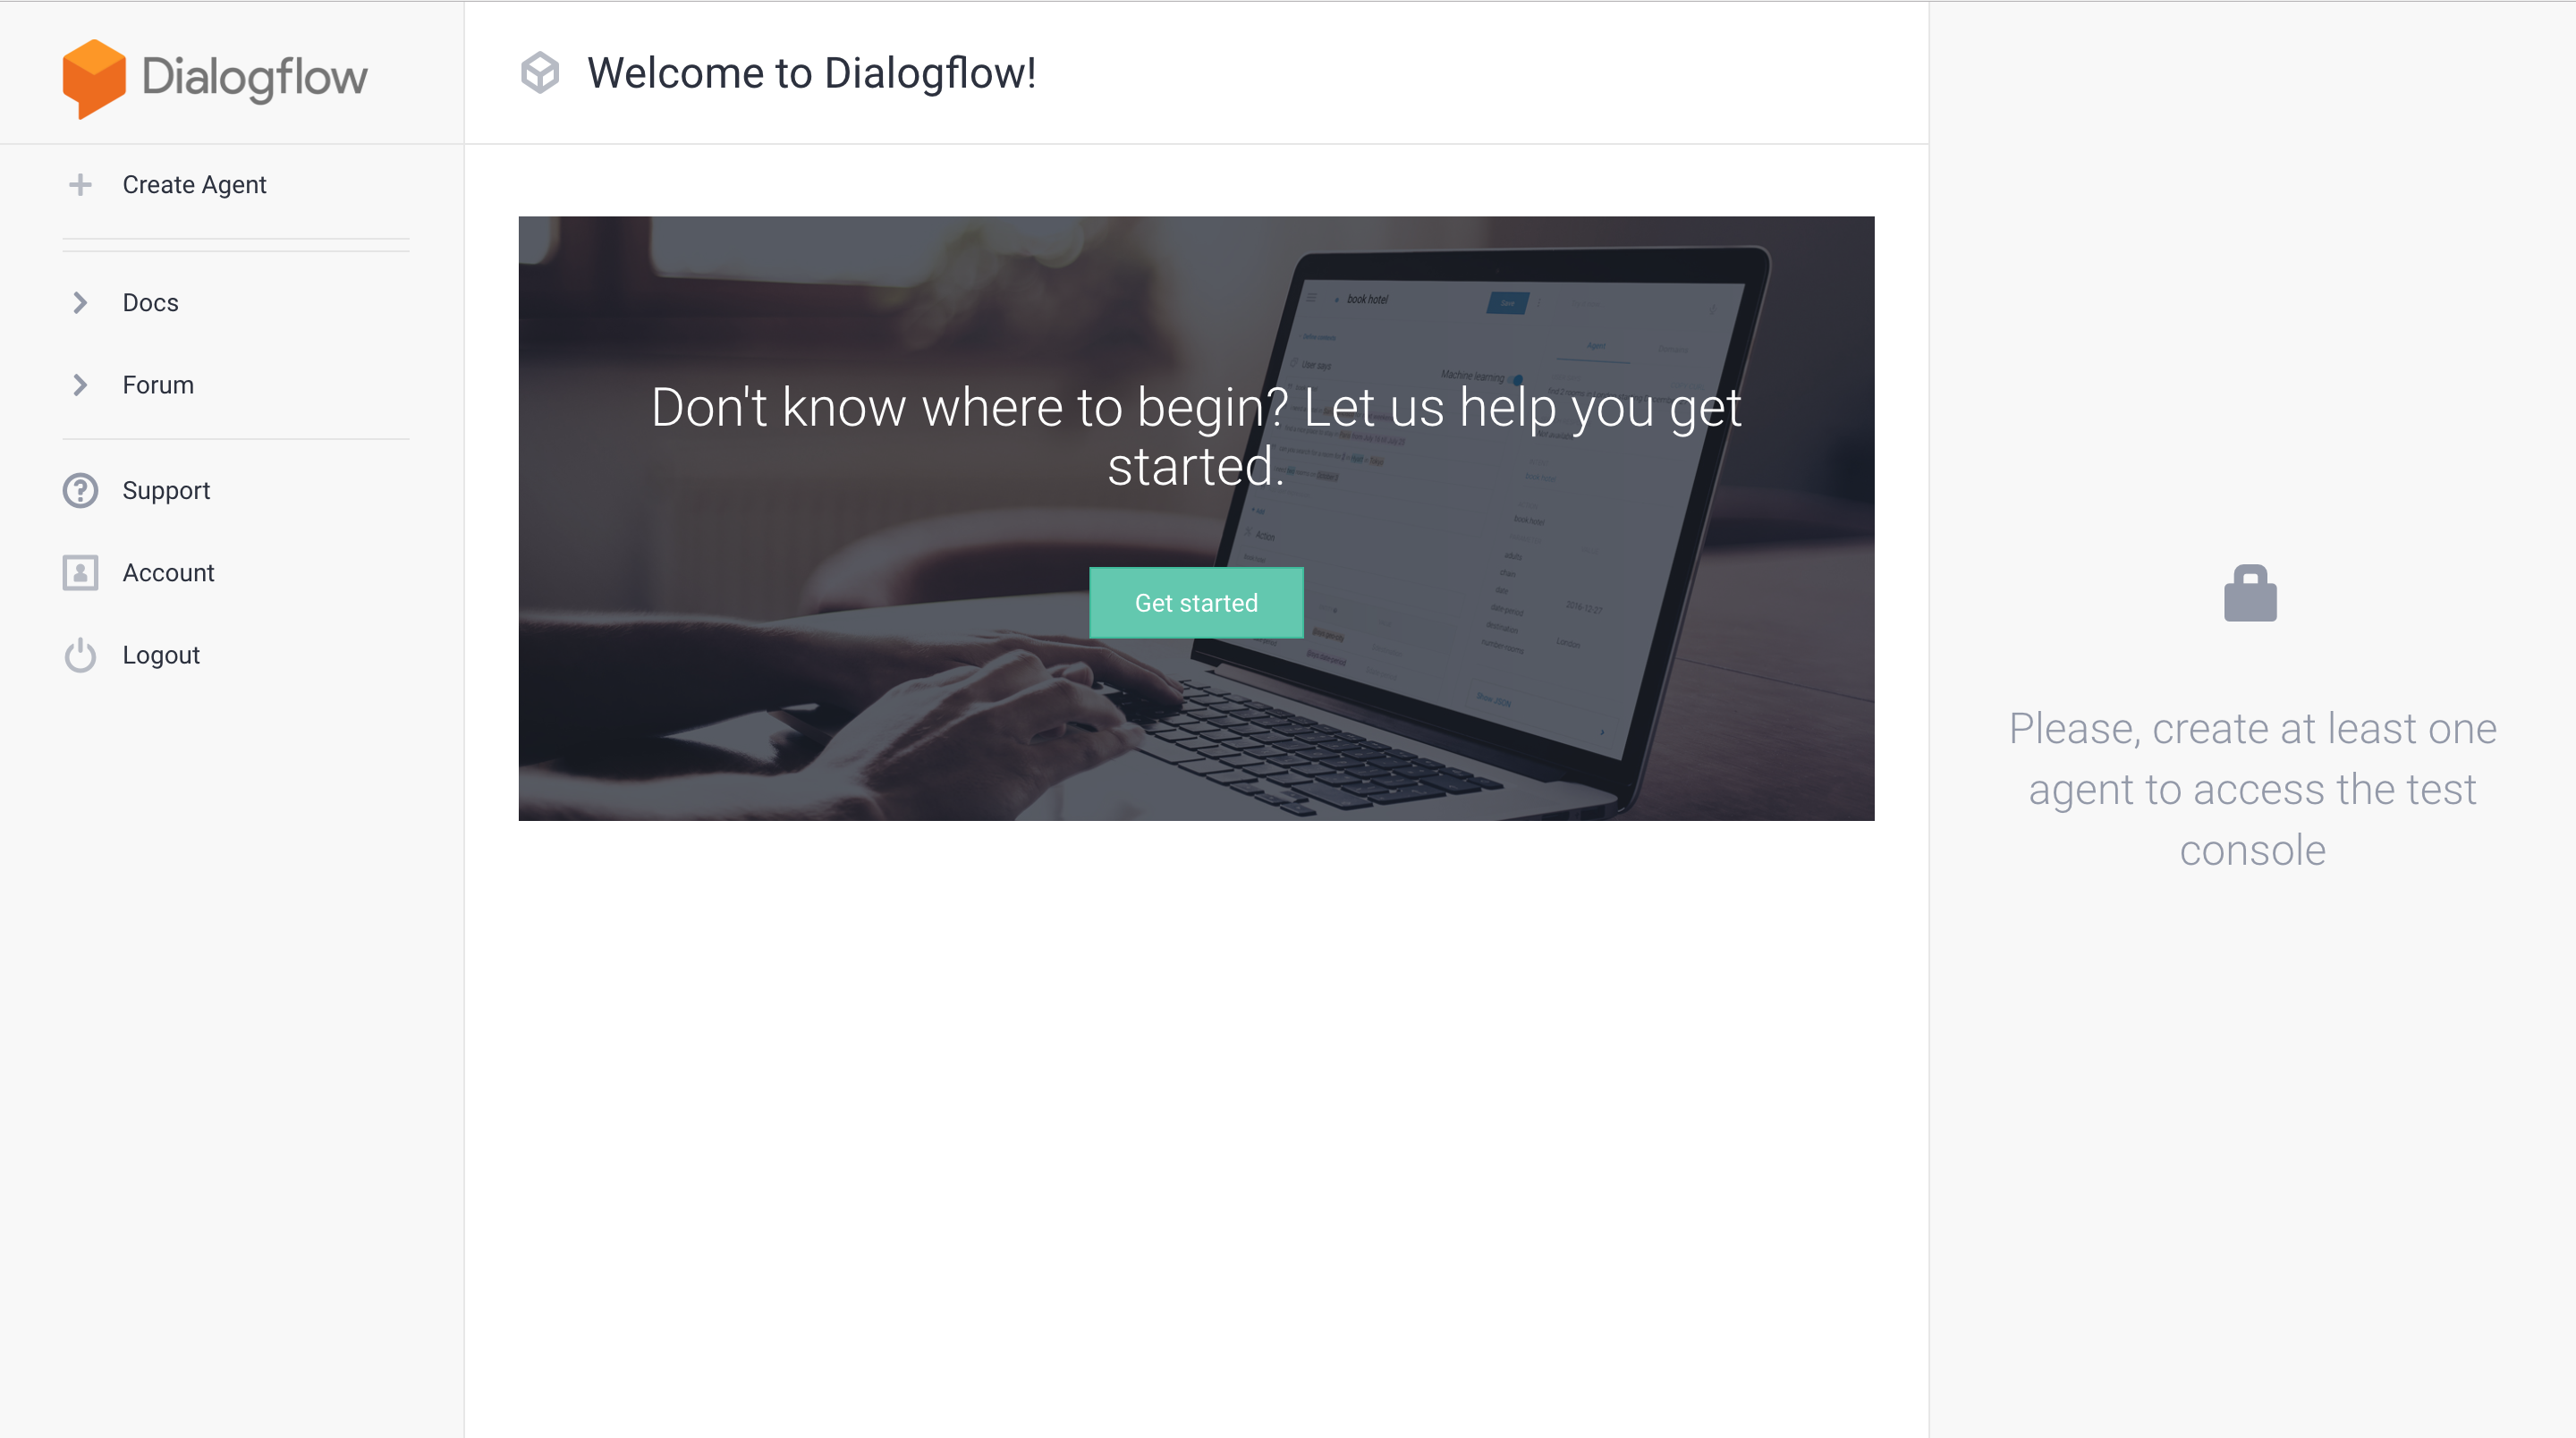
Go ahead and Create Agent by clicking the link the top left of the menu. You then need to provide AgentName that should not contain any whitespaces and choose the basic settings, like language and location. Please choose the same language you’ve chosen in BotTalk when you created your scenario; in our case, it is English:
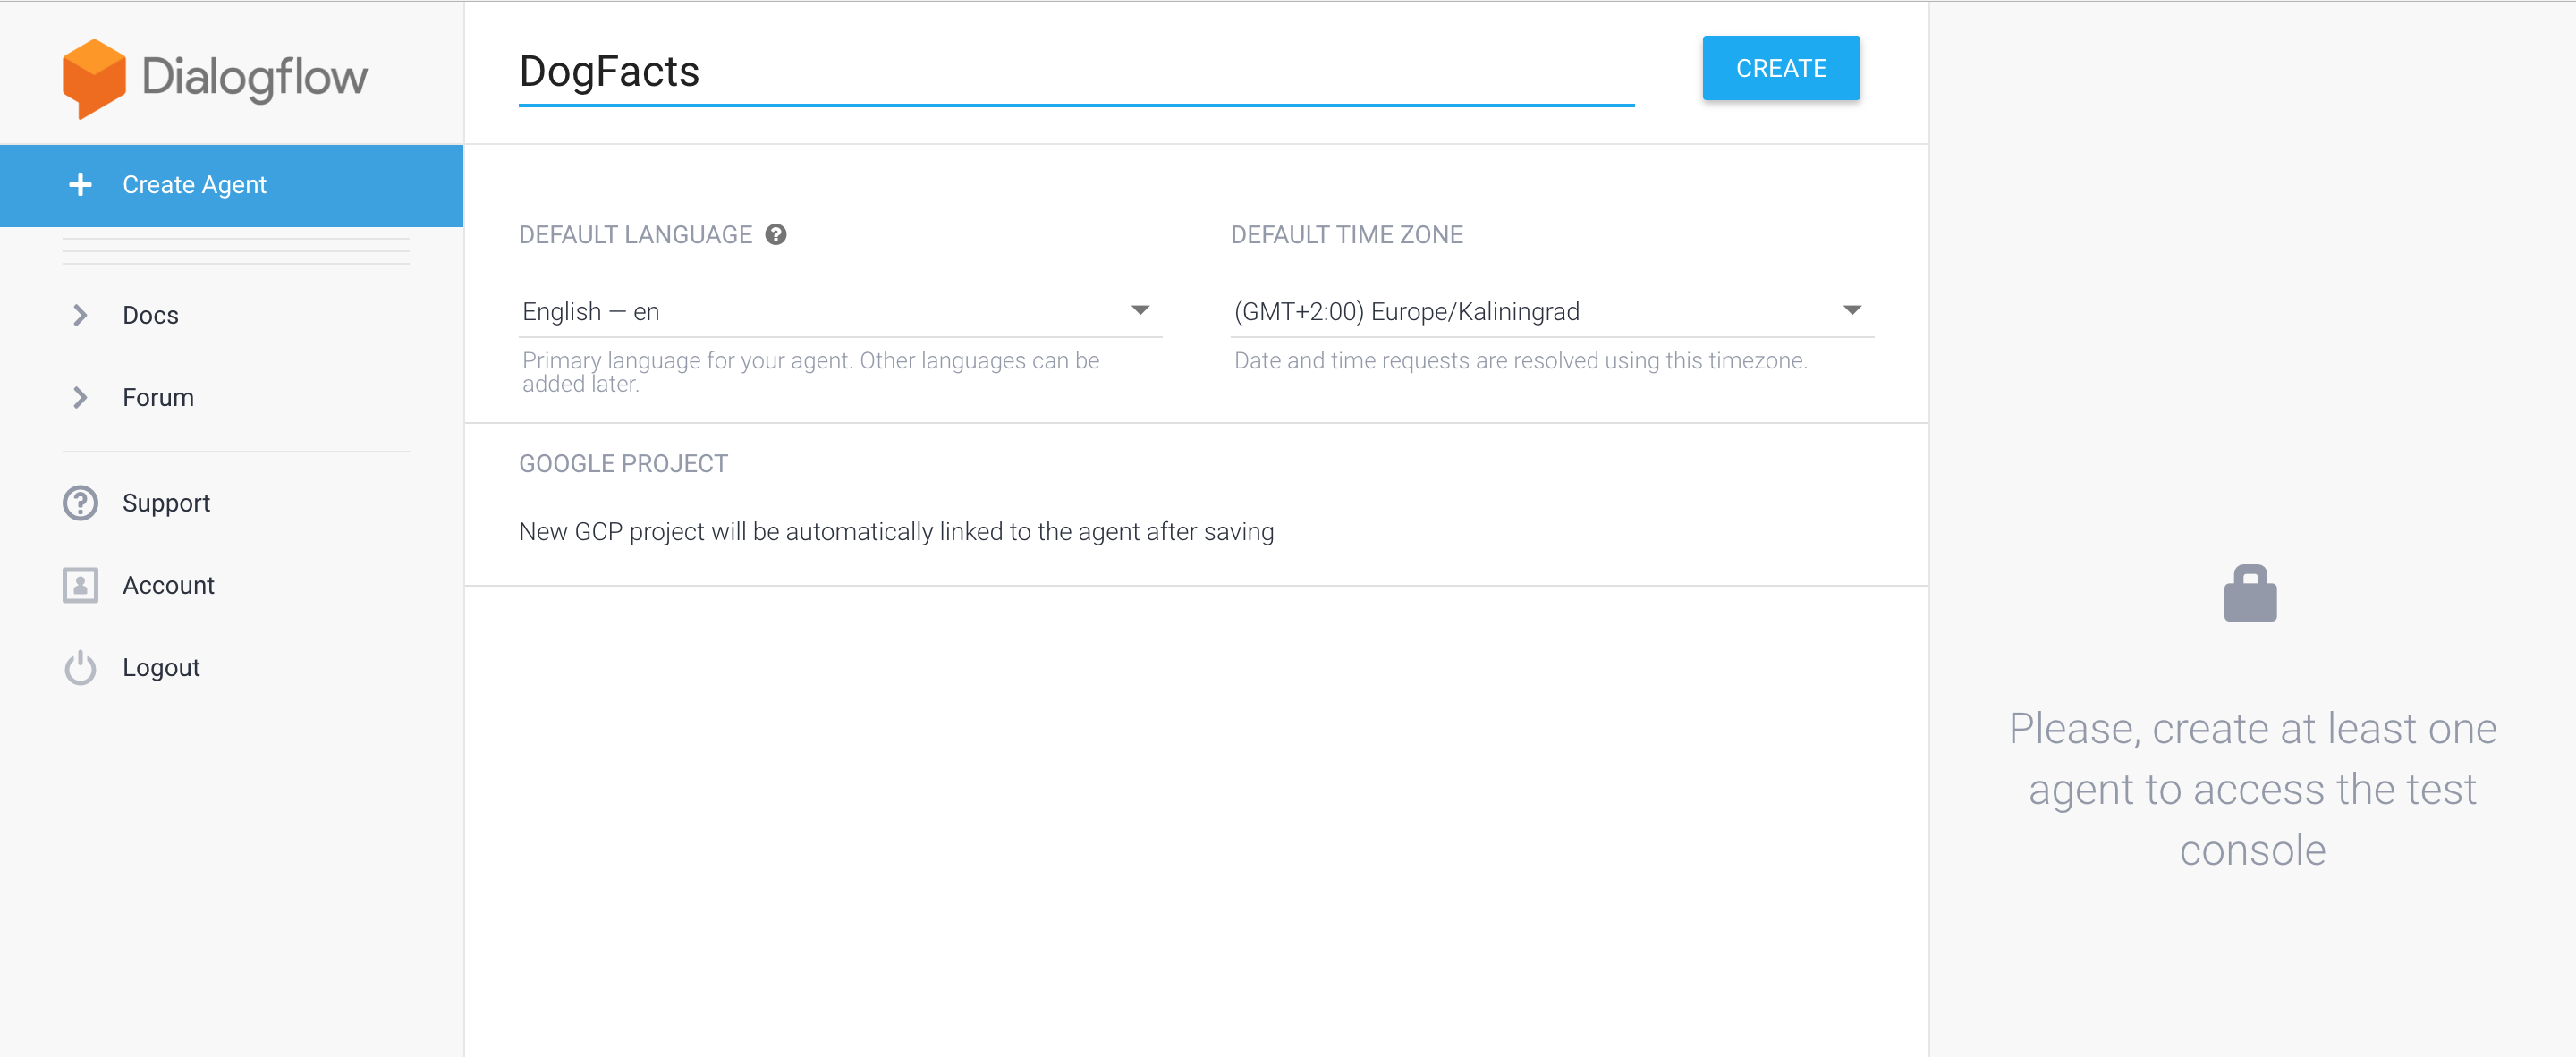
Click Create and wait for the Agent to be created. It could take a couple of minutes:
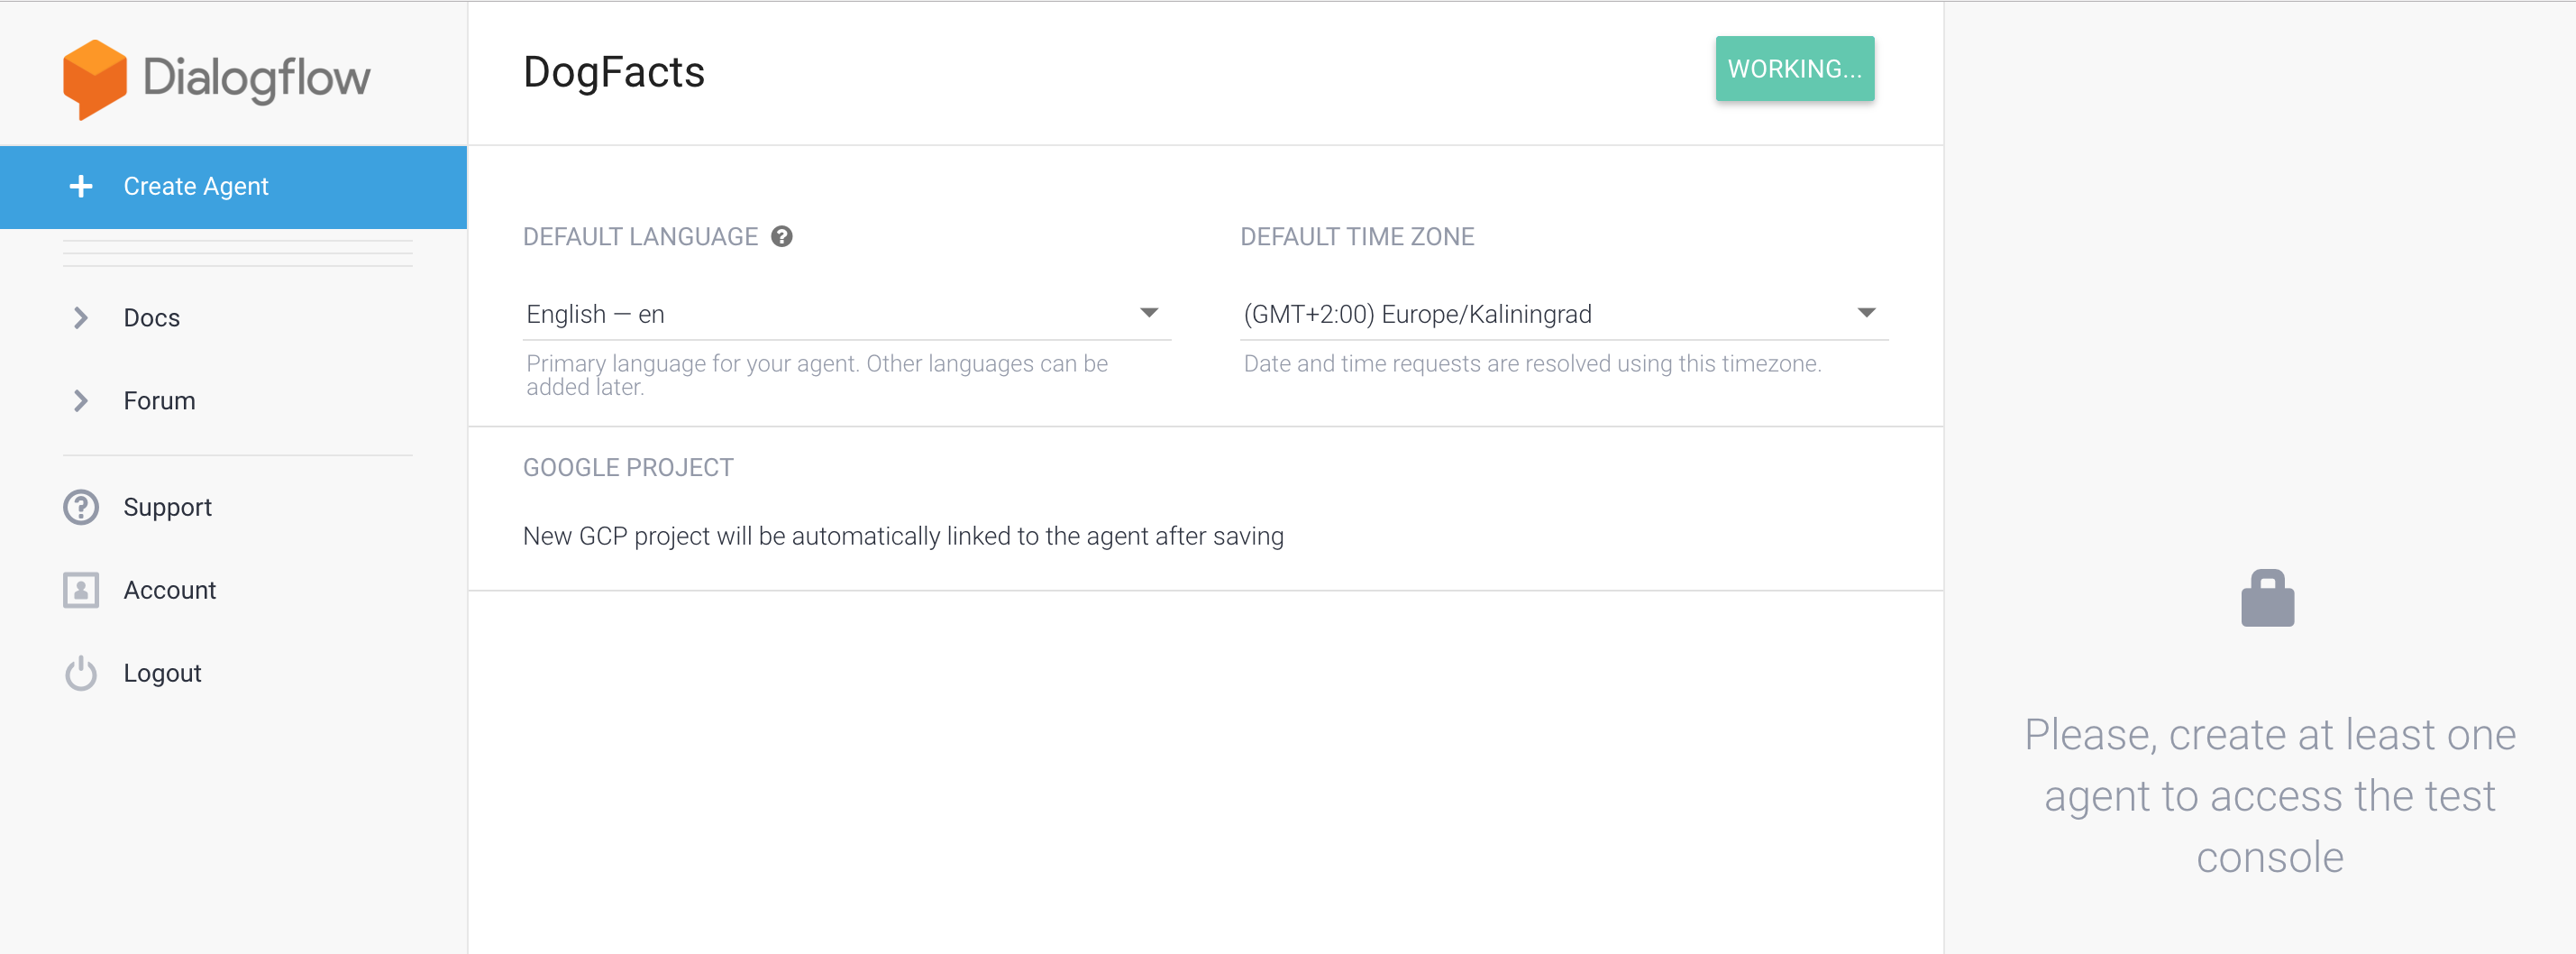
After it’s done you’ll see the following screen:
Now head back to BotTalk, choose your scenario and click on the Deploy tab. From there click on the red button Download export file from the Google Assistant section:
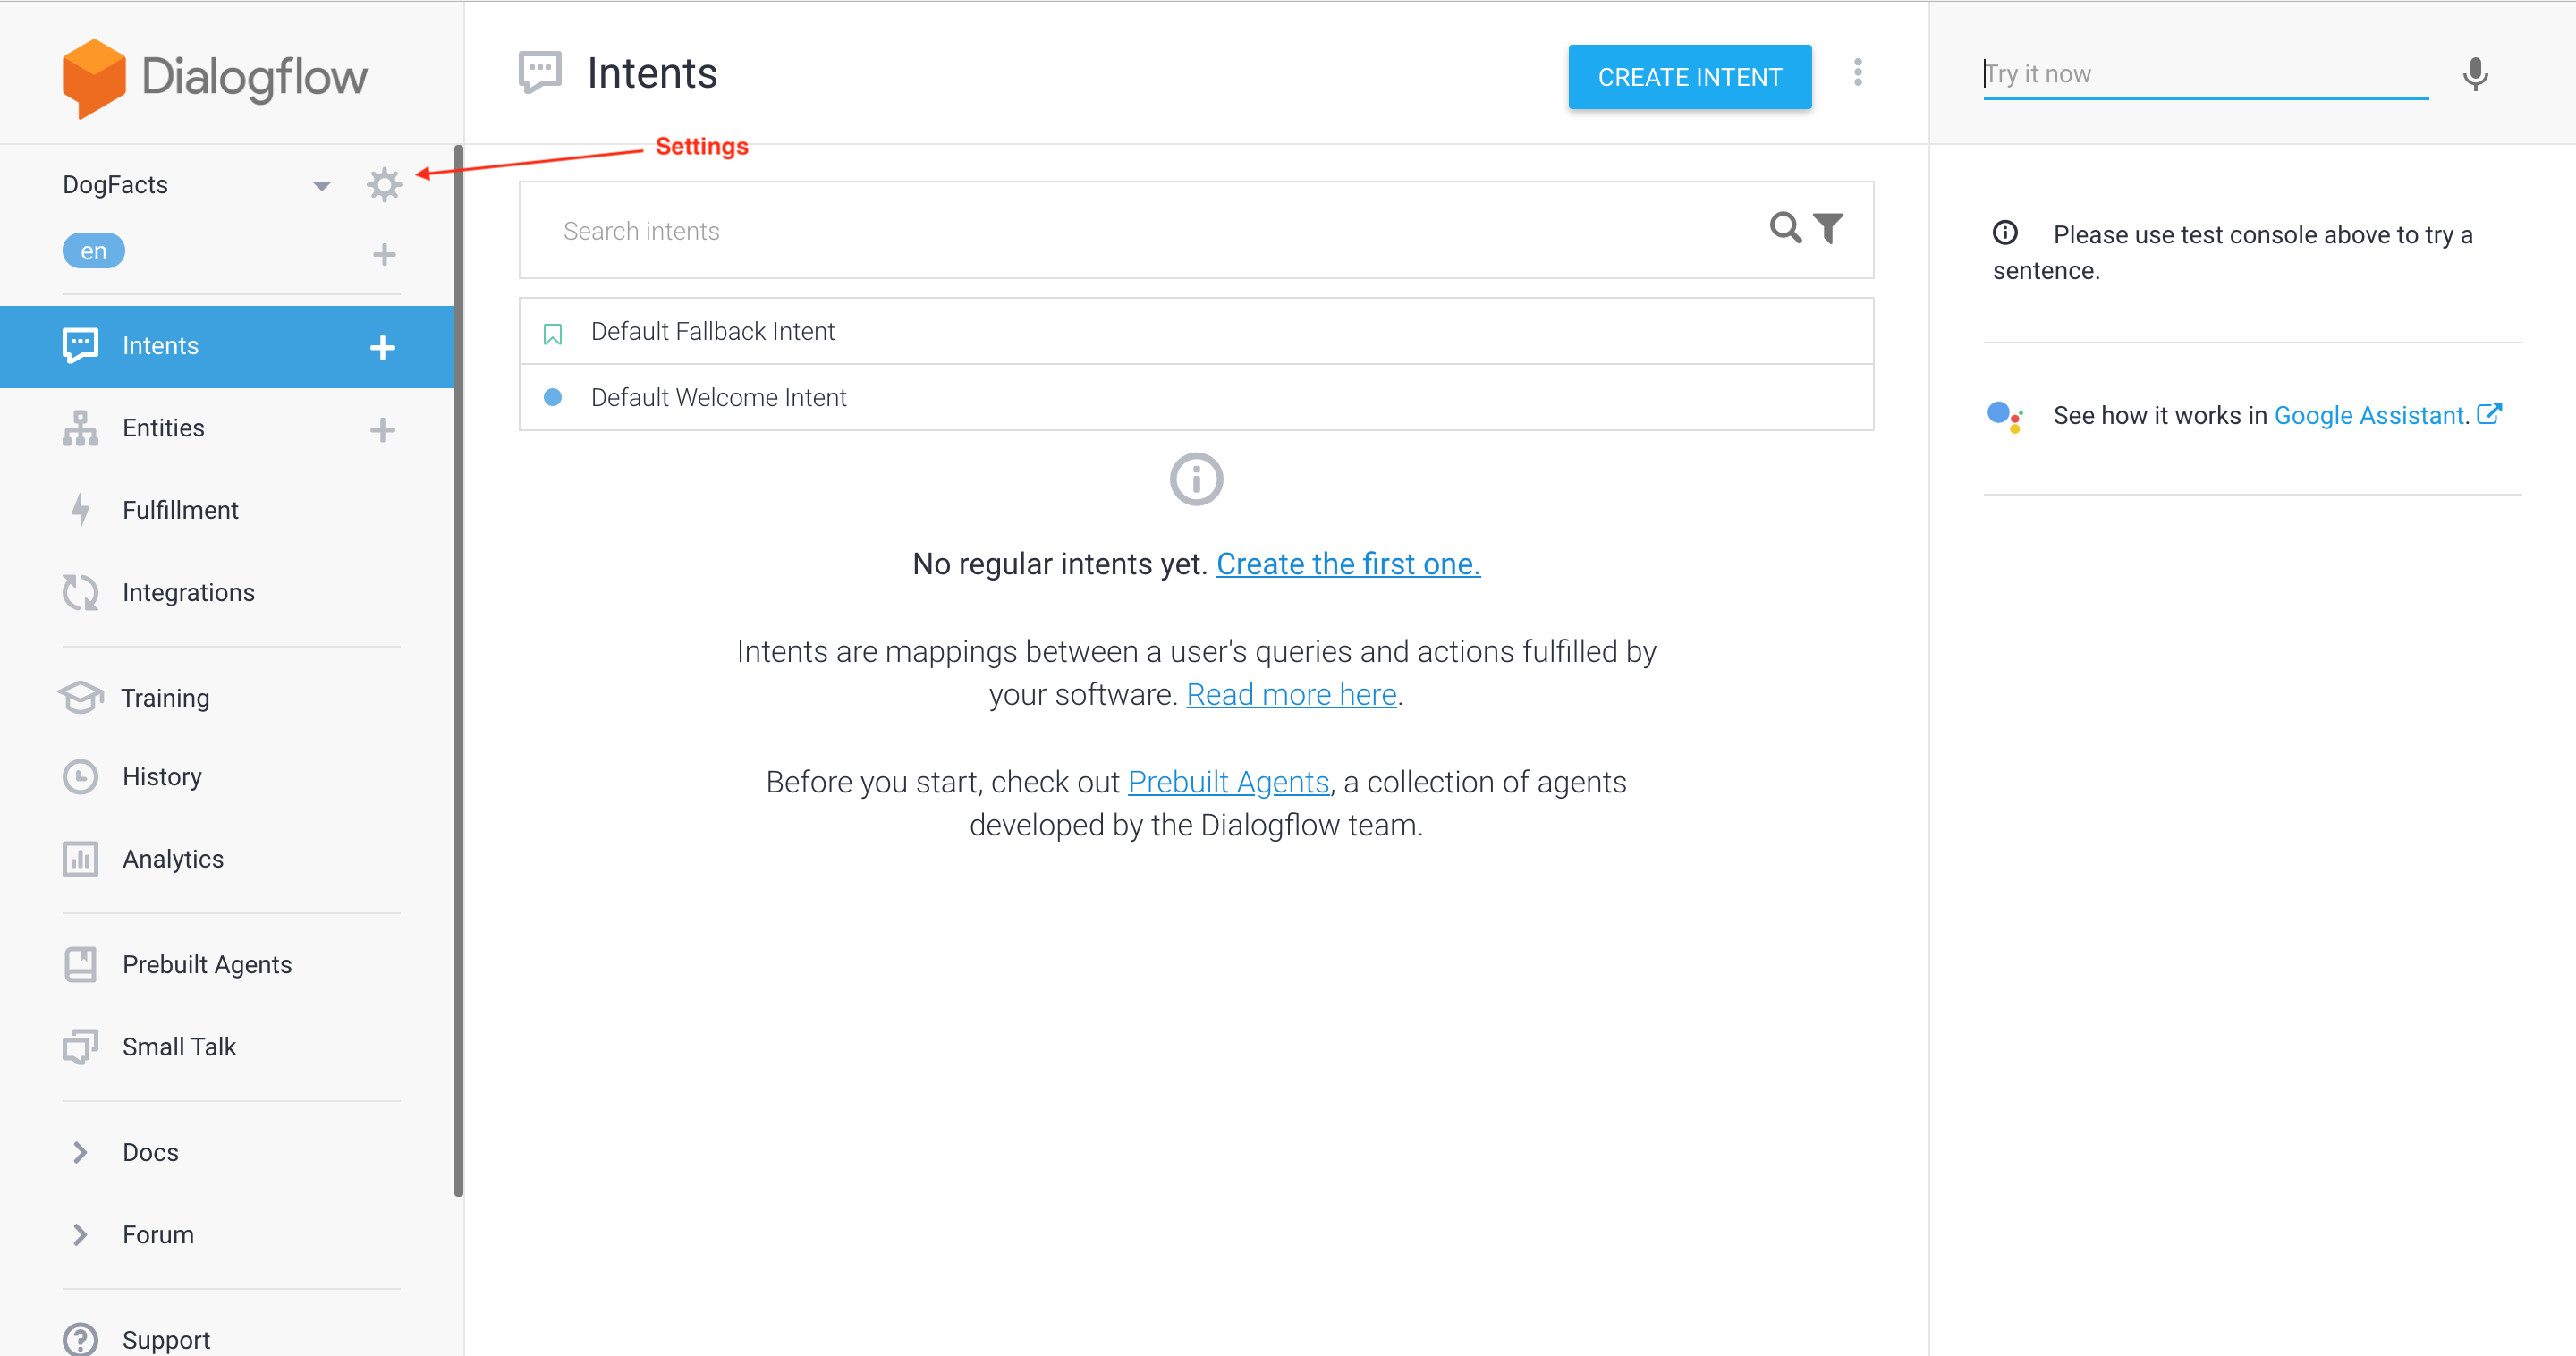
Save the zip file on your computer and go back to Dialogflow. There click the settings icon next to the Agent name (marked with the red arrow on the screenshot):
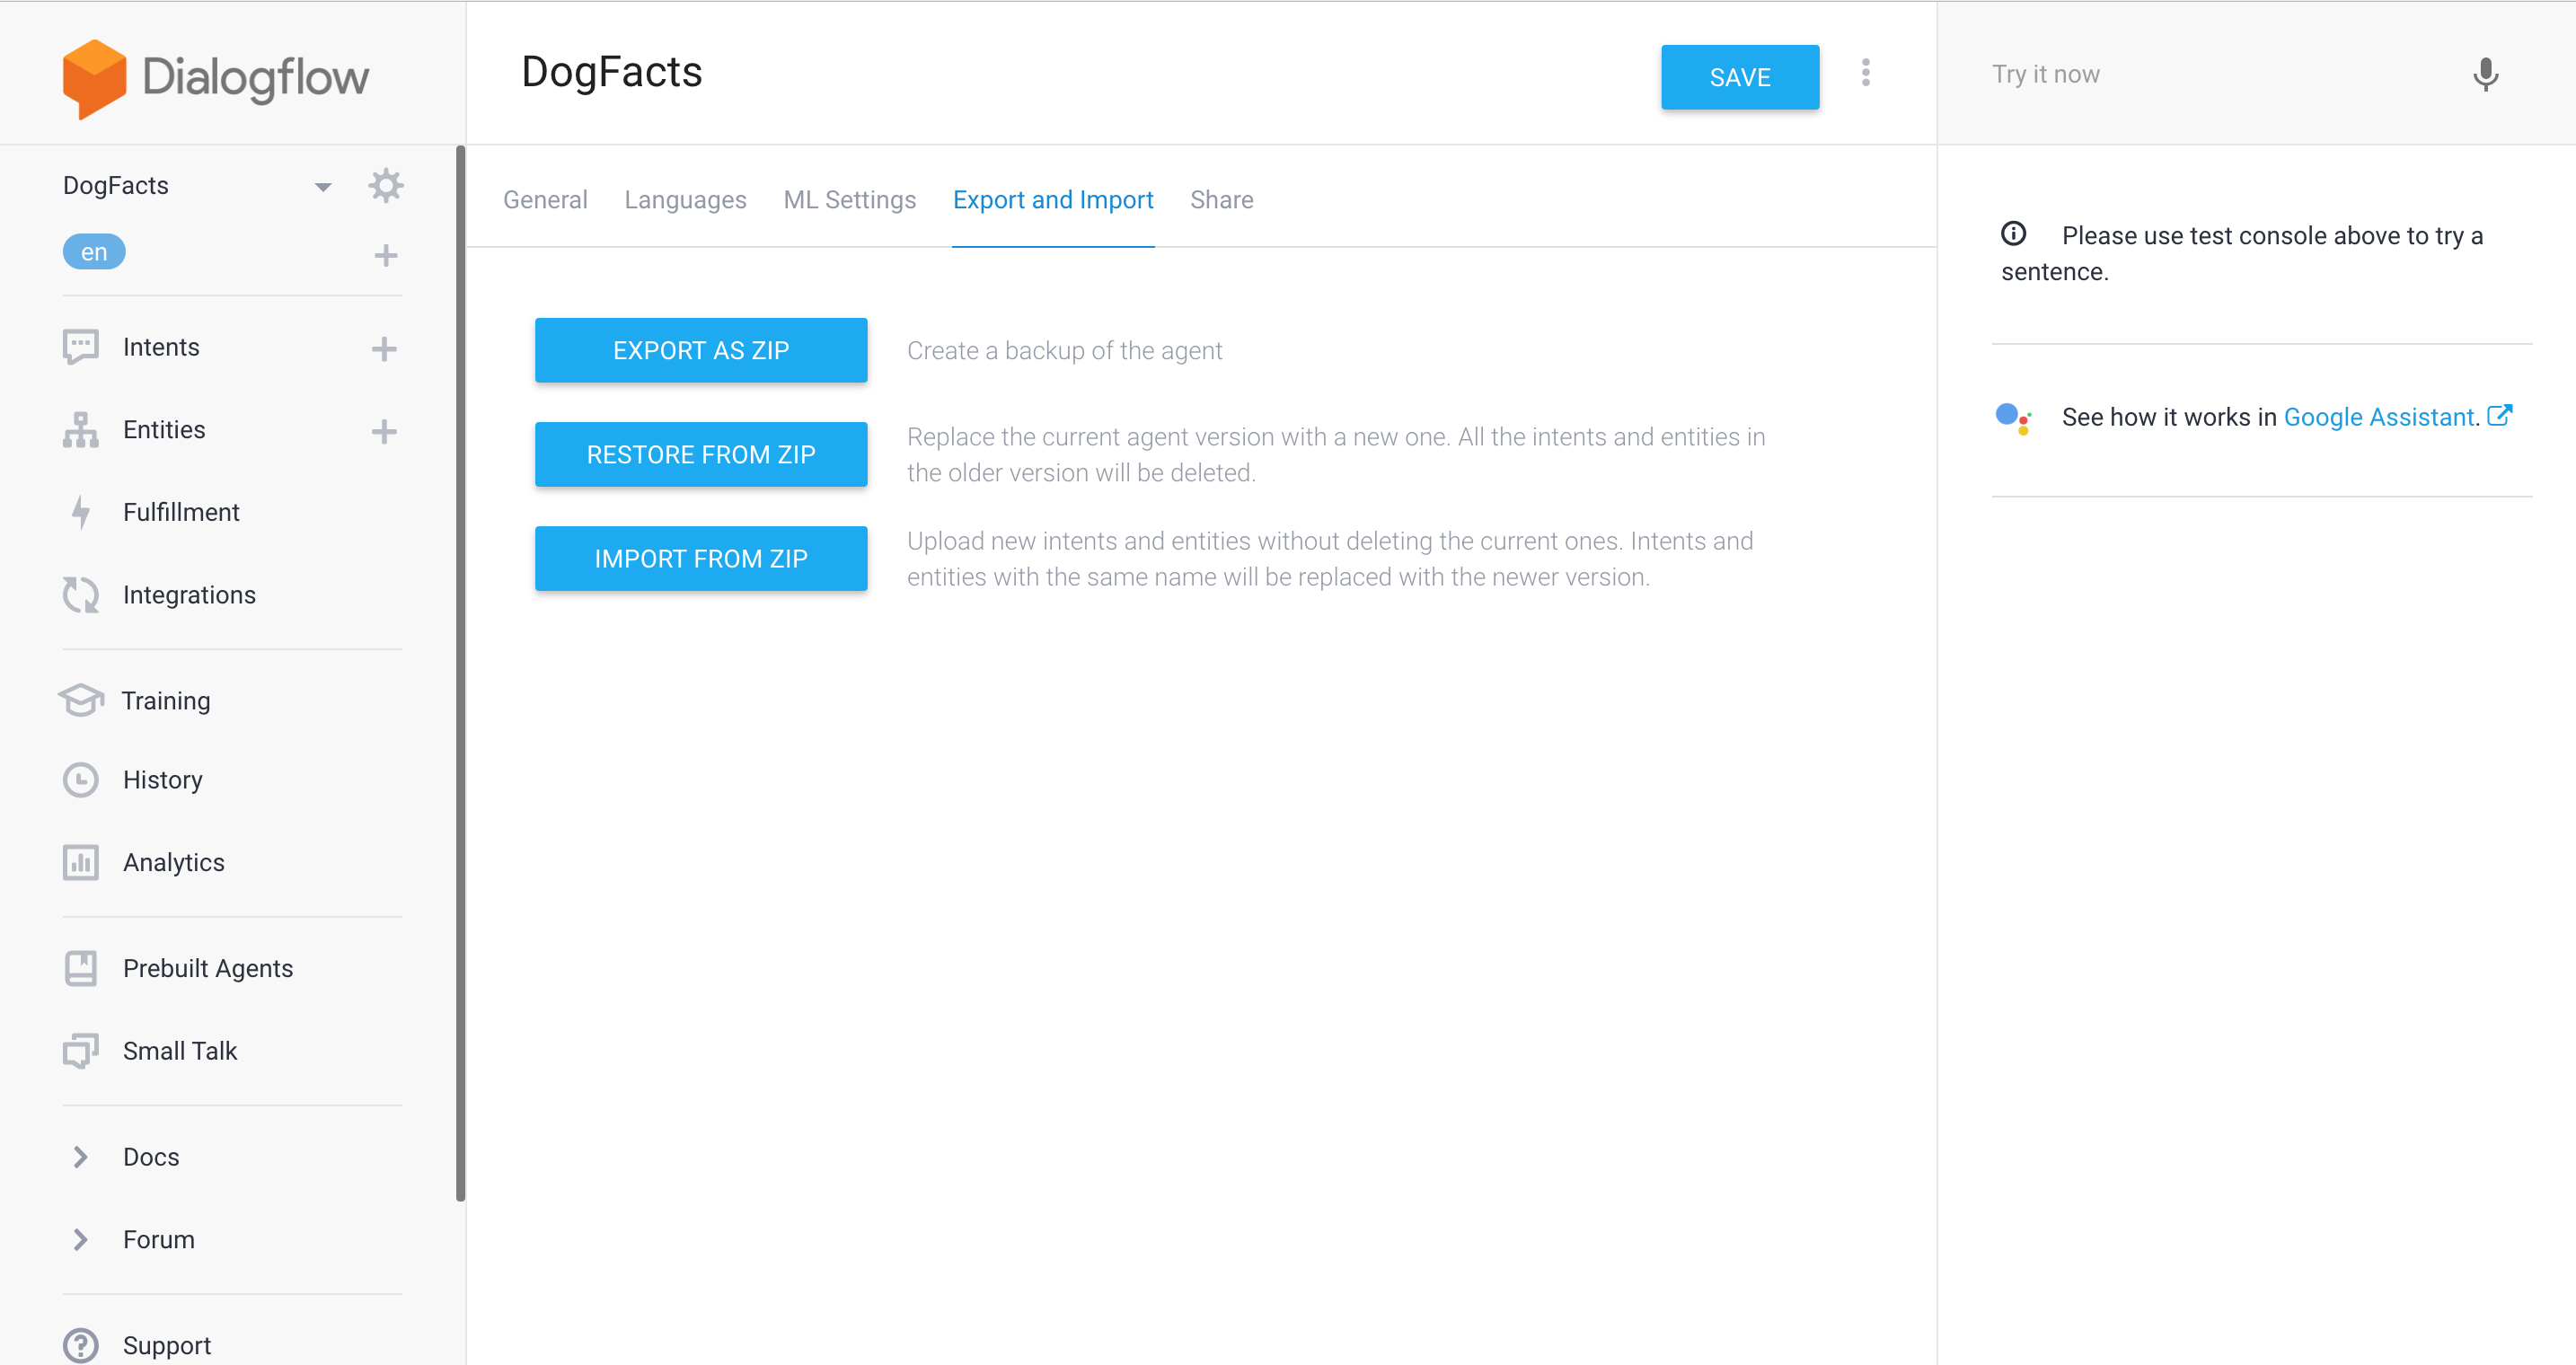
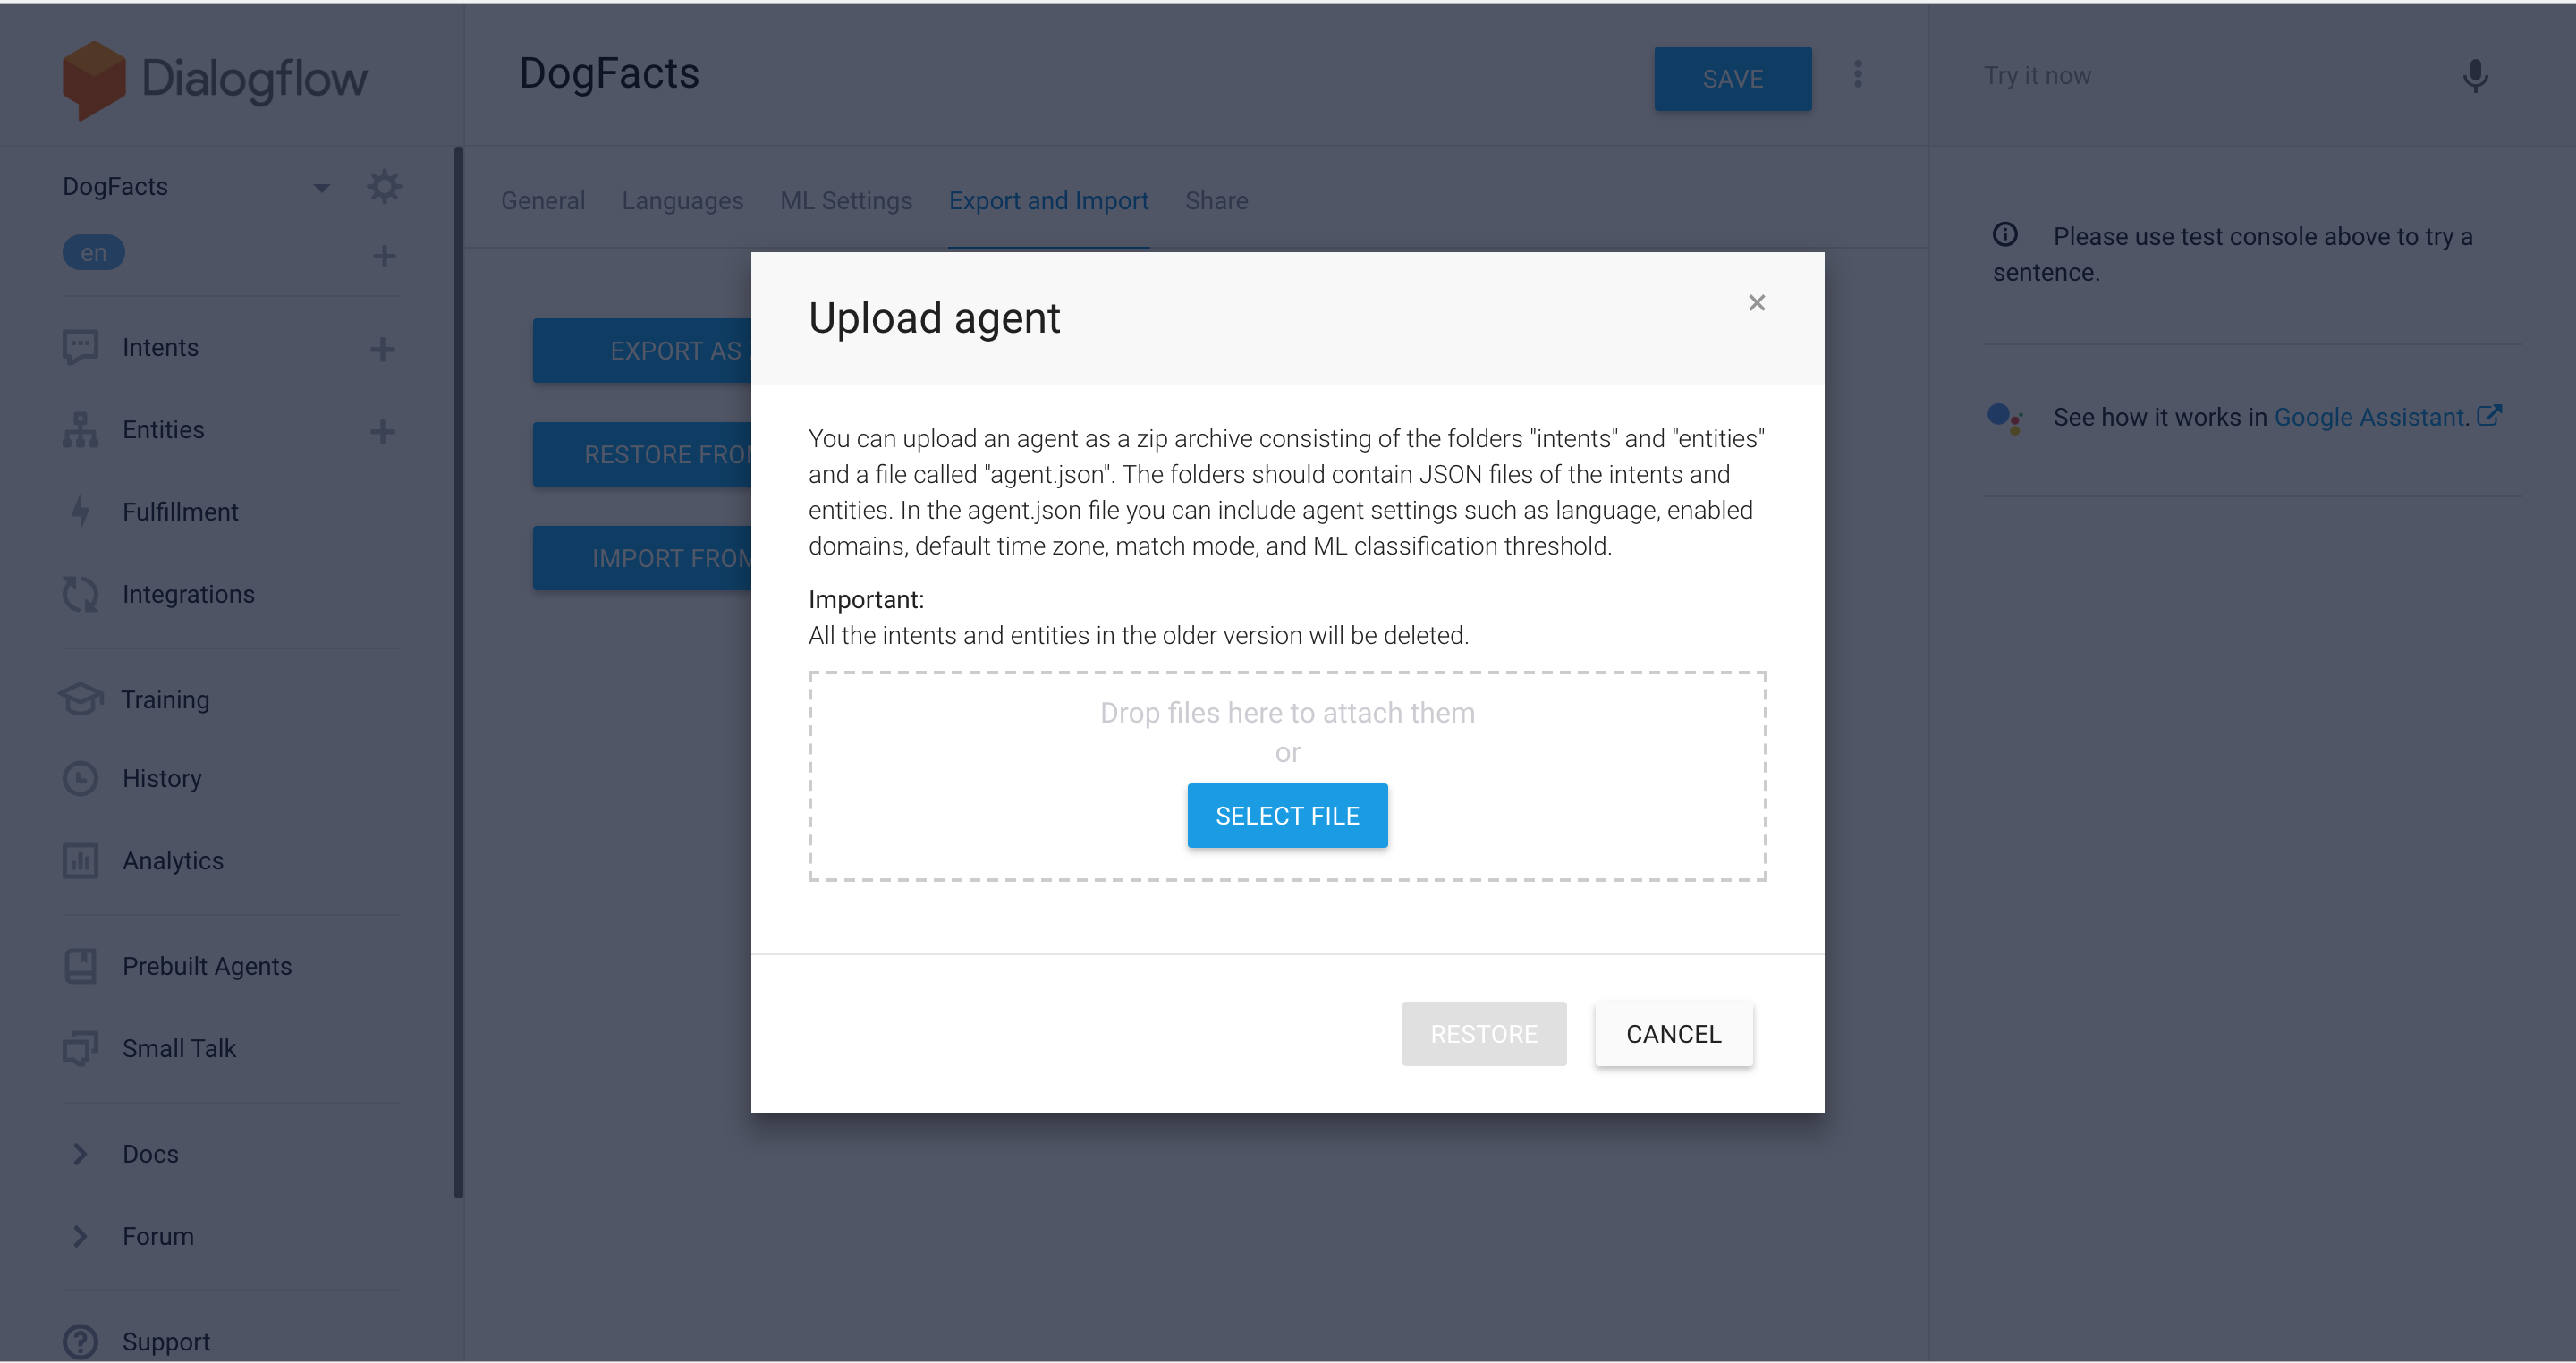
In the Settings go to the Export and Import tab and click on the Restore from Zip button:
In the popup window choose the file you’ve just downloaded from BotTalk:
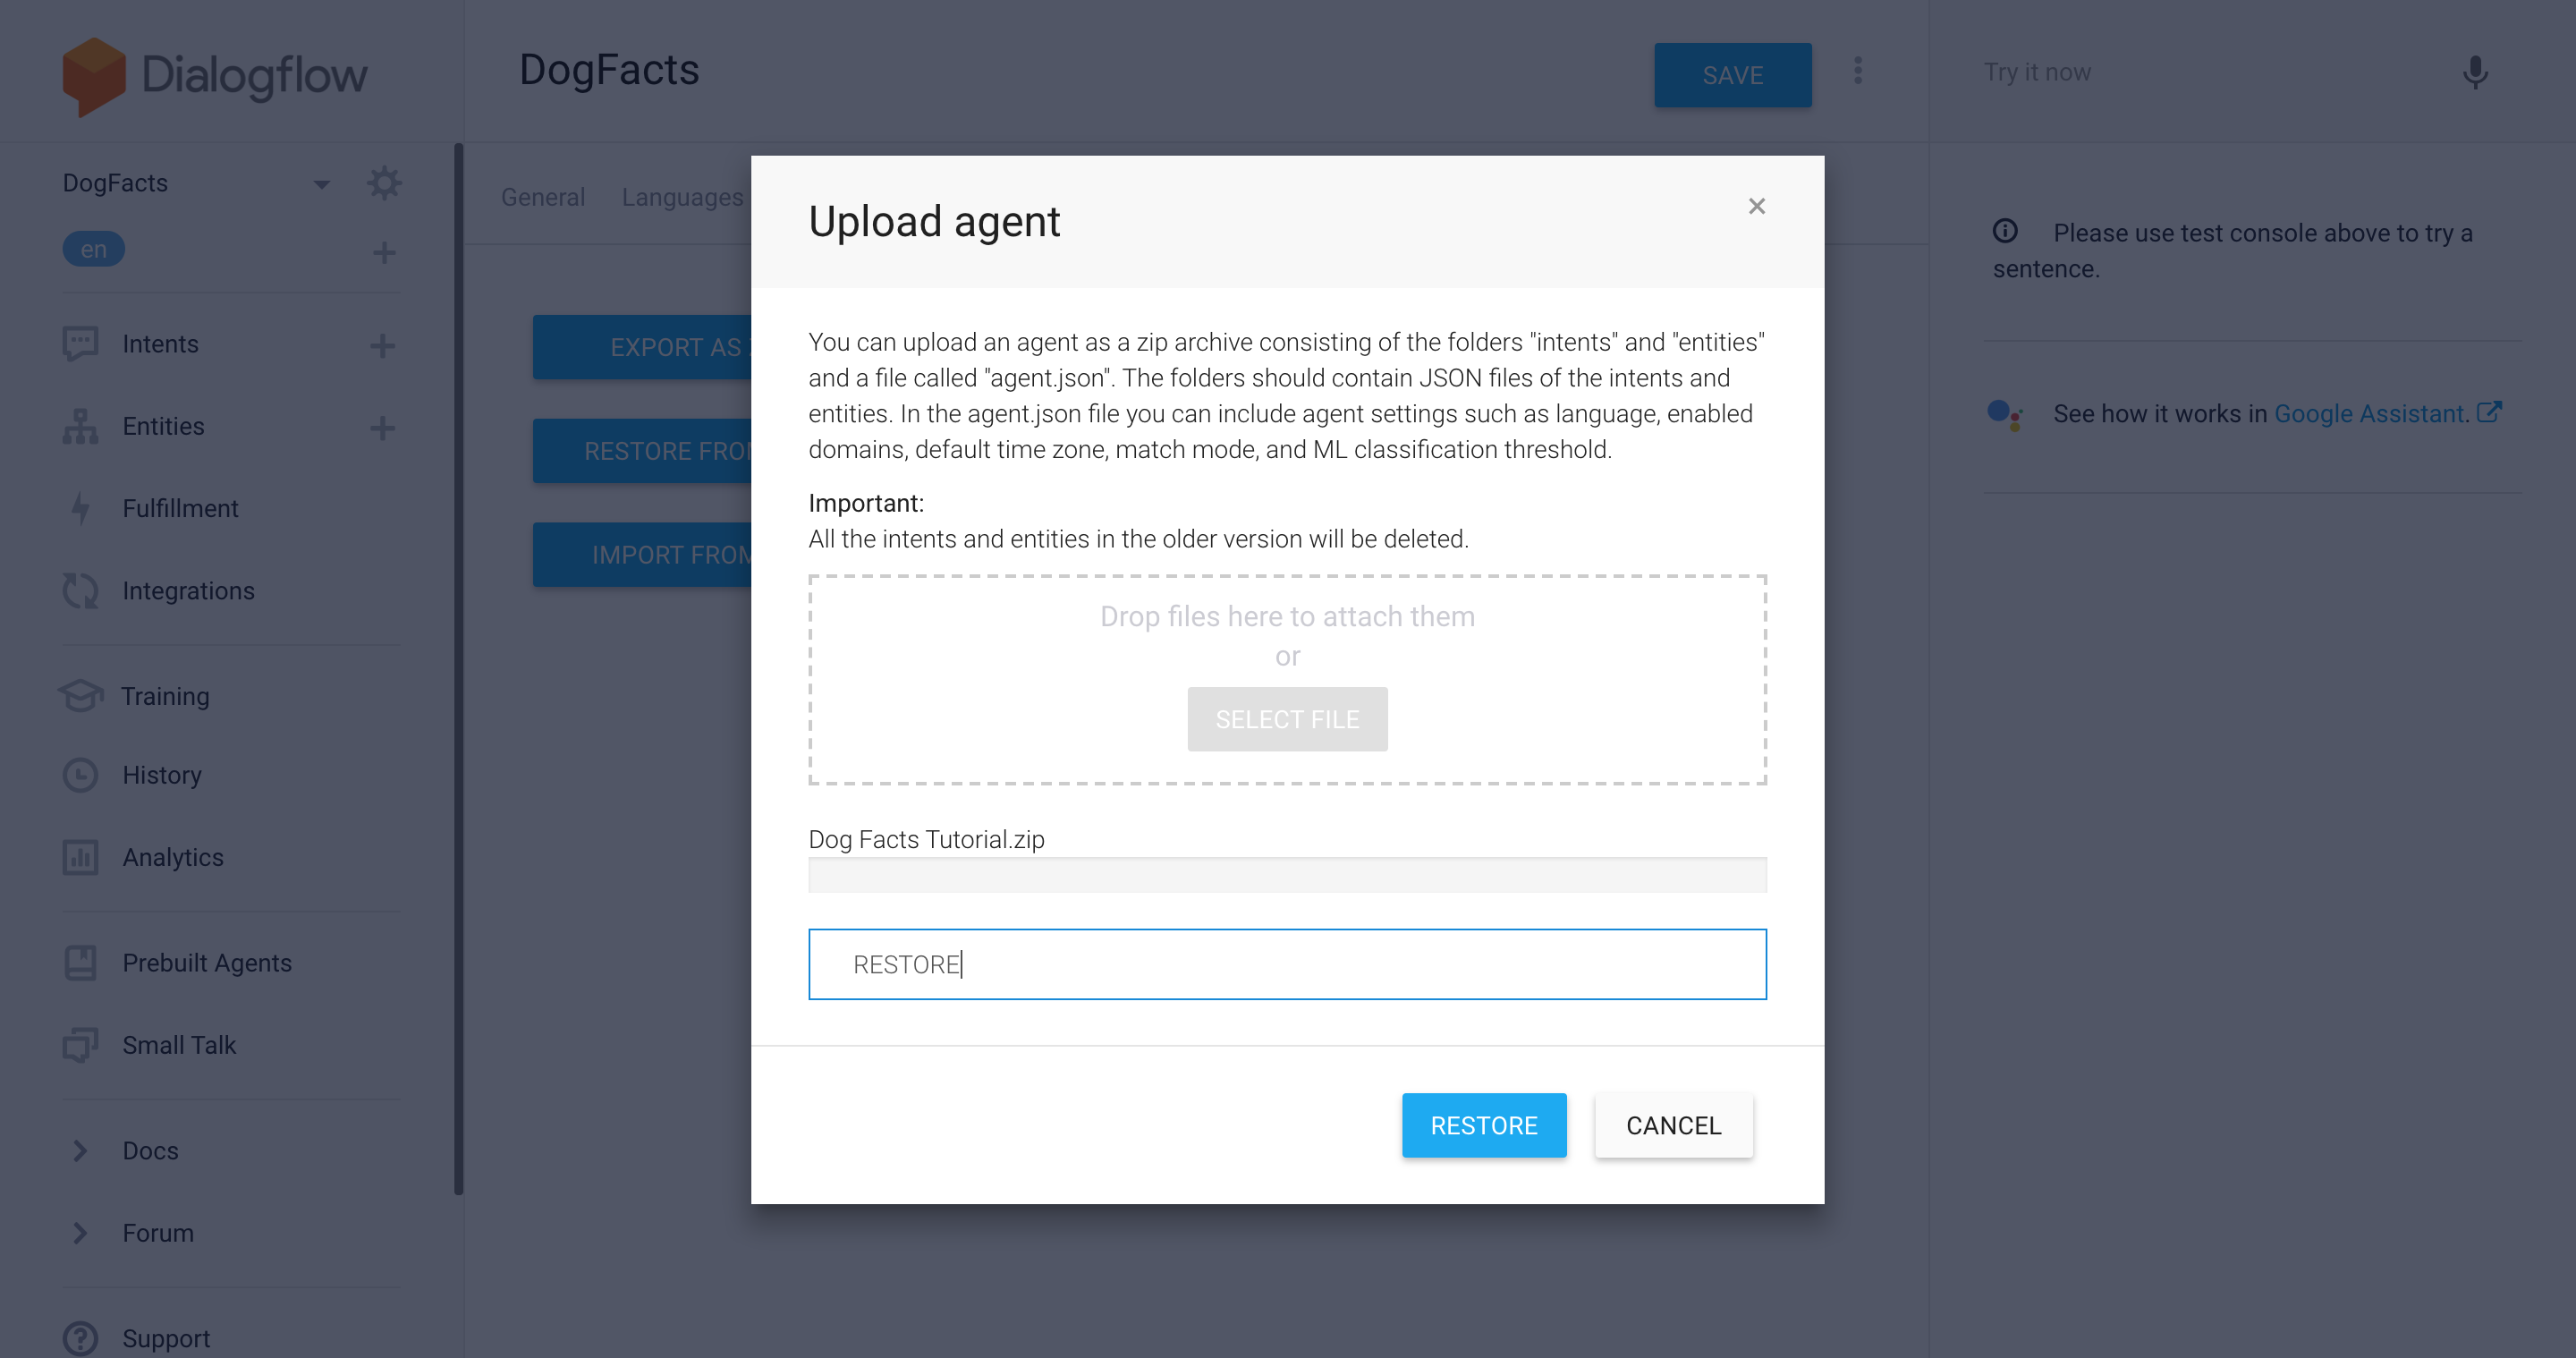
Type in RESTORE in the text field and click the RESTORE button:
You’ll get a green notification in the bottom right corner of the screen:
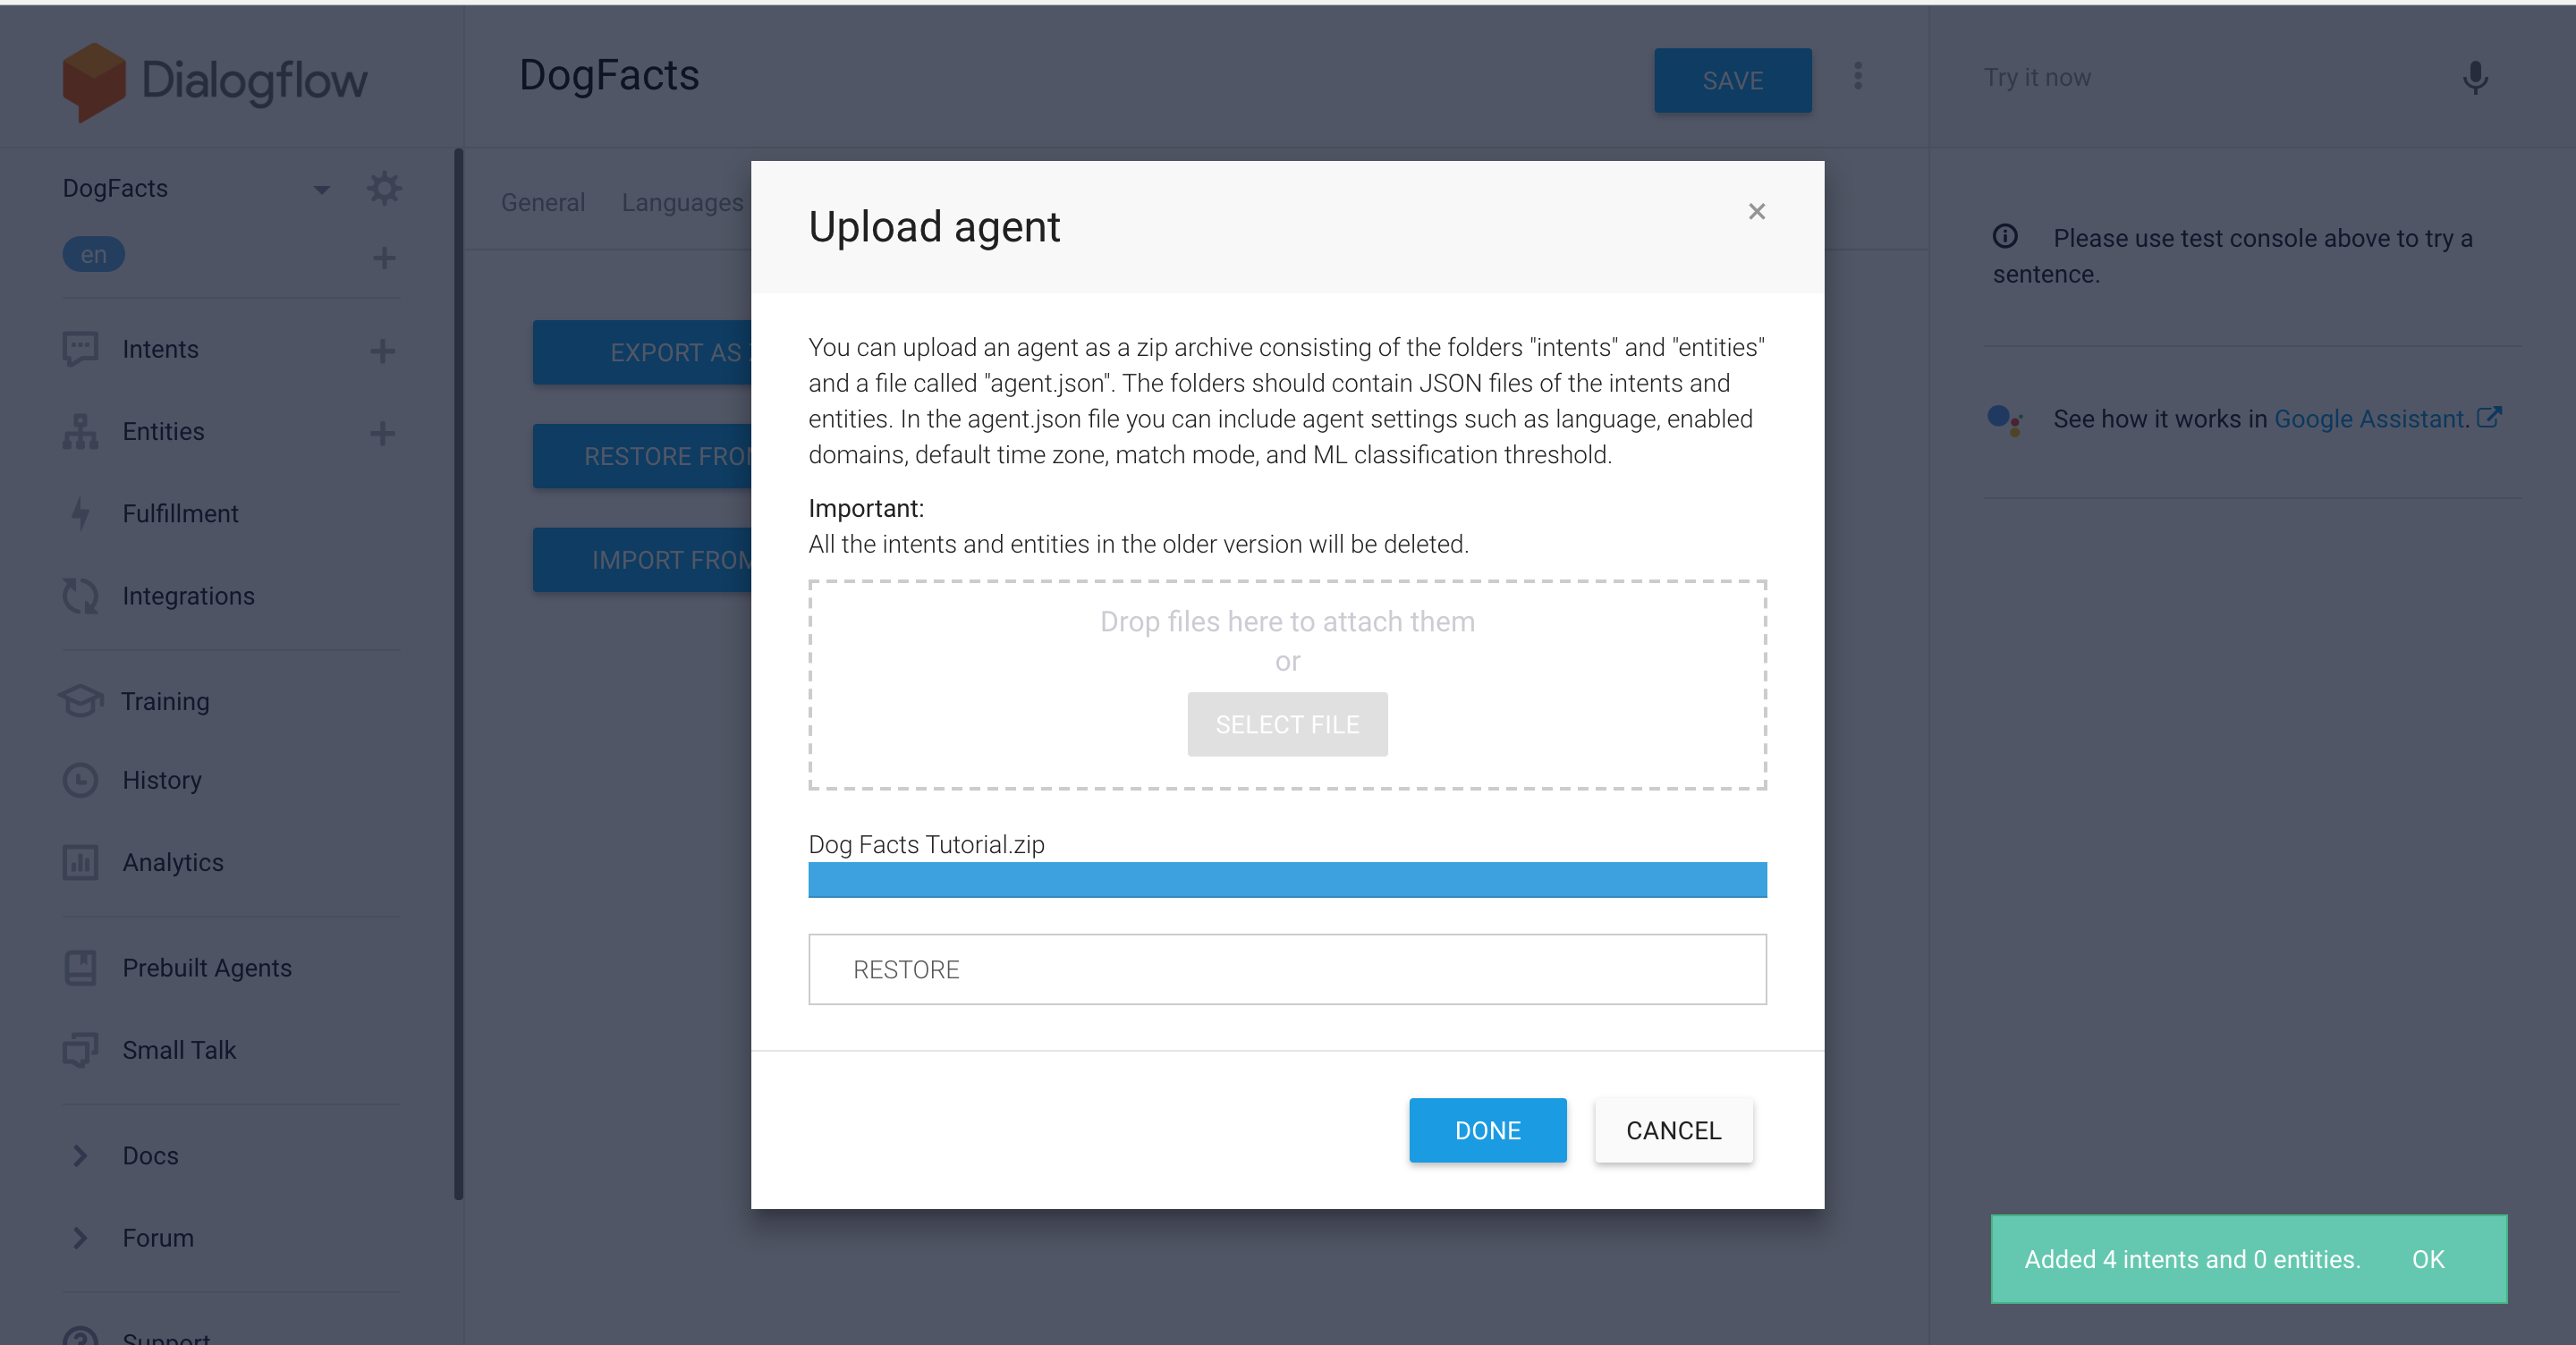
You can now close the popup window. You’ve successfully deployed your BotTalk scenario to Dialogflow!
Testing a Google Action in Actions on Google Simulator
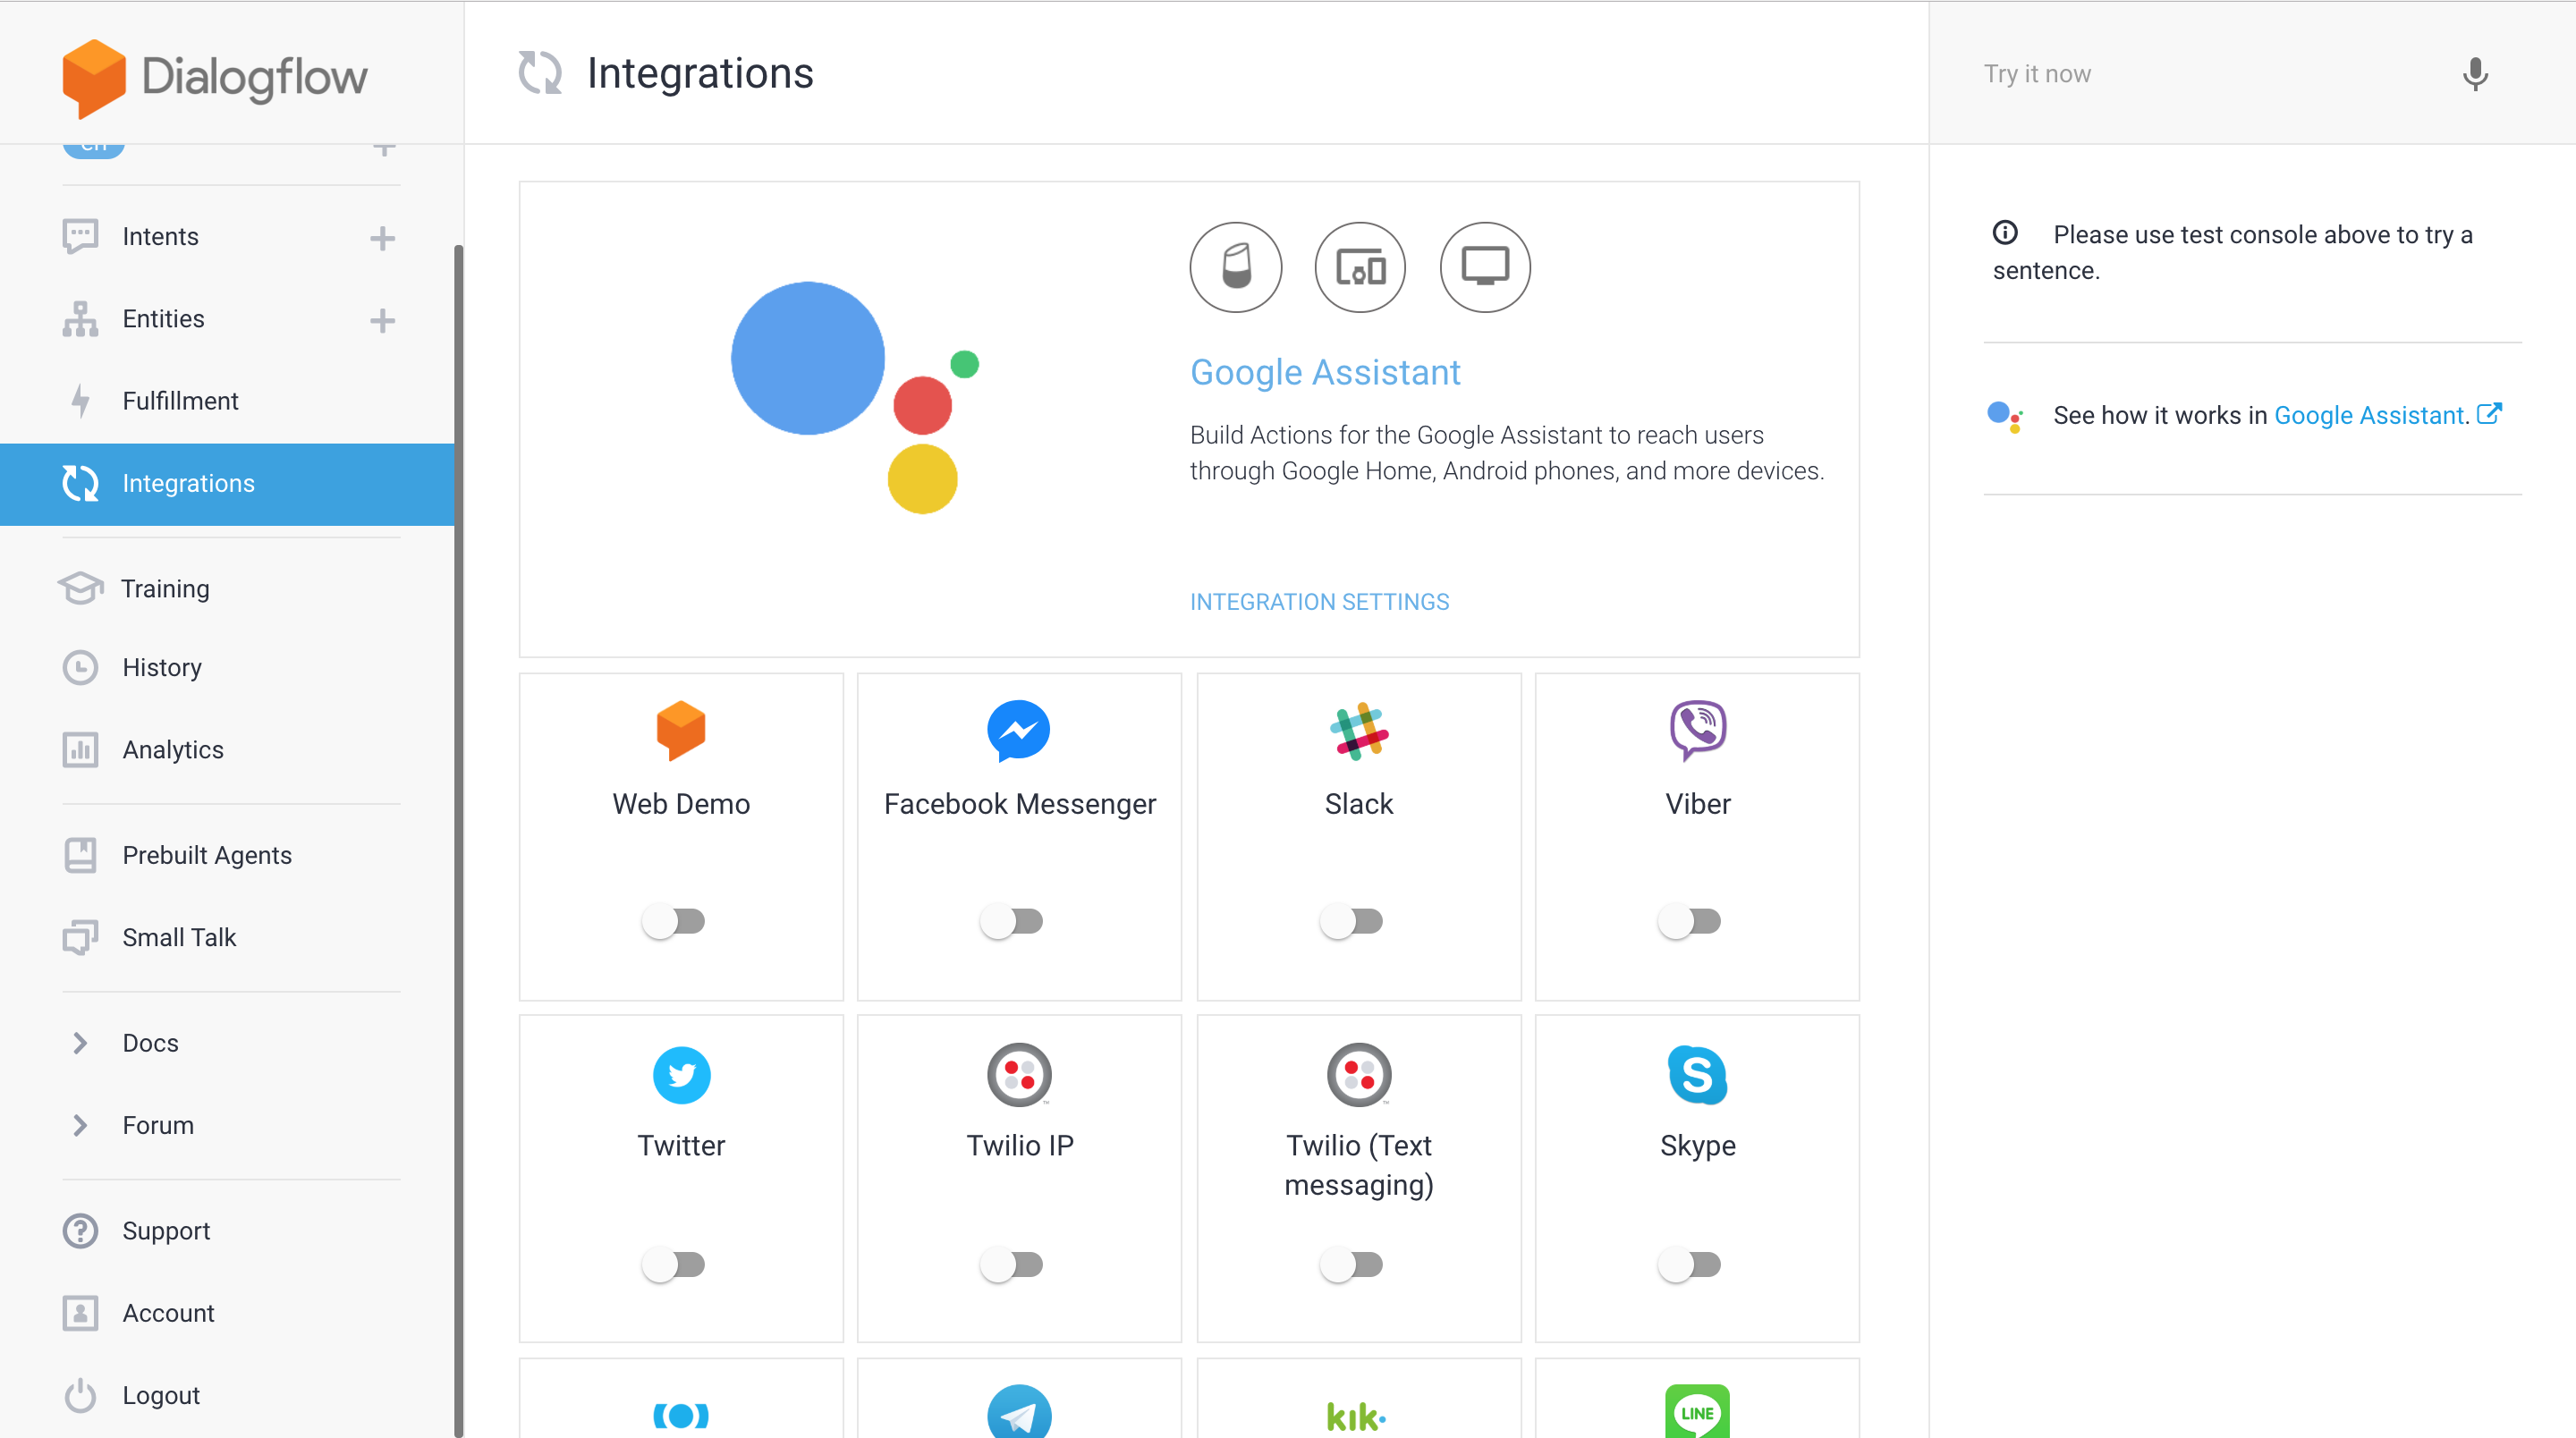
To test your freshly created Google Action head to the Integrations section of the menu:
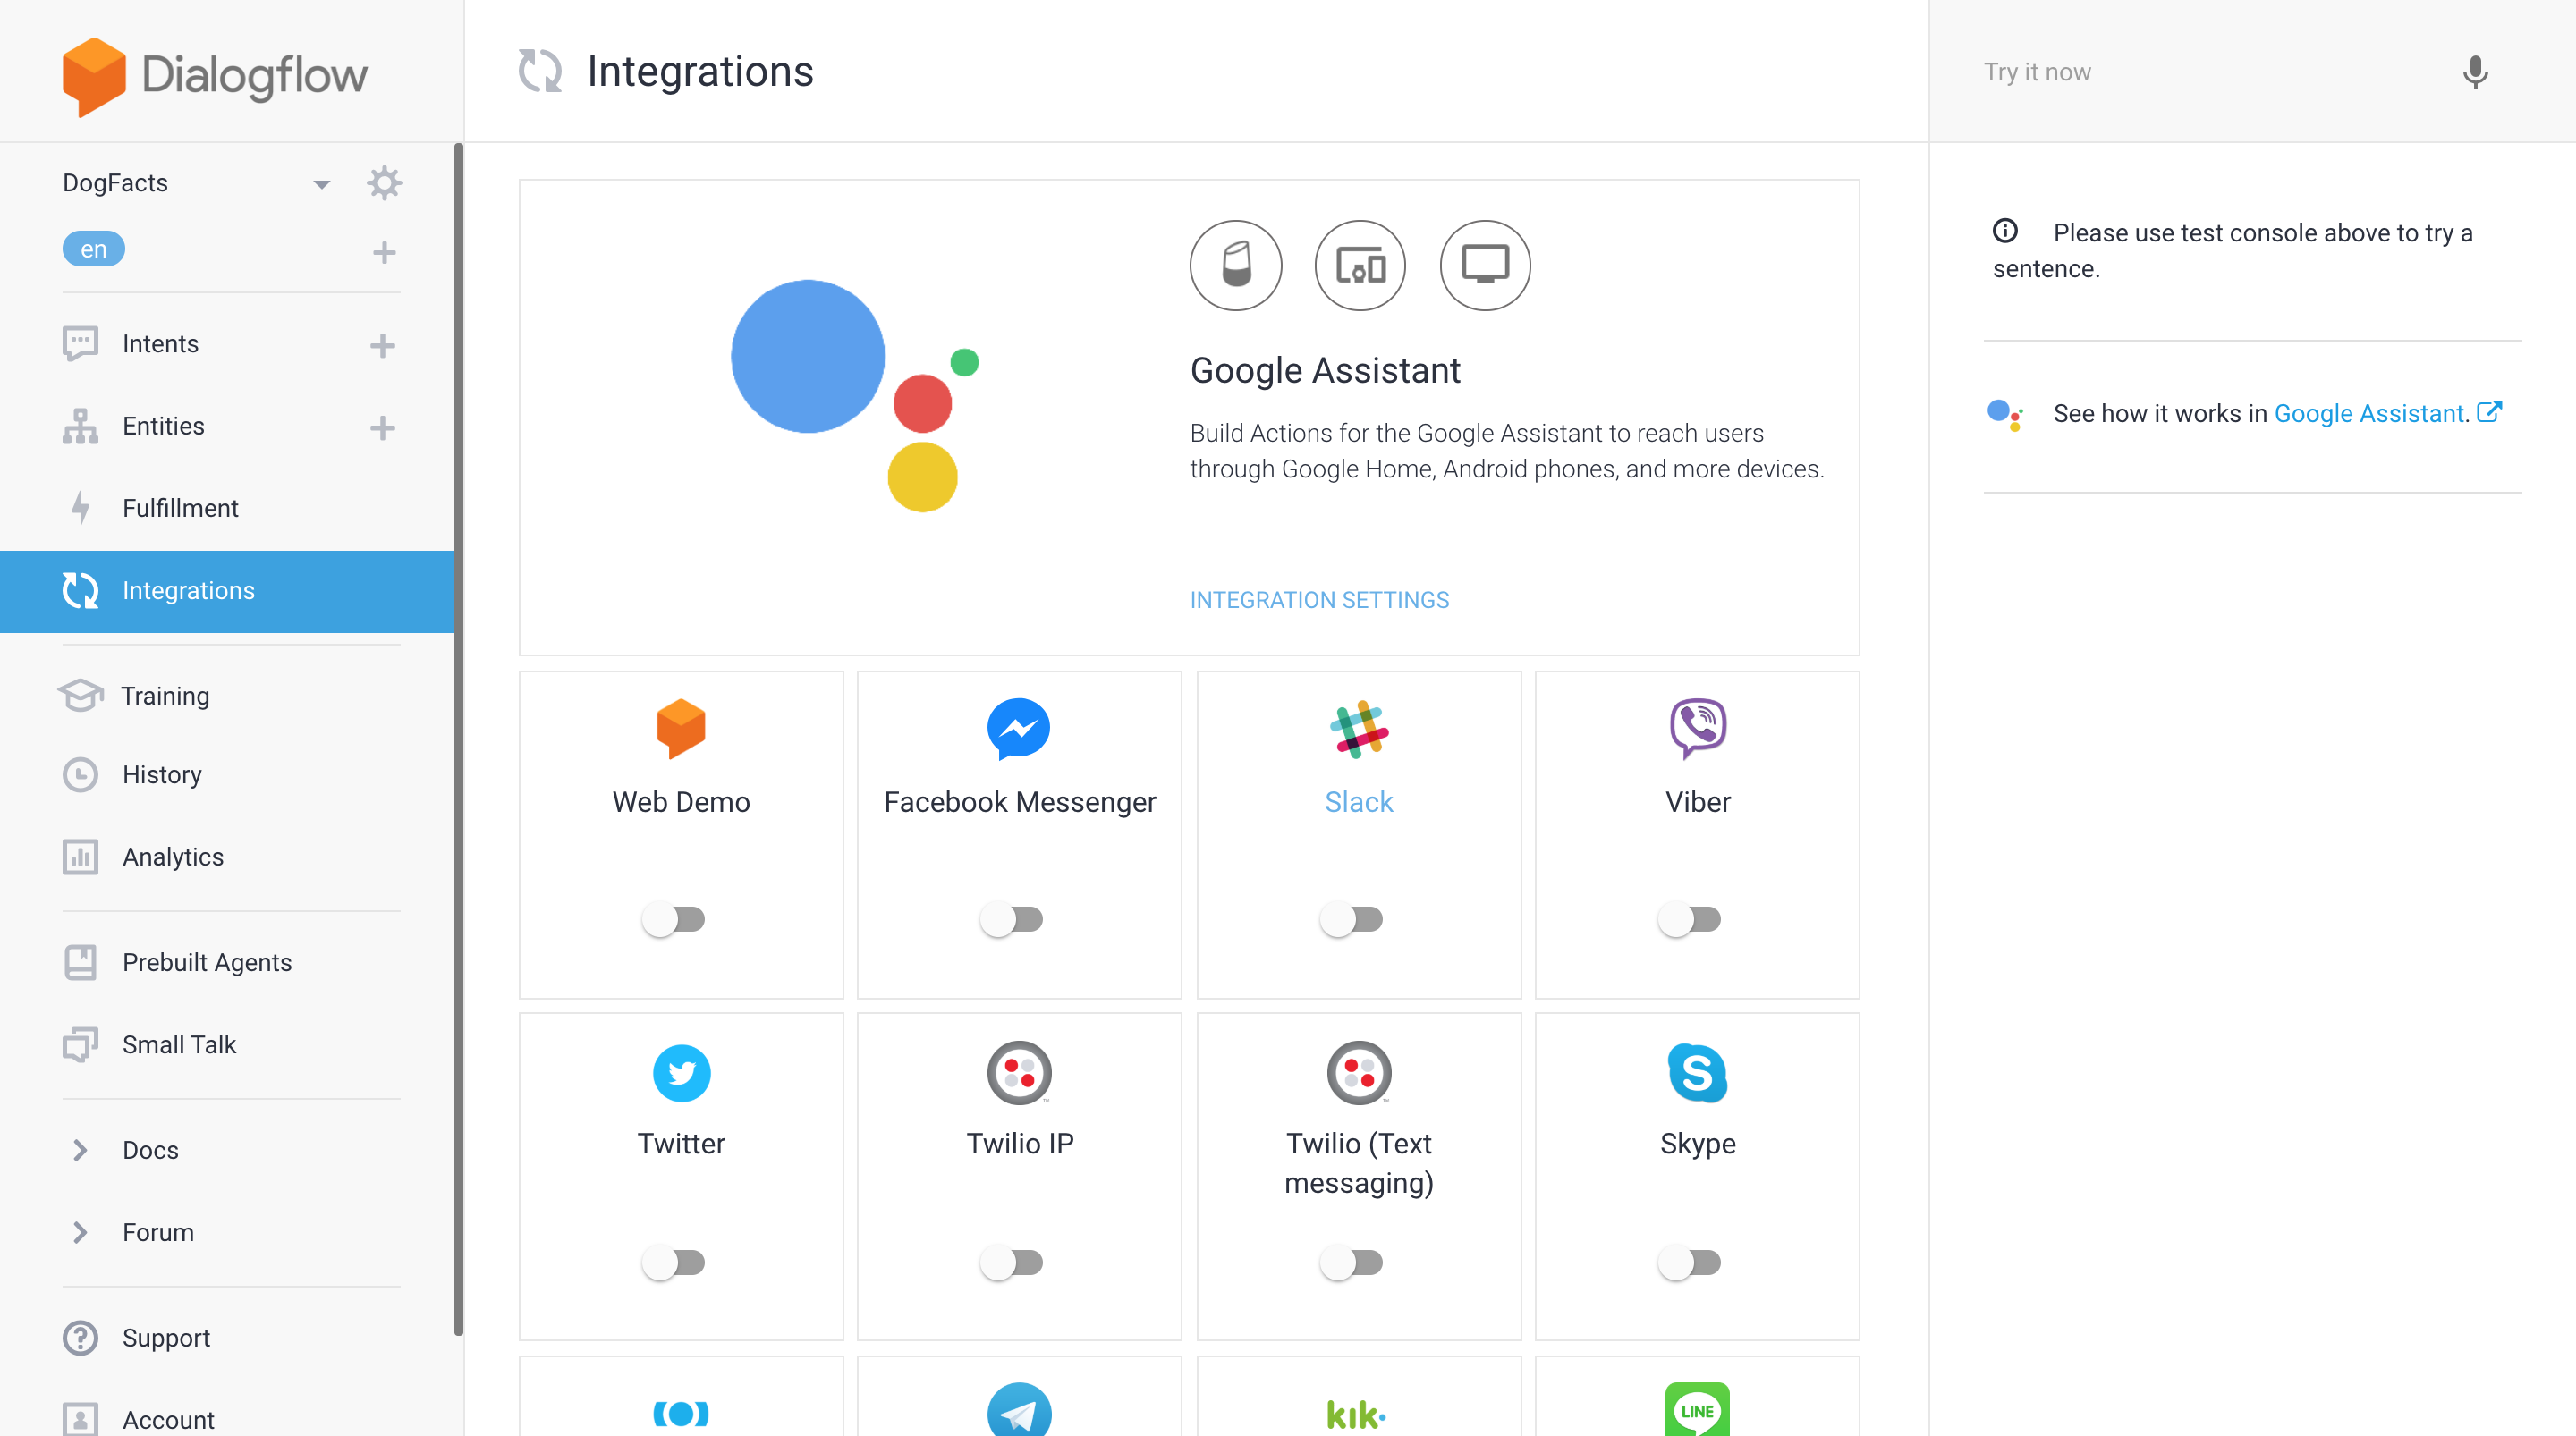
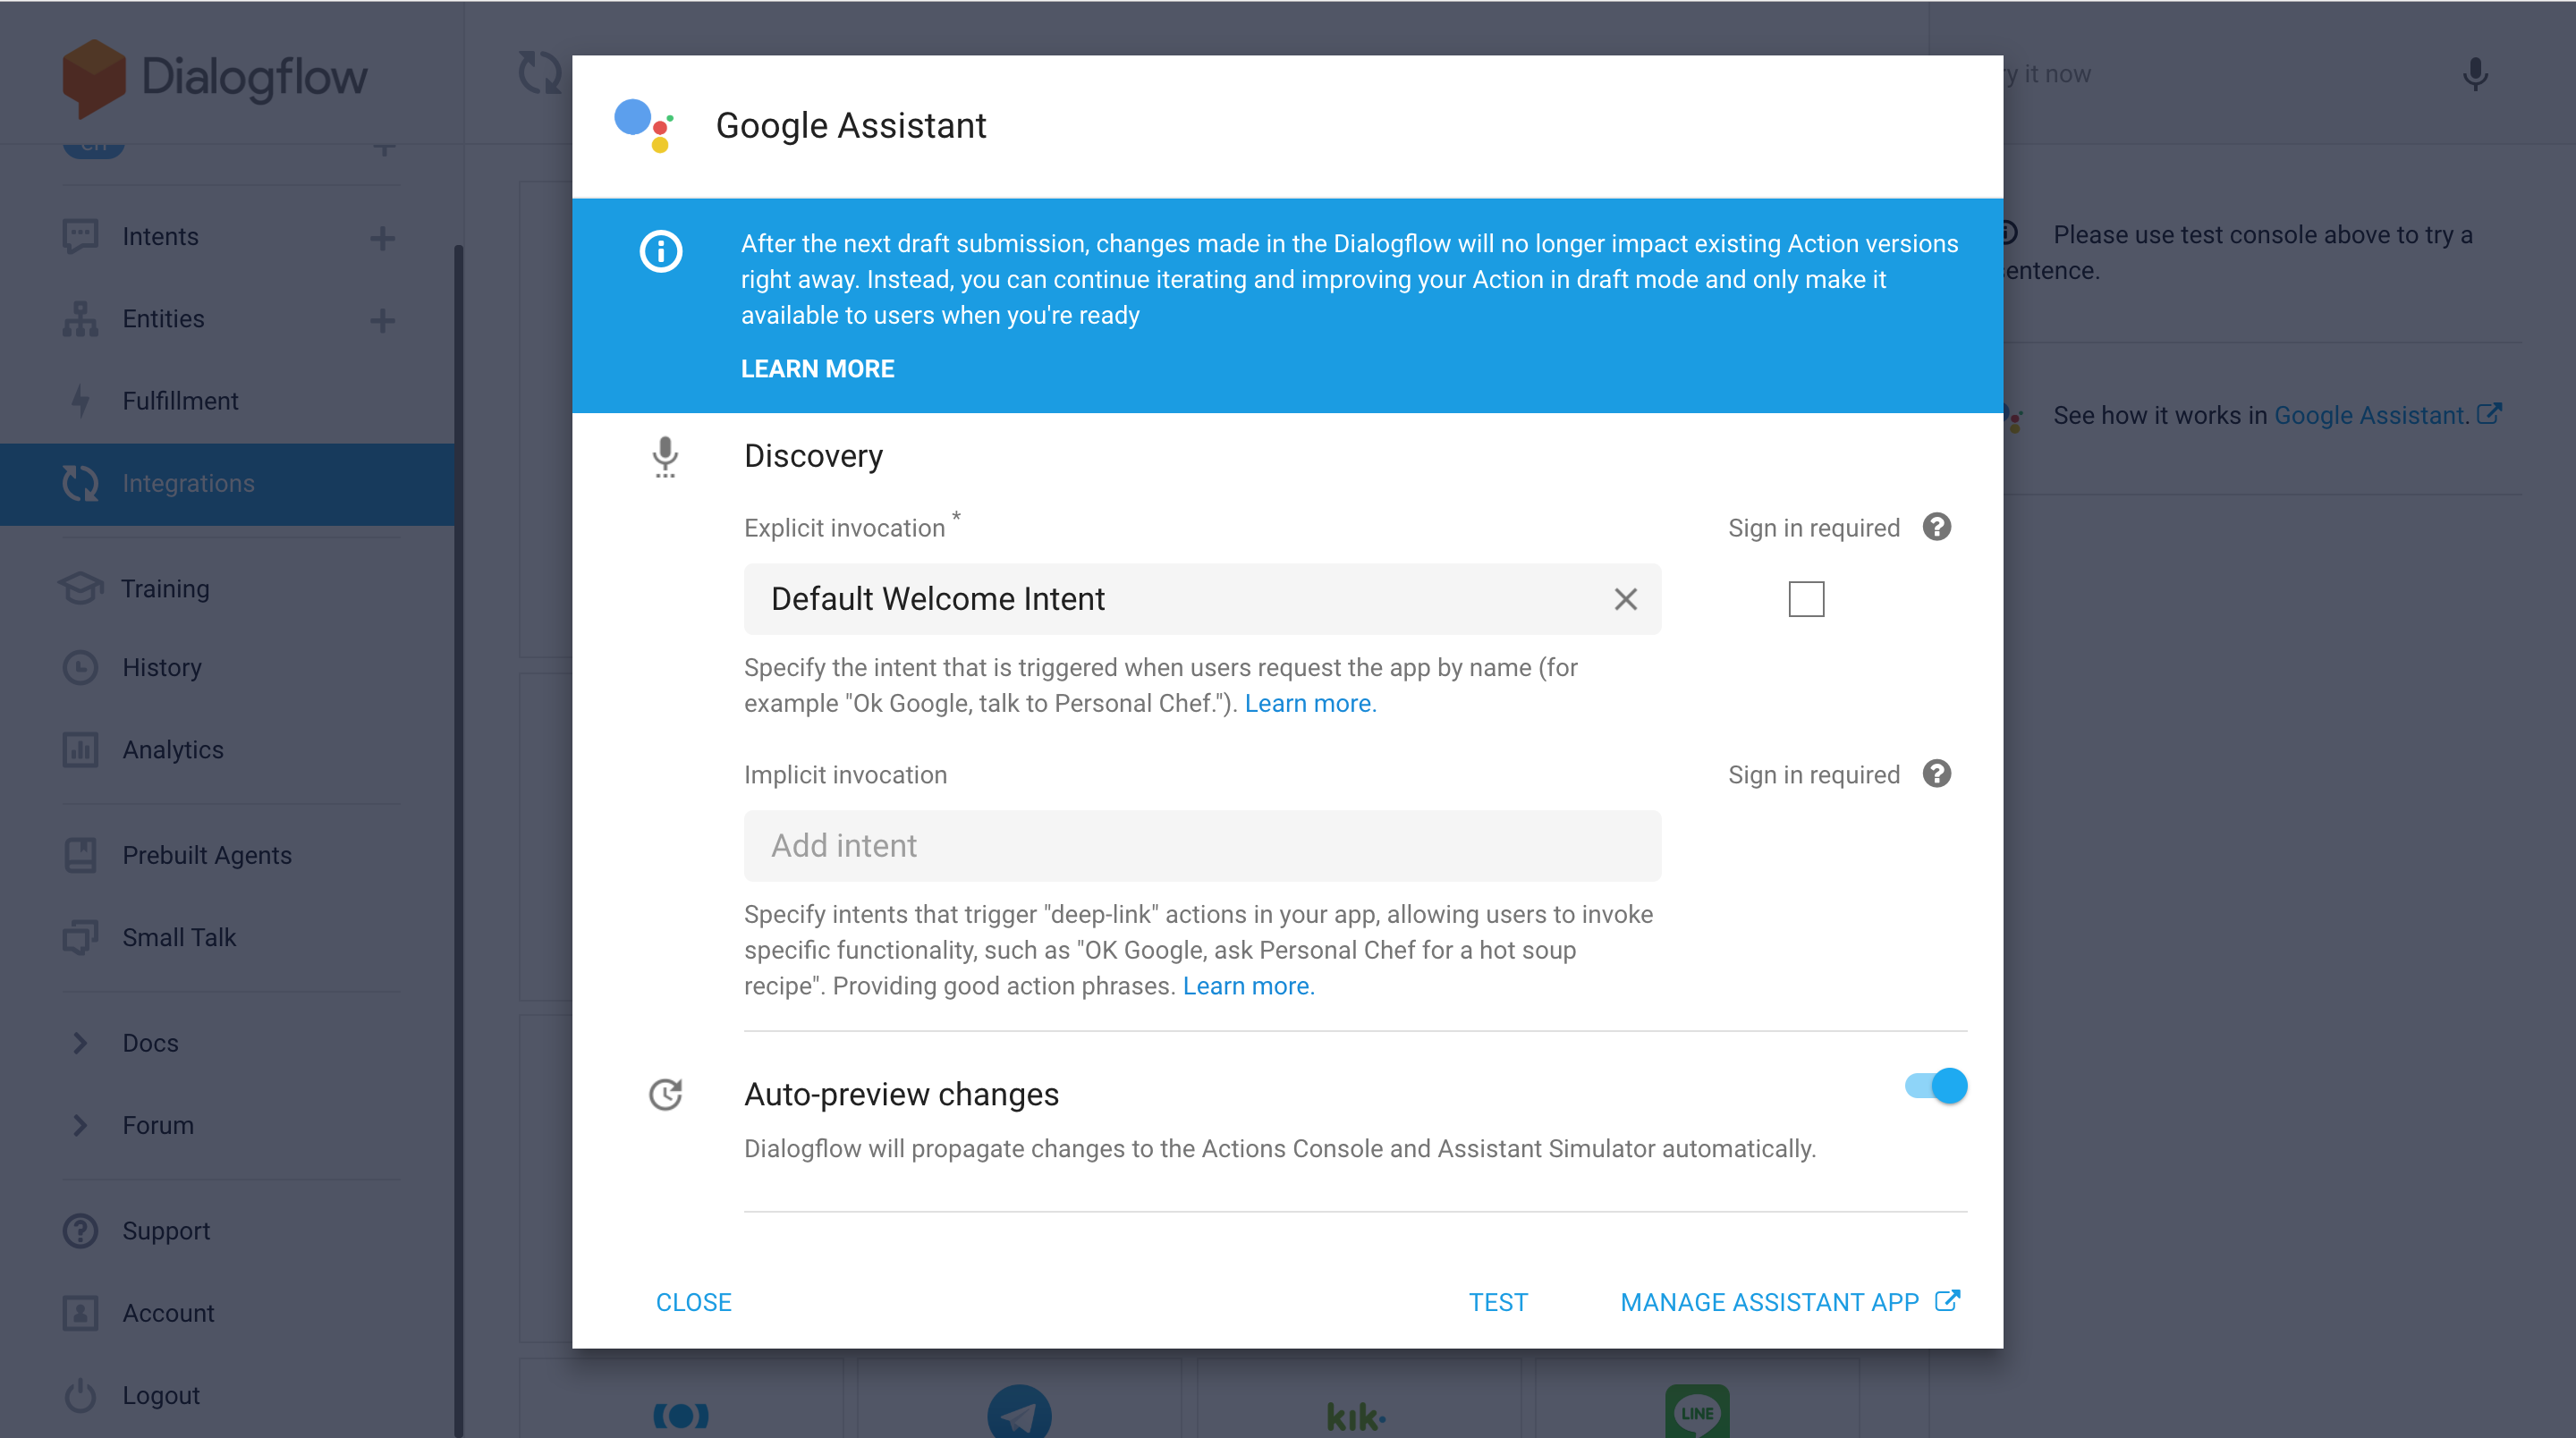
Click on the Integration Settings link, and the popup window appears:
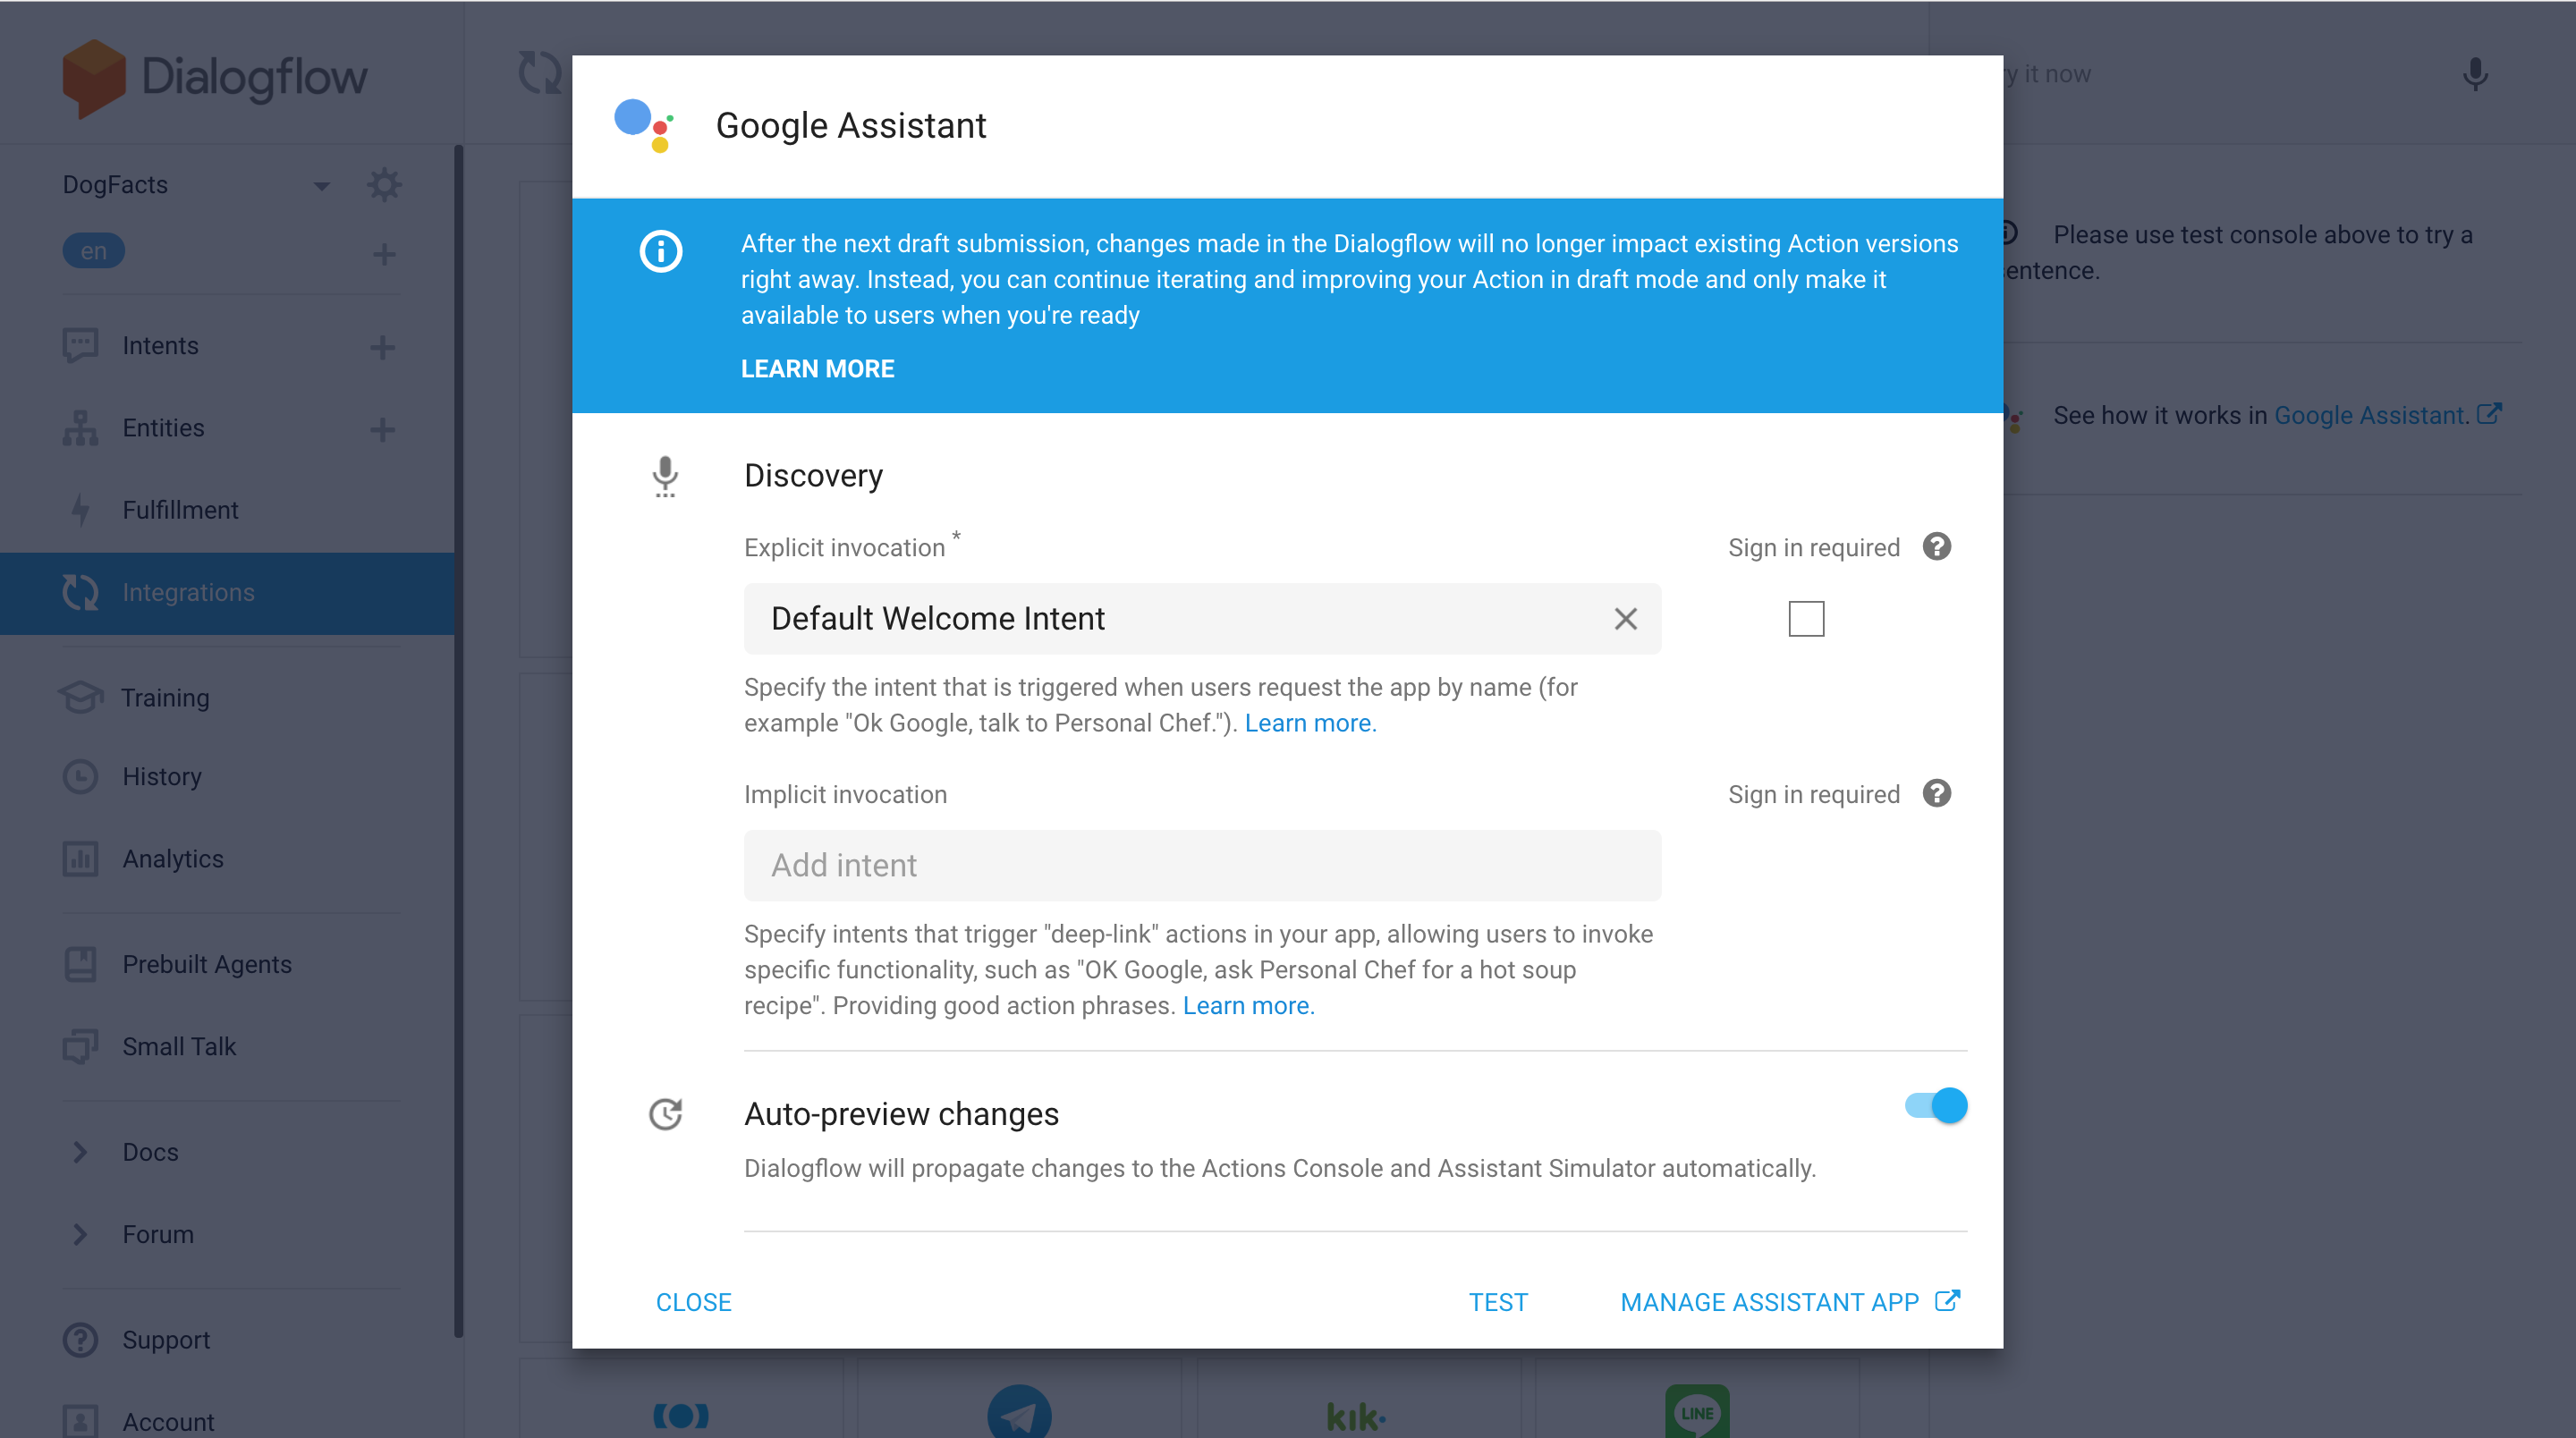
From there click on the TEST button at the bottom of the window. NOTE: If after the click a new browser tab is opened and instantly closed, you would need to close that popup window and click on the Integration Settings link once again. It’s a known Dialogflow bug =(
This is how the Simulator of Google Actions looks like:
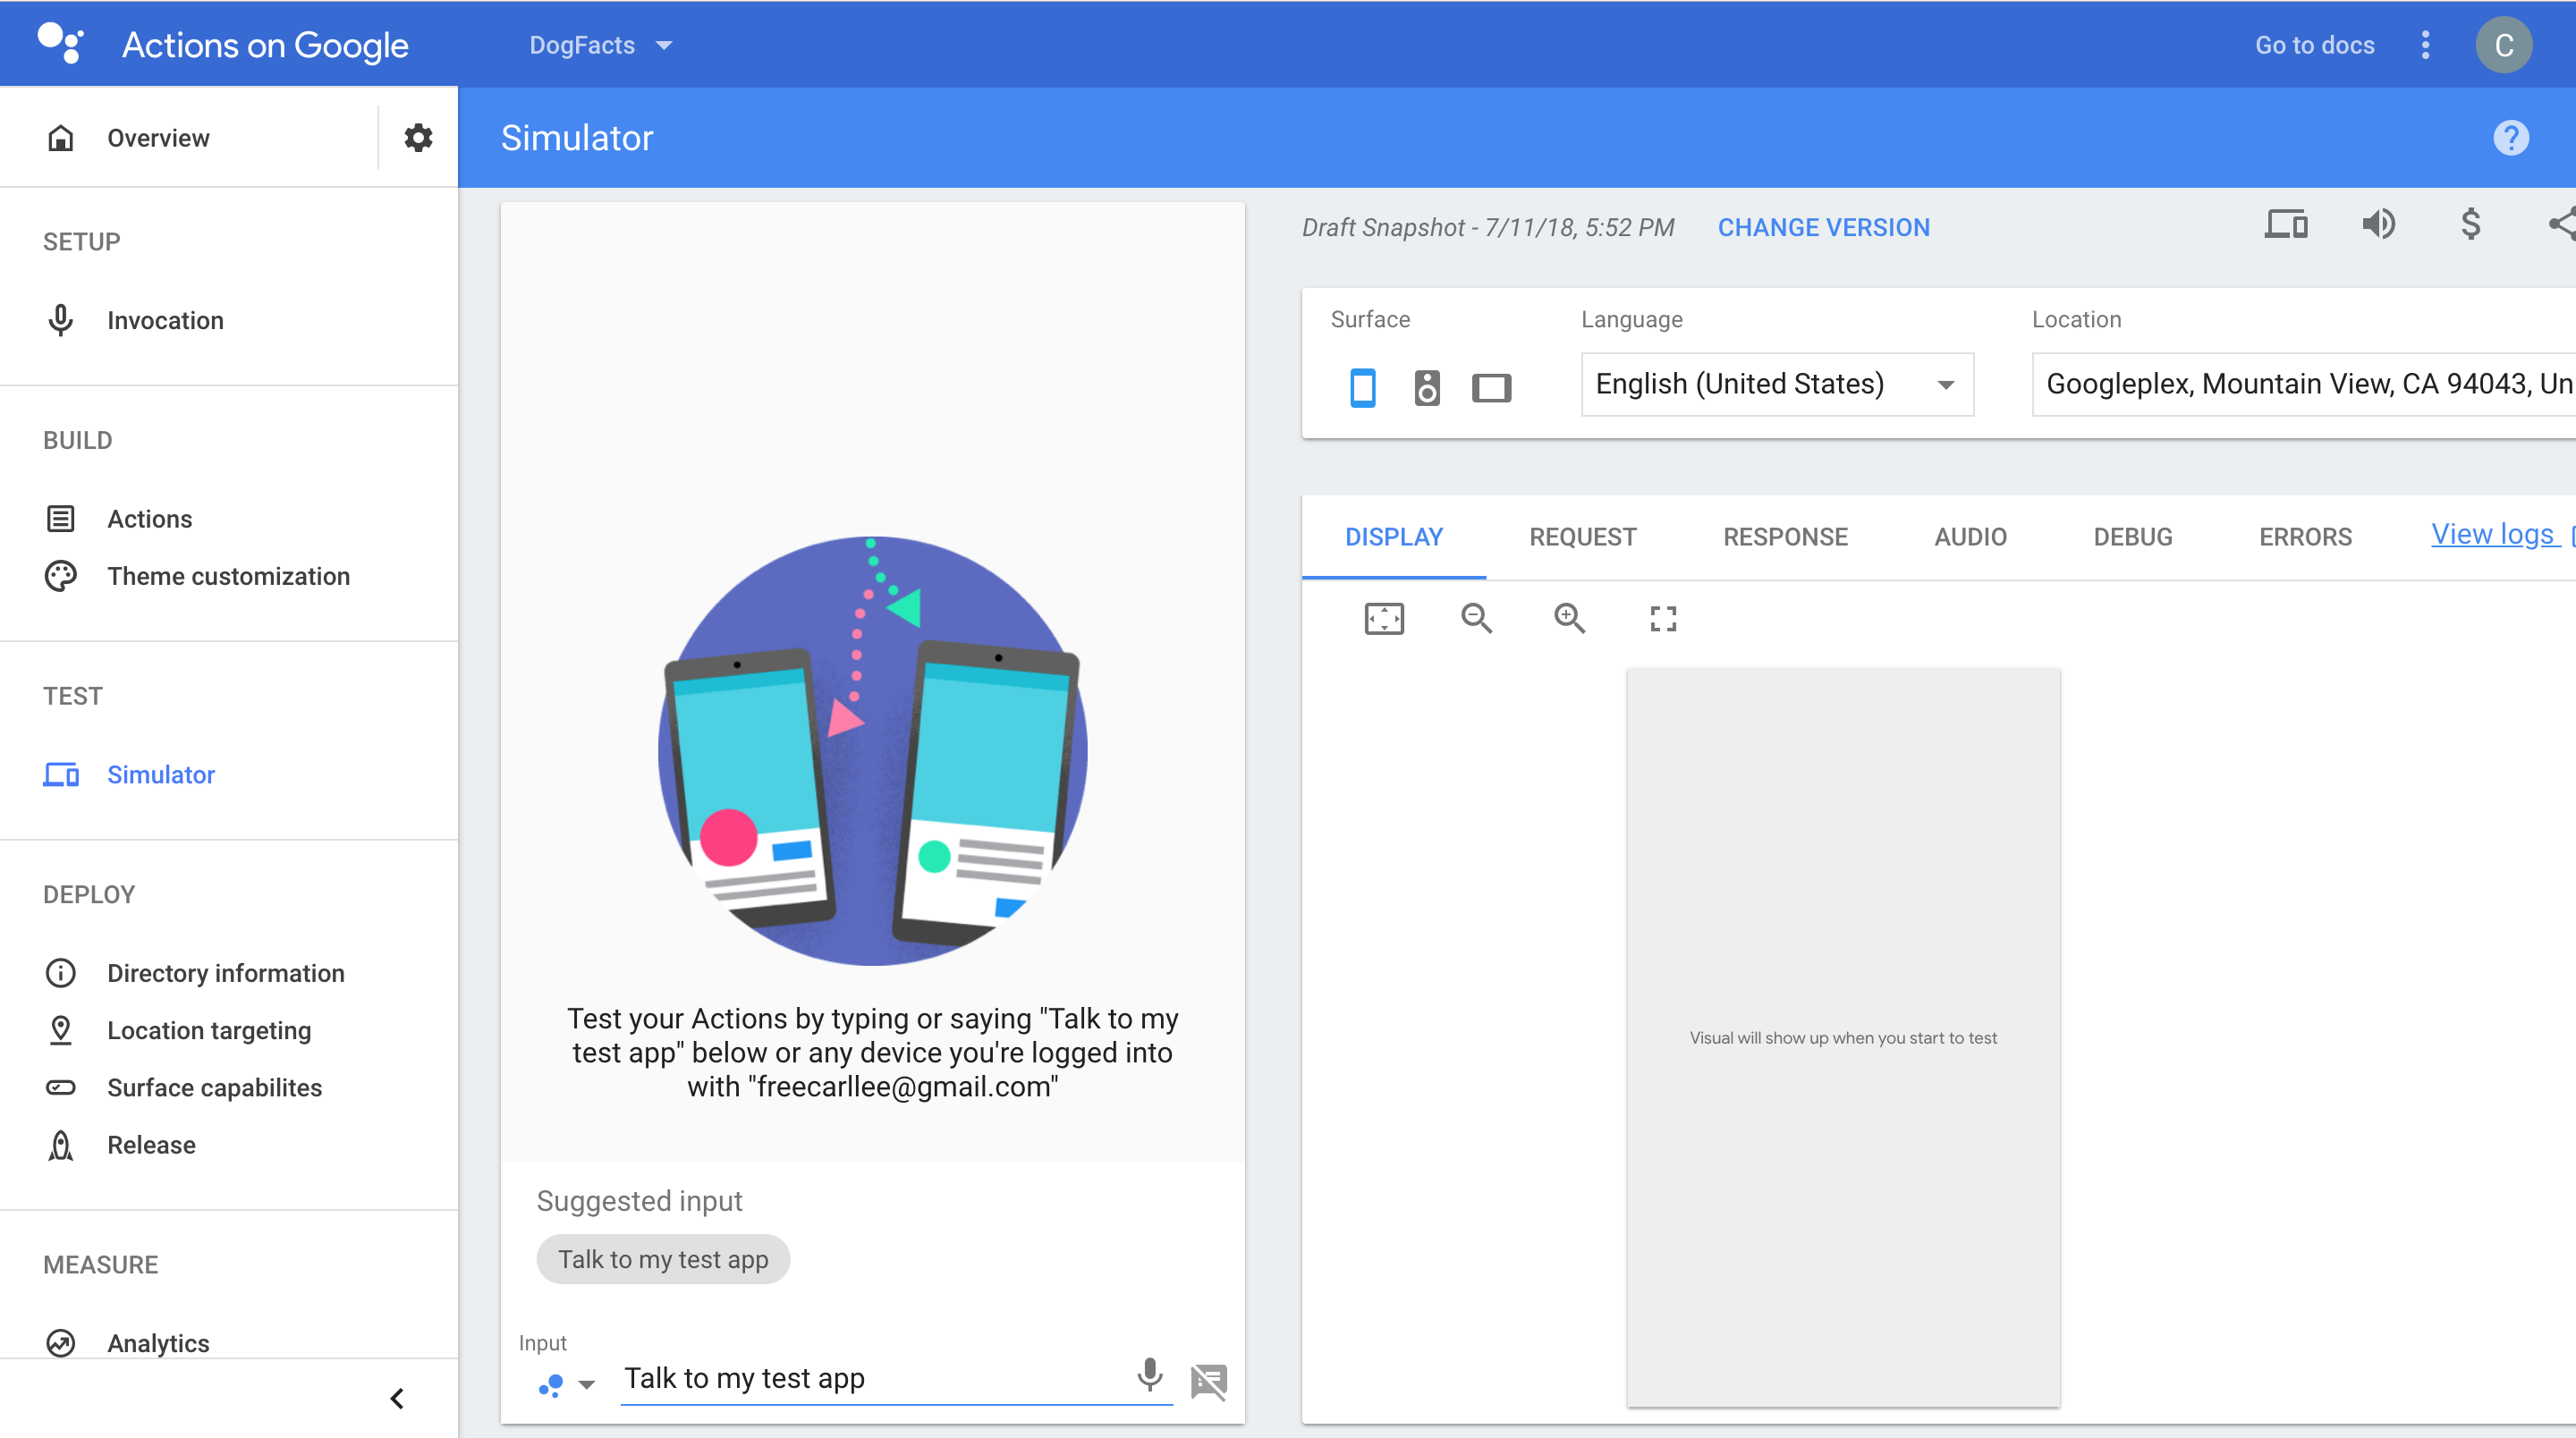
You can go ahead and click enter in the input field. That launches the test version of your Google Action.
Congratulations, you’ve just created your first Google Action!
Now that was easy! Are you proud of yourself? Do you want to show it to your friend and colleagues? You learn how to do that in the next section!
How to test an Alexa Skill on Amazon Echo Device
If the Amazon Developer Account is the same account your Amazon Echo is configured with - your skill is available on your device directly after the deployment. Just try it out by saying:
Alexa, open Greetings from Earth
If you want to test your skill on the other device or send this skill for testing purposes to your friends and colleagues you need to invite them (or yourself) to be beta-testers.
Before you can invite others to test your skill, you need to complete a couple of things in the Amazon Alexa Console. Head to Amazon Developer Sign In and click Edit link in the ACTIONS section next to your Skill name:
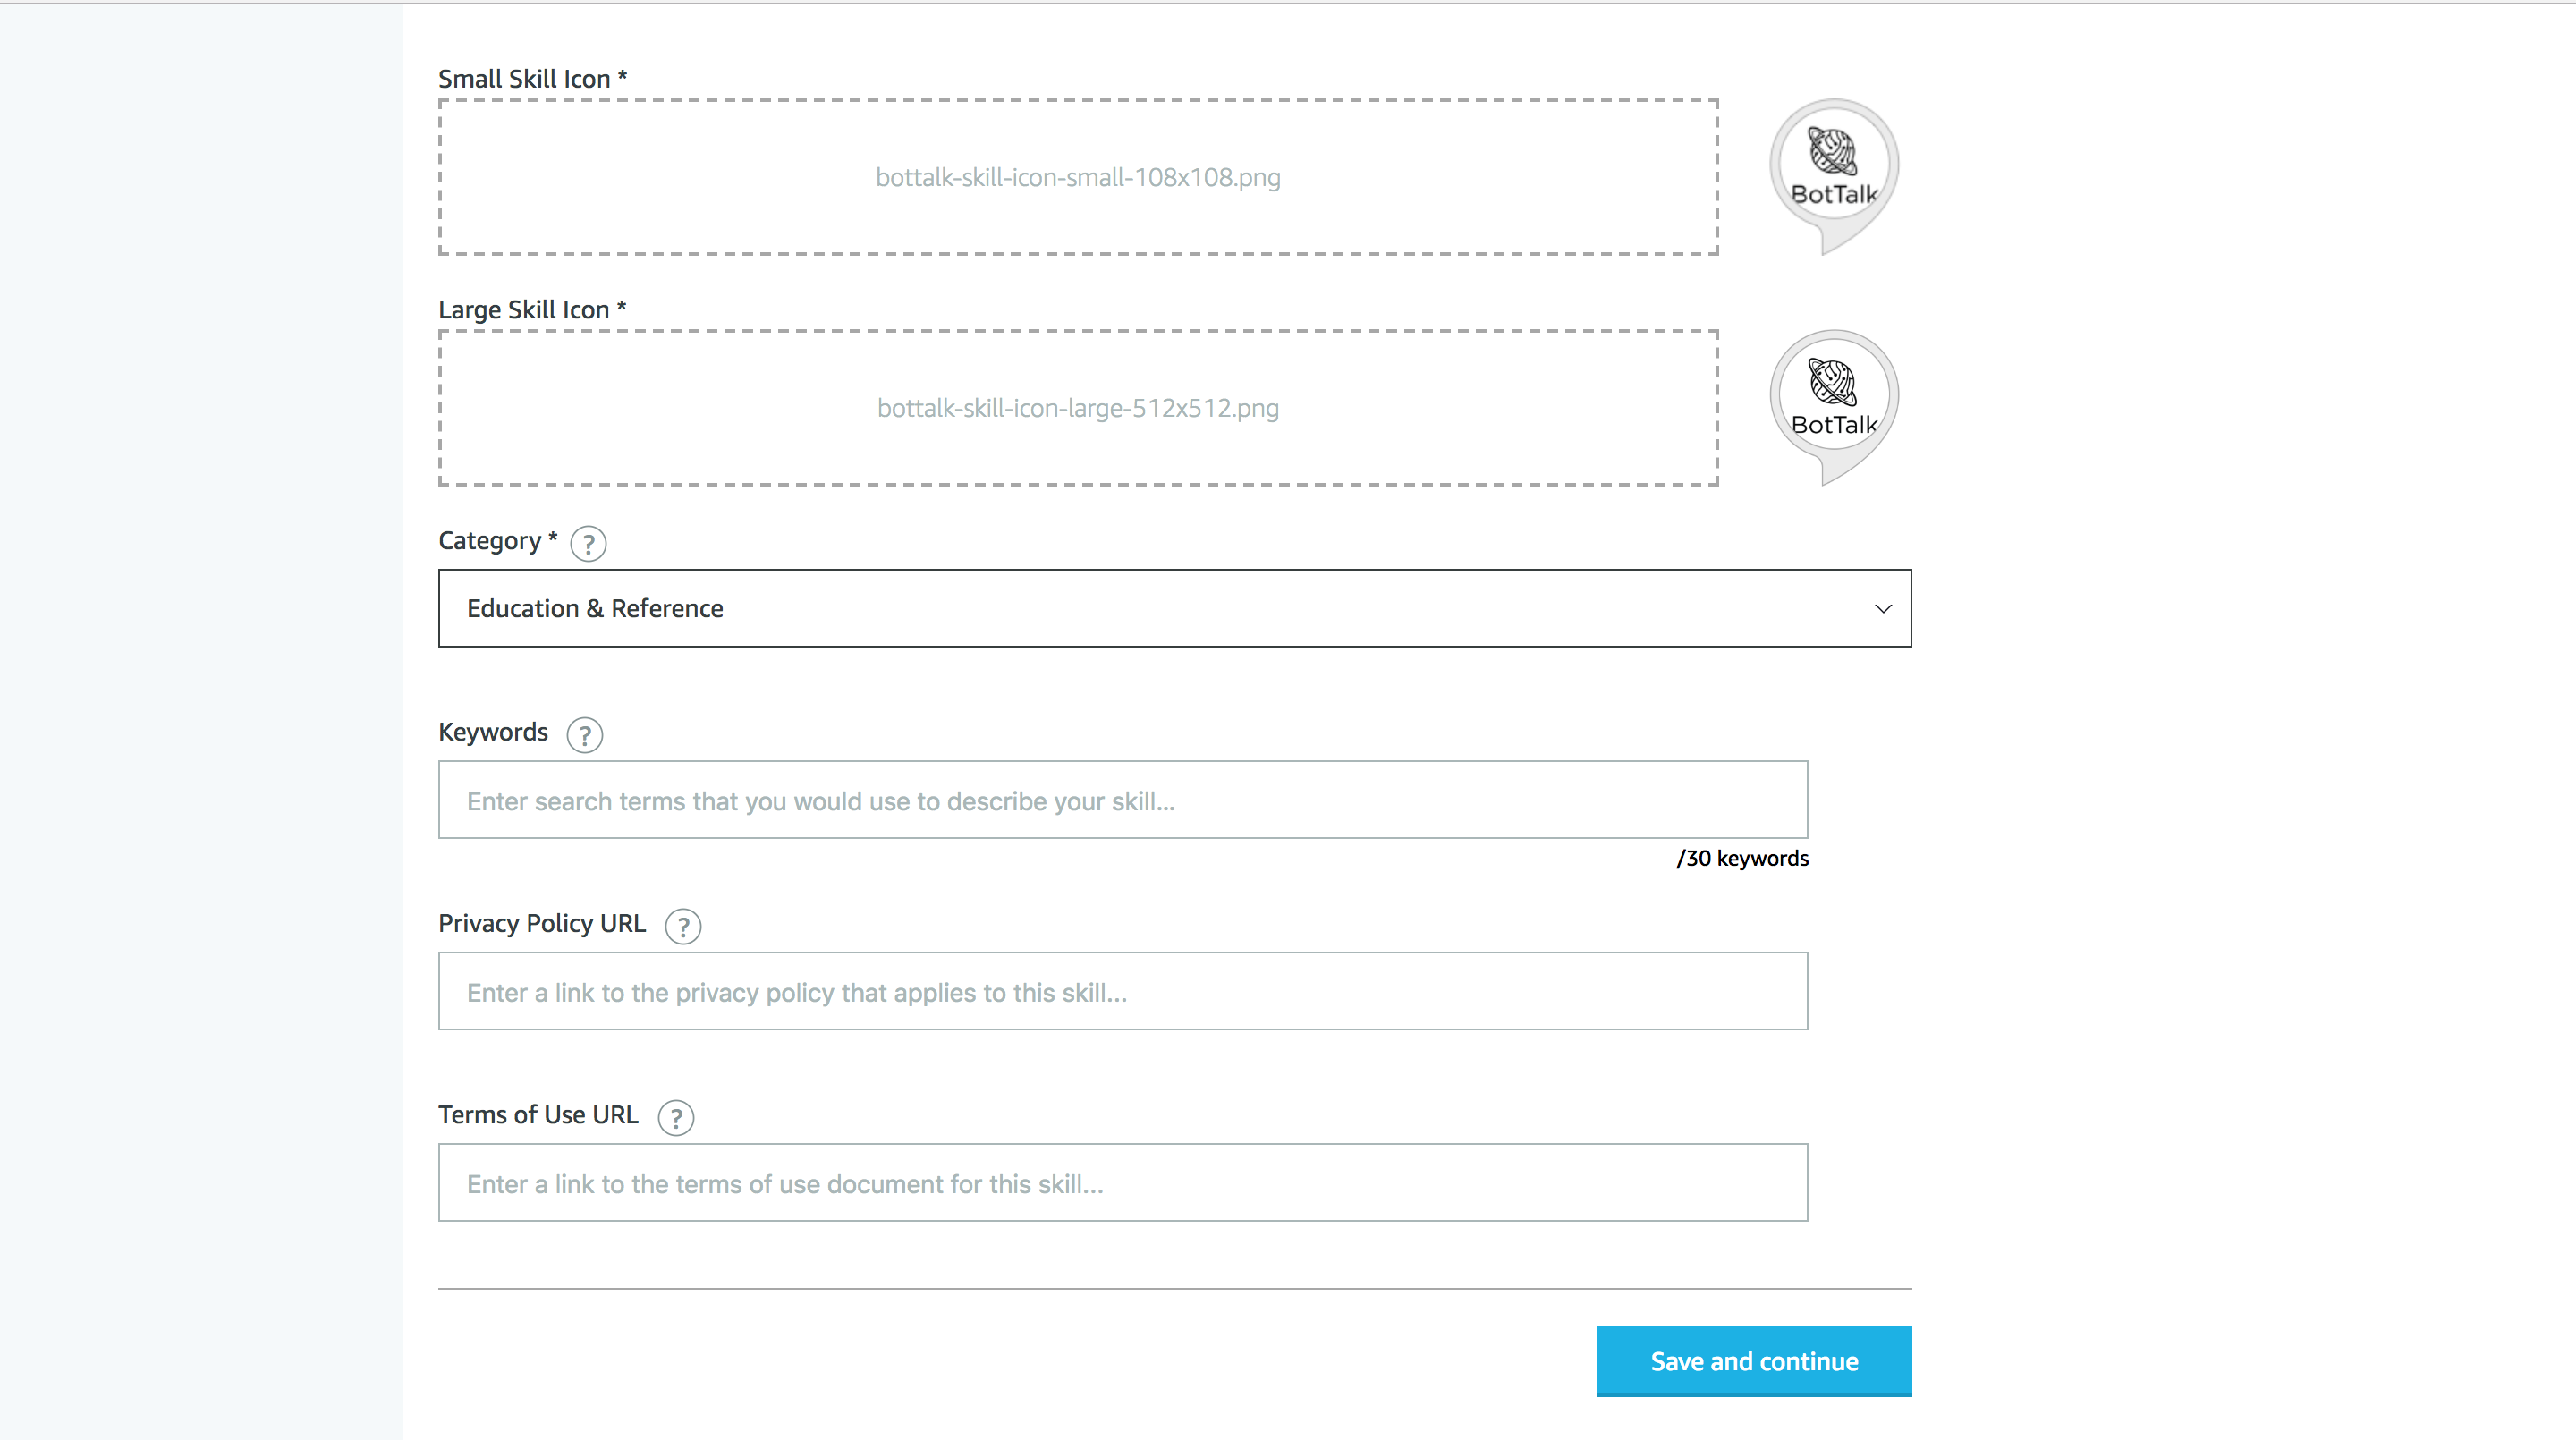
From there go to the Distribution tab. You would need to upload two icons: a small one 108x108 pixel and a large one 512x512 pixel. For your convince, Amazon has a special tool where you can build your icon for your custom Alexa Skill: Amazon Alexa Icon Builder.
Just create your icon and upload it here:
Click on Save and continue button. In the next section choose the following answers:
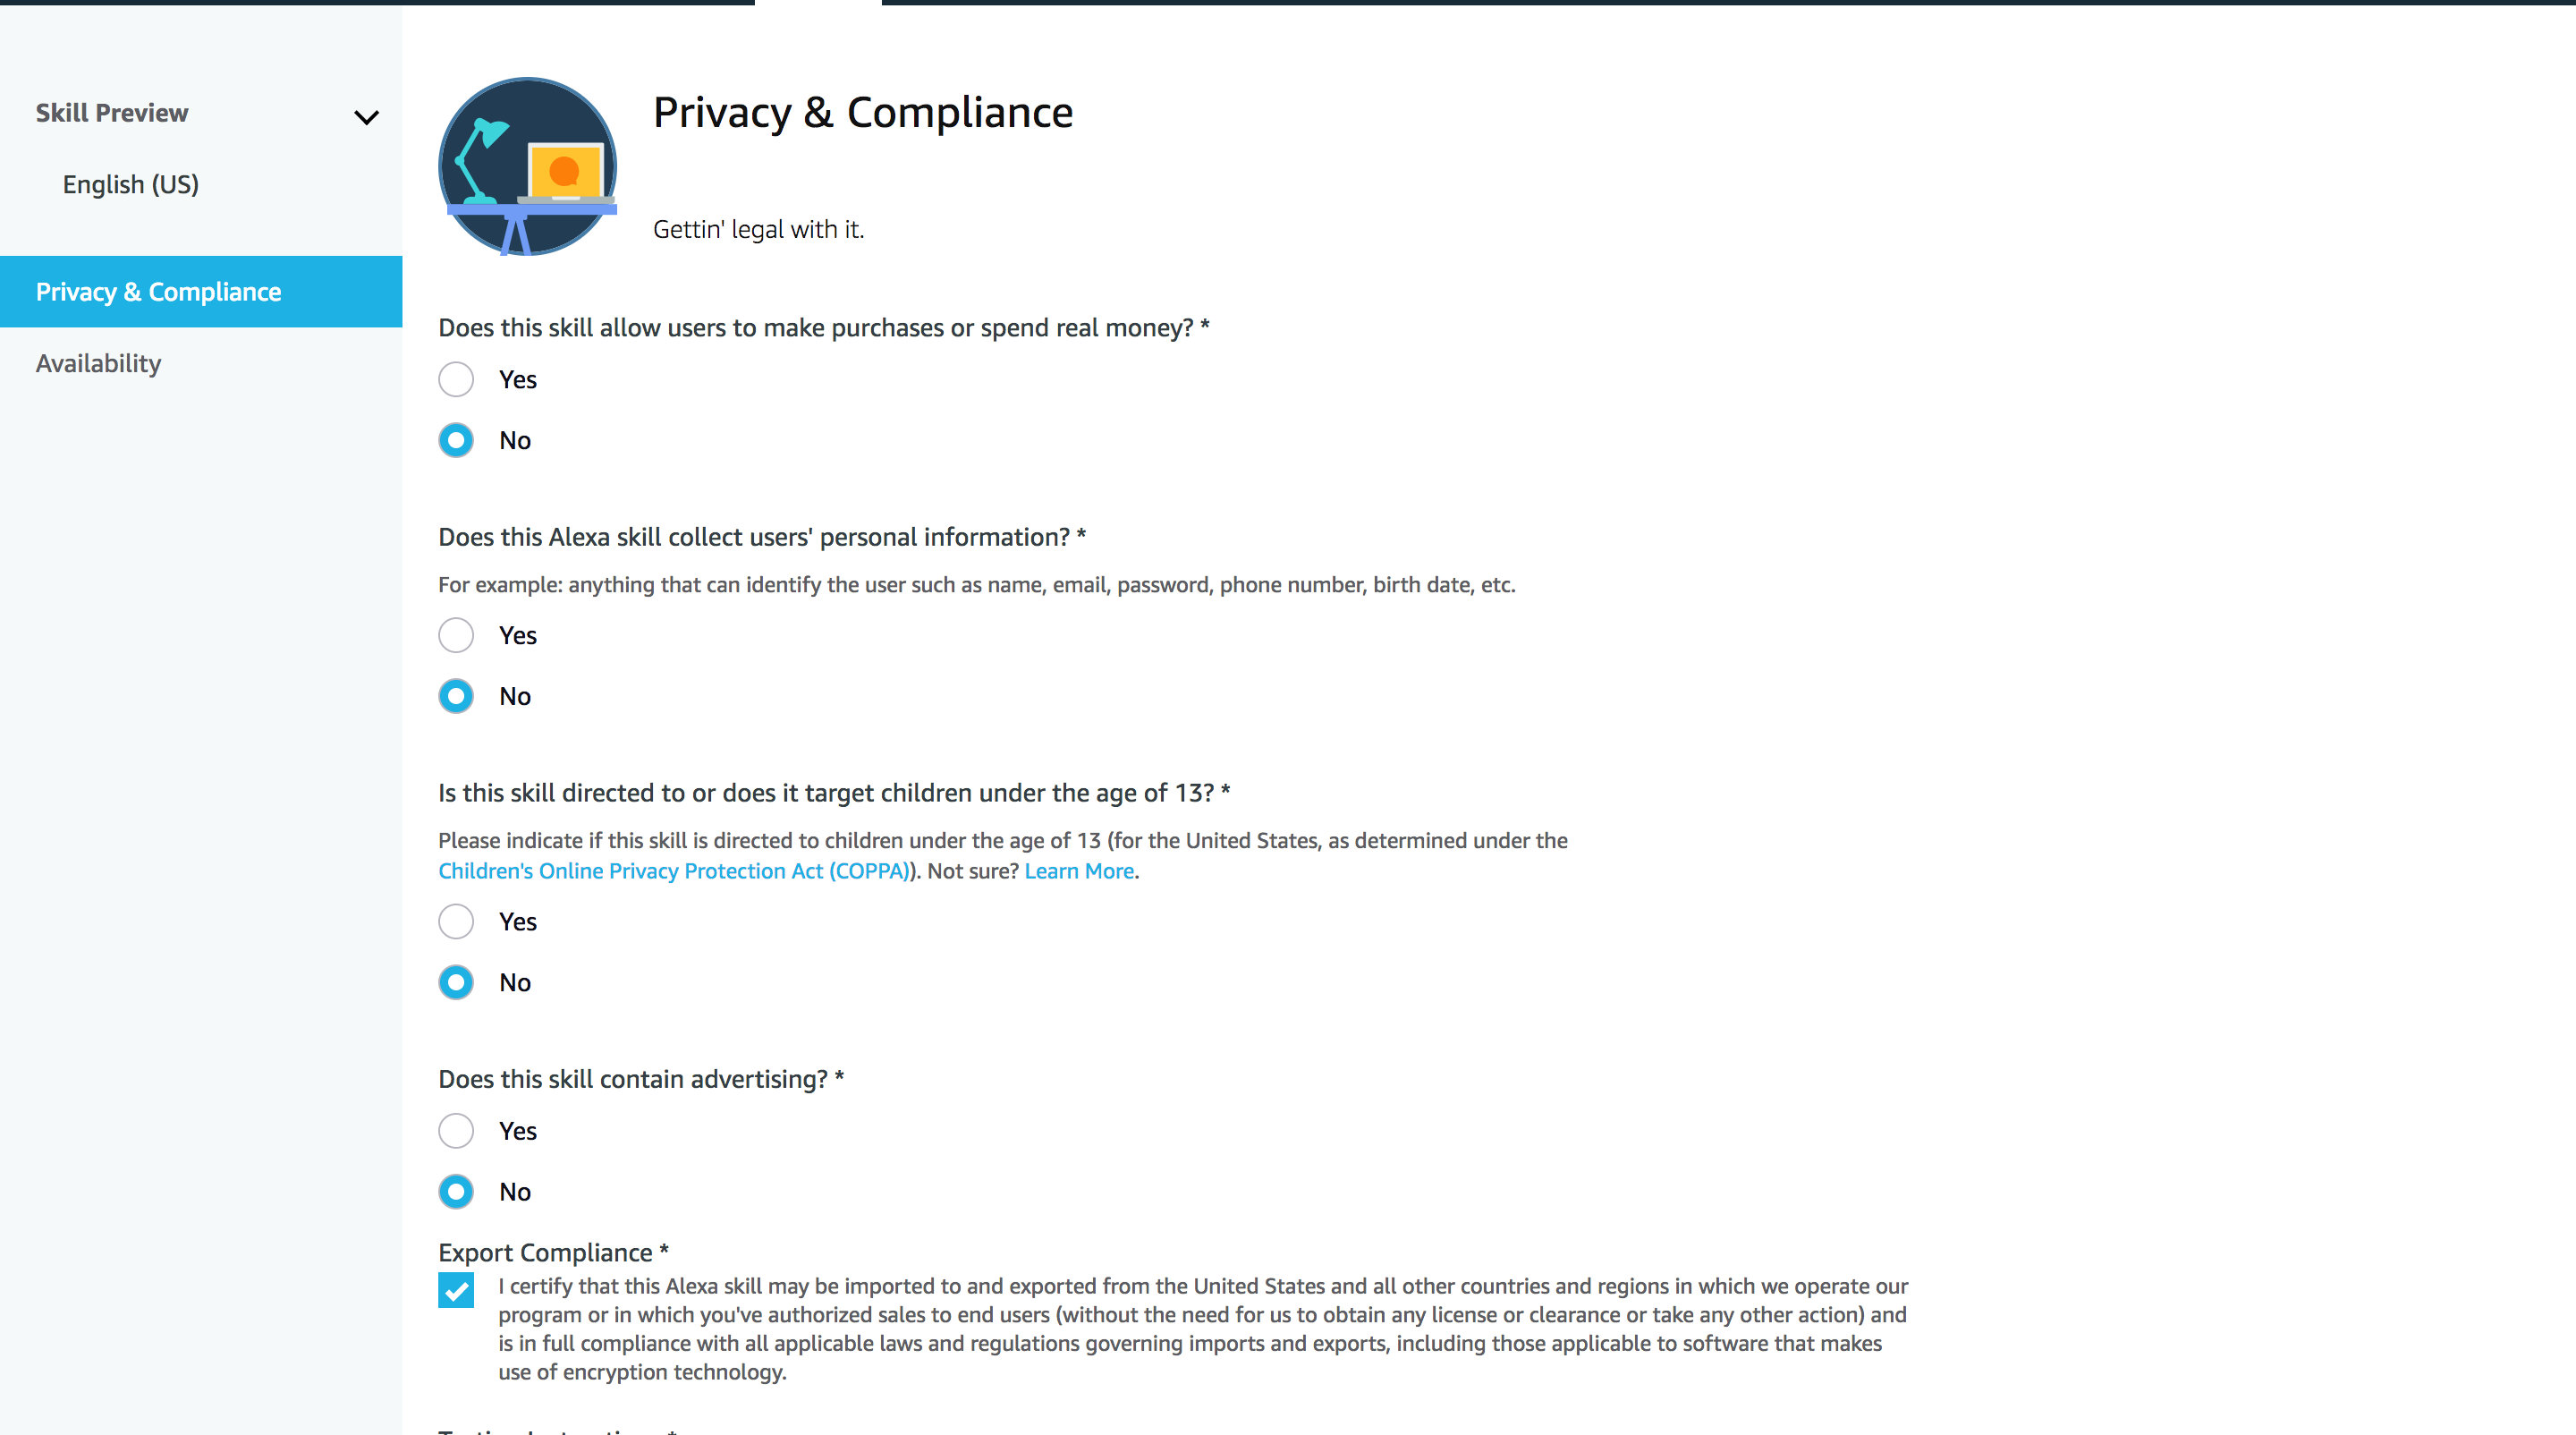
Once again click on Save and continue.
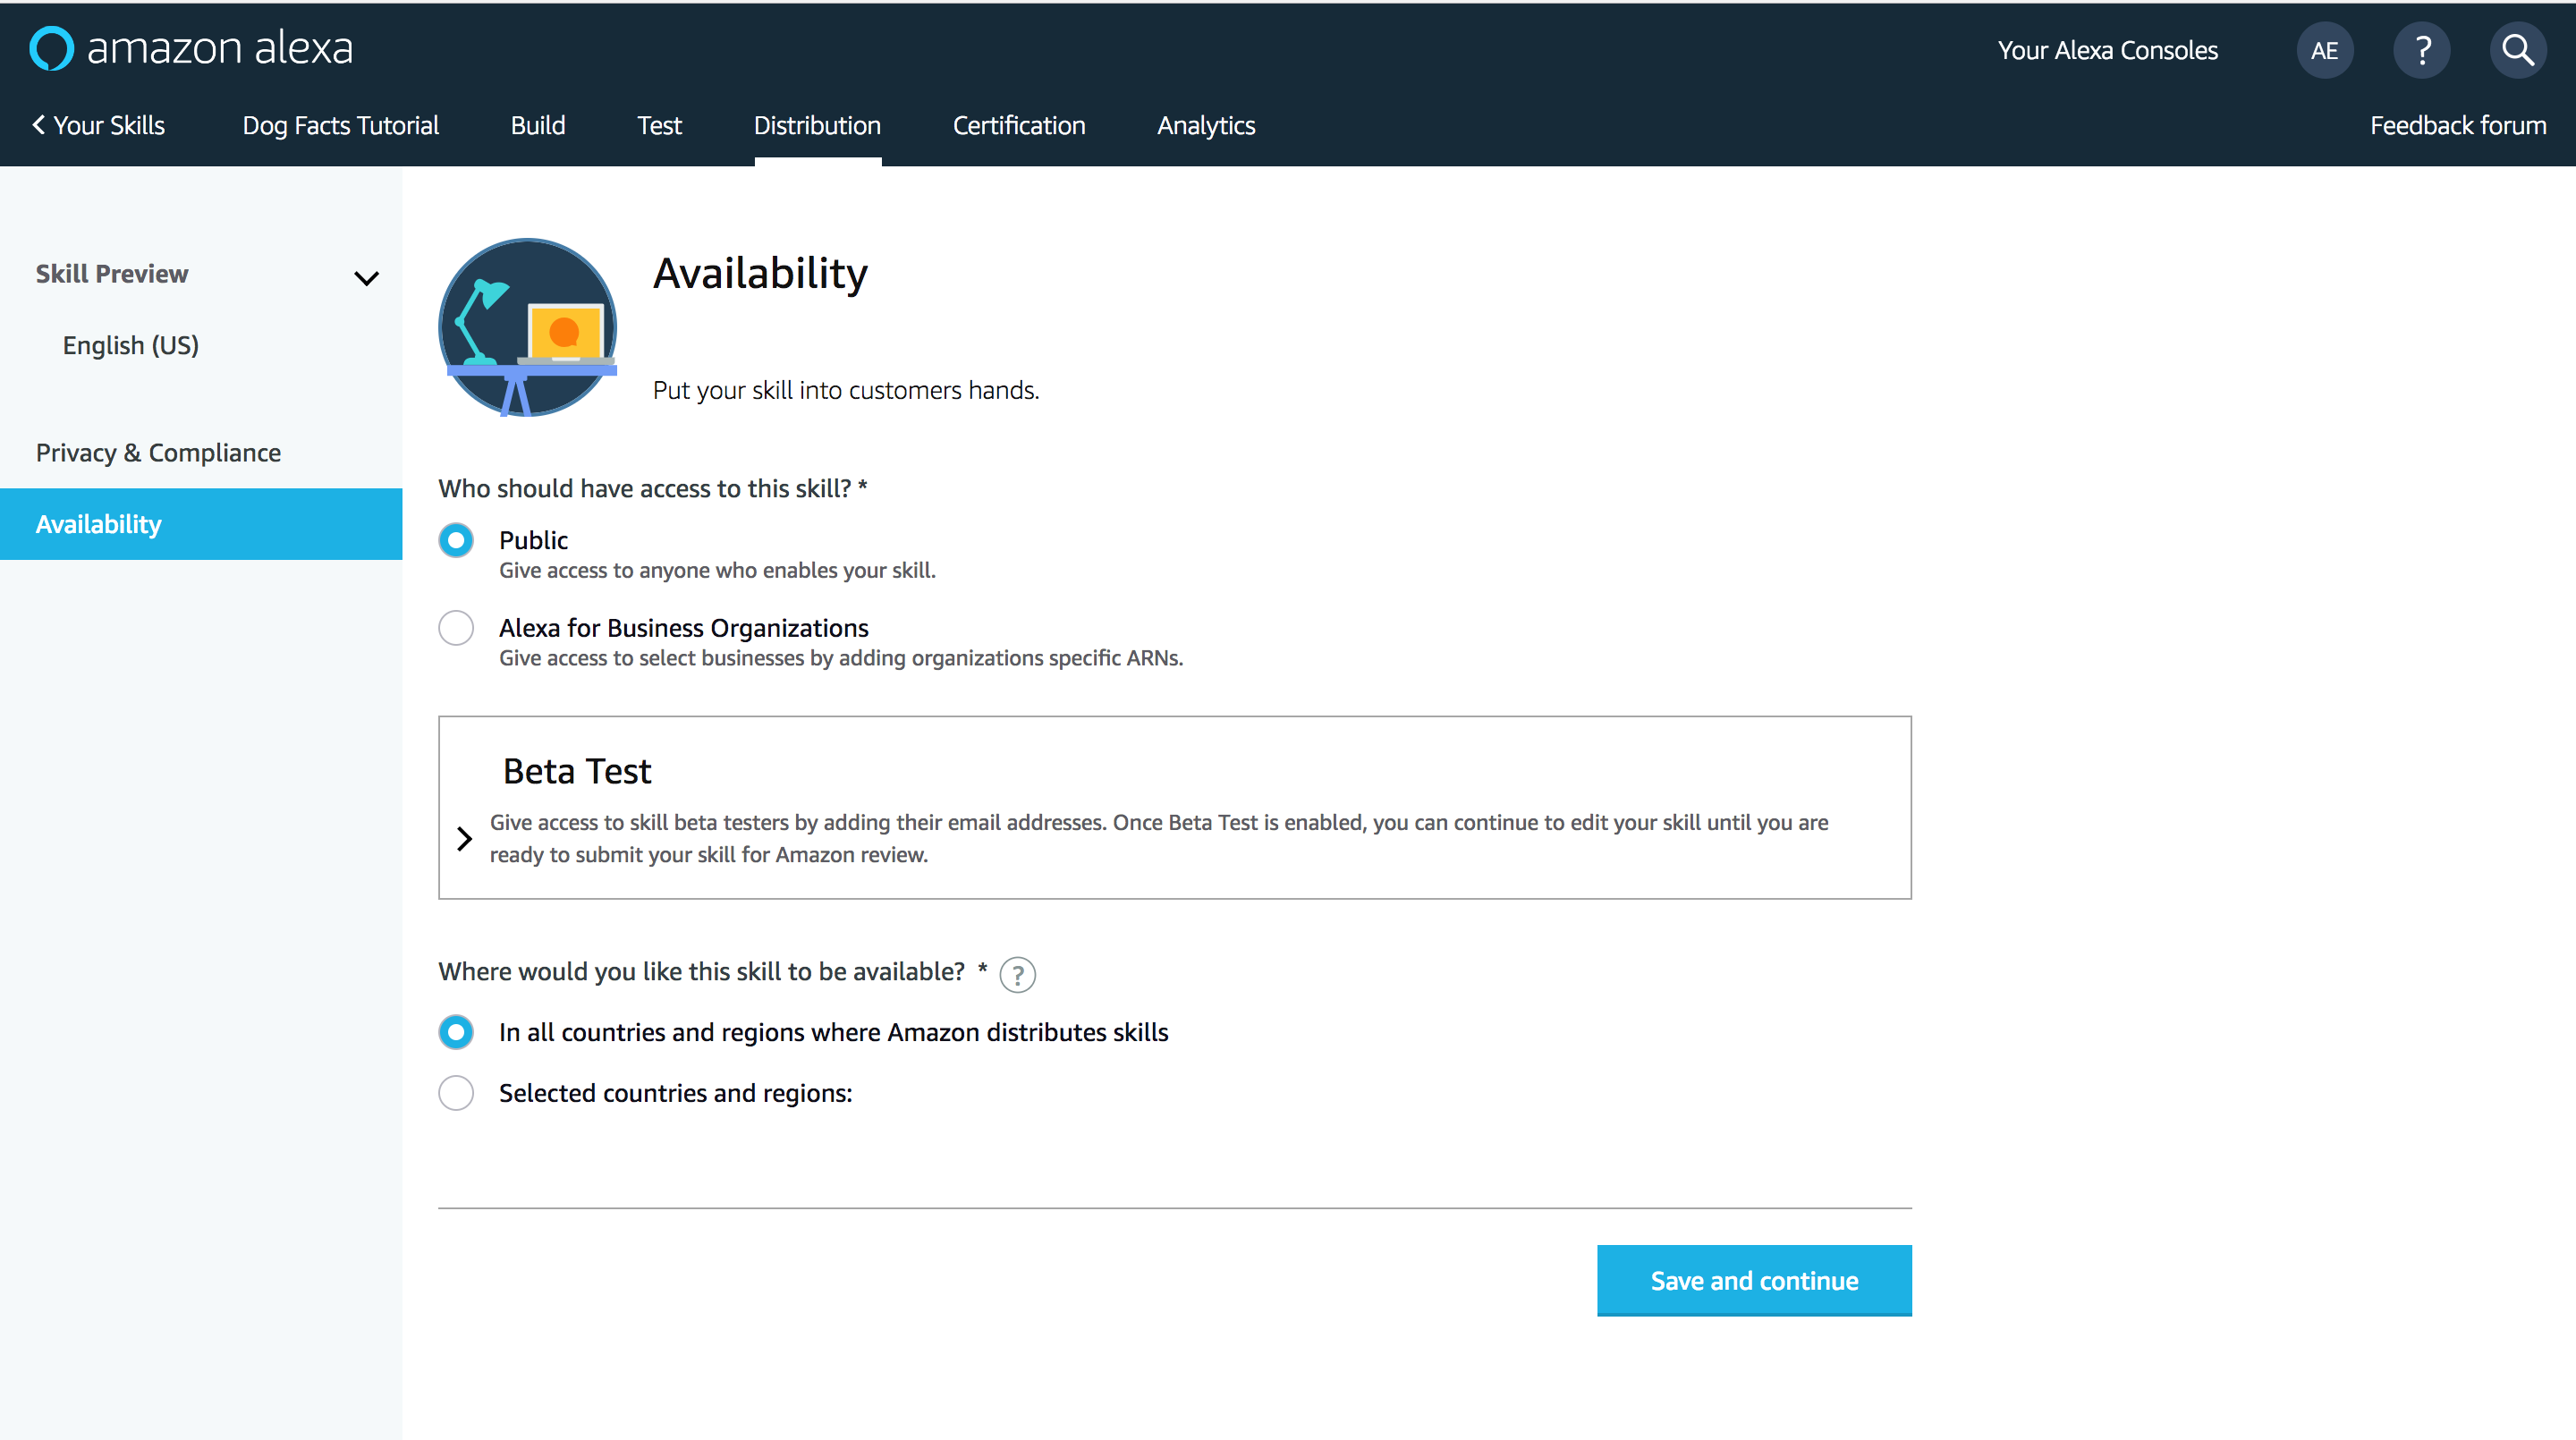
In the Availability section you have a rectangular section called Beta Test:
Click on the error to open this section. Enter the tester email addresses in the field:
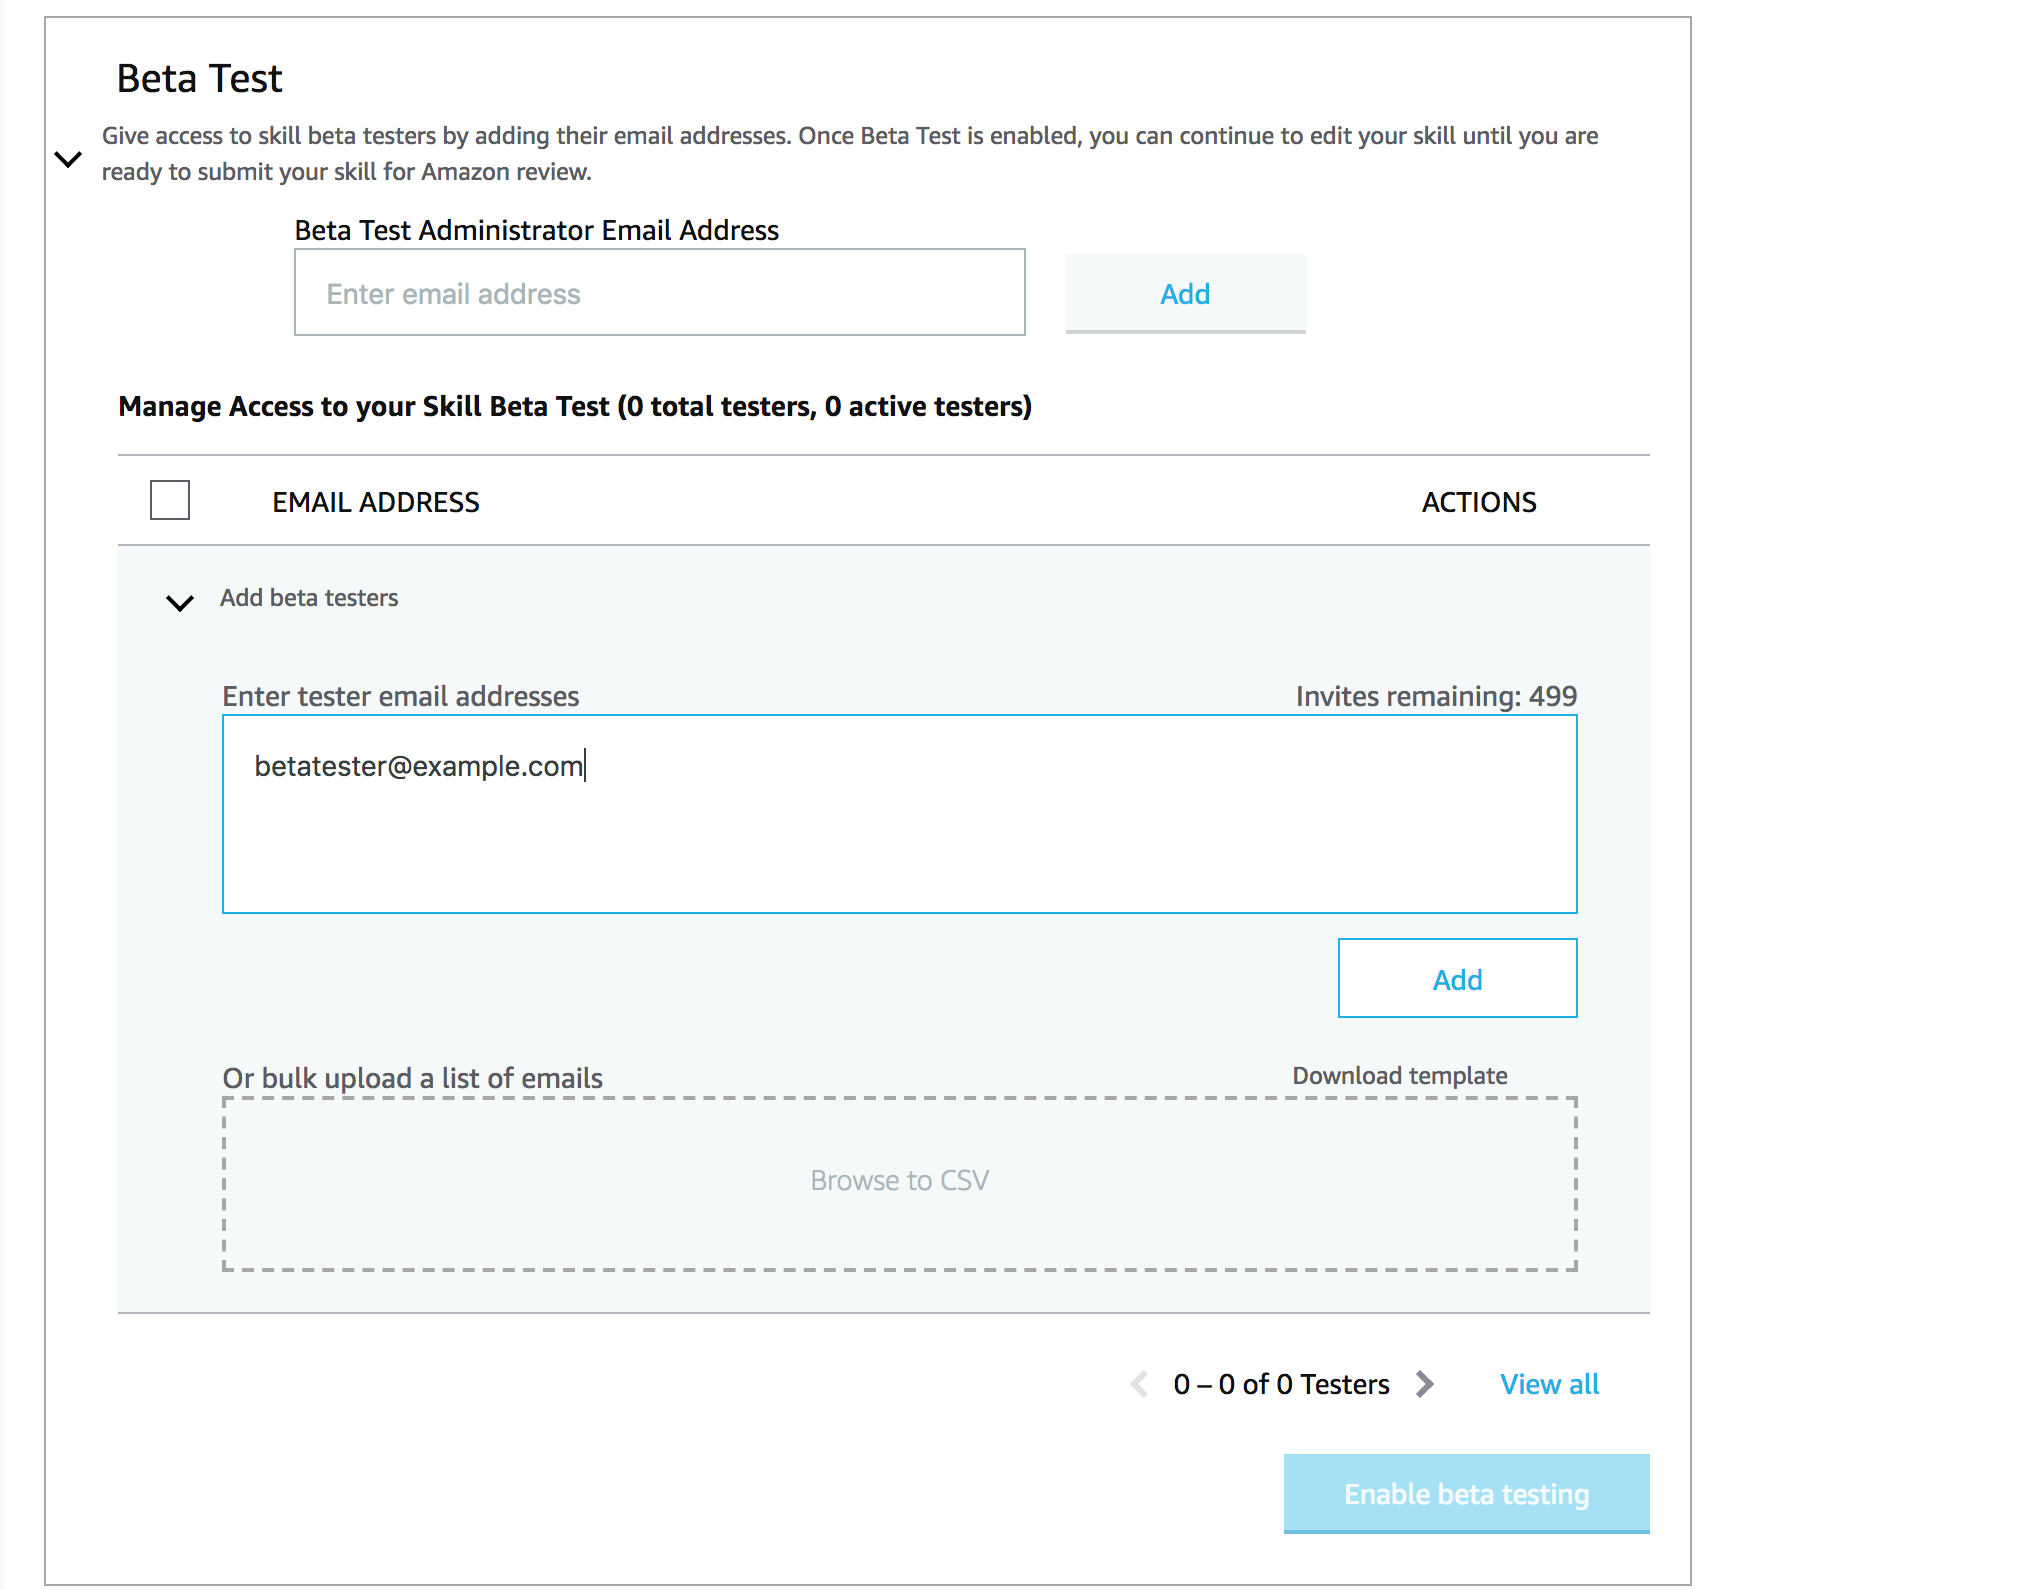
Click on the Add button, and then the Enable beta testing button is highlighted as active:
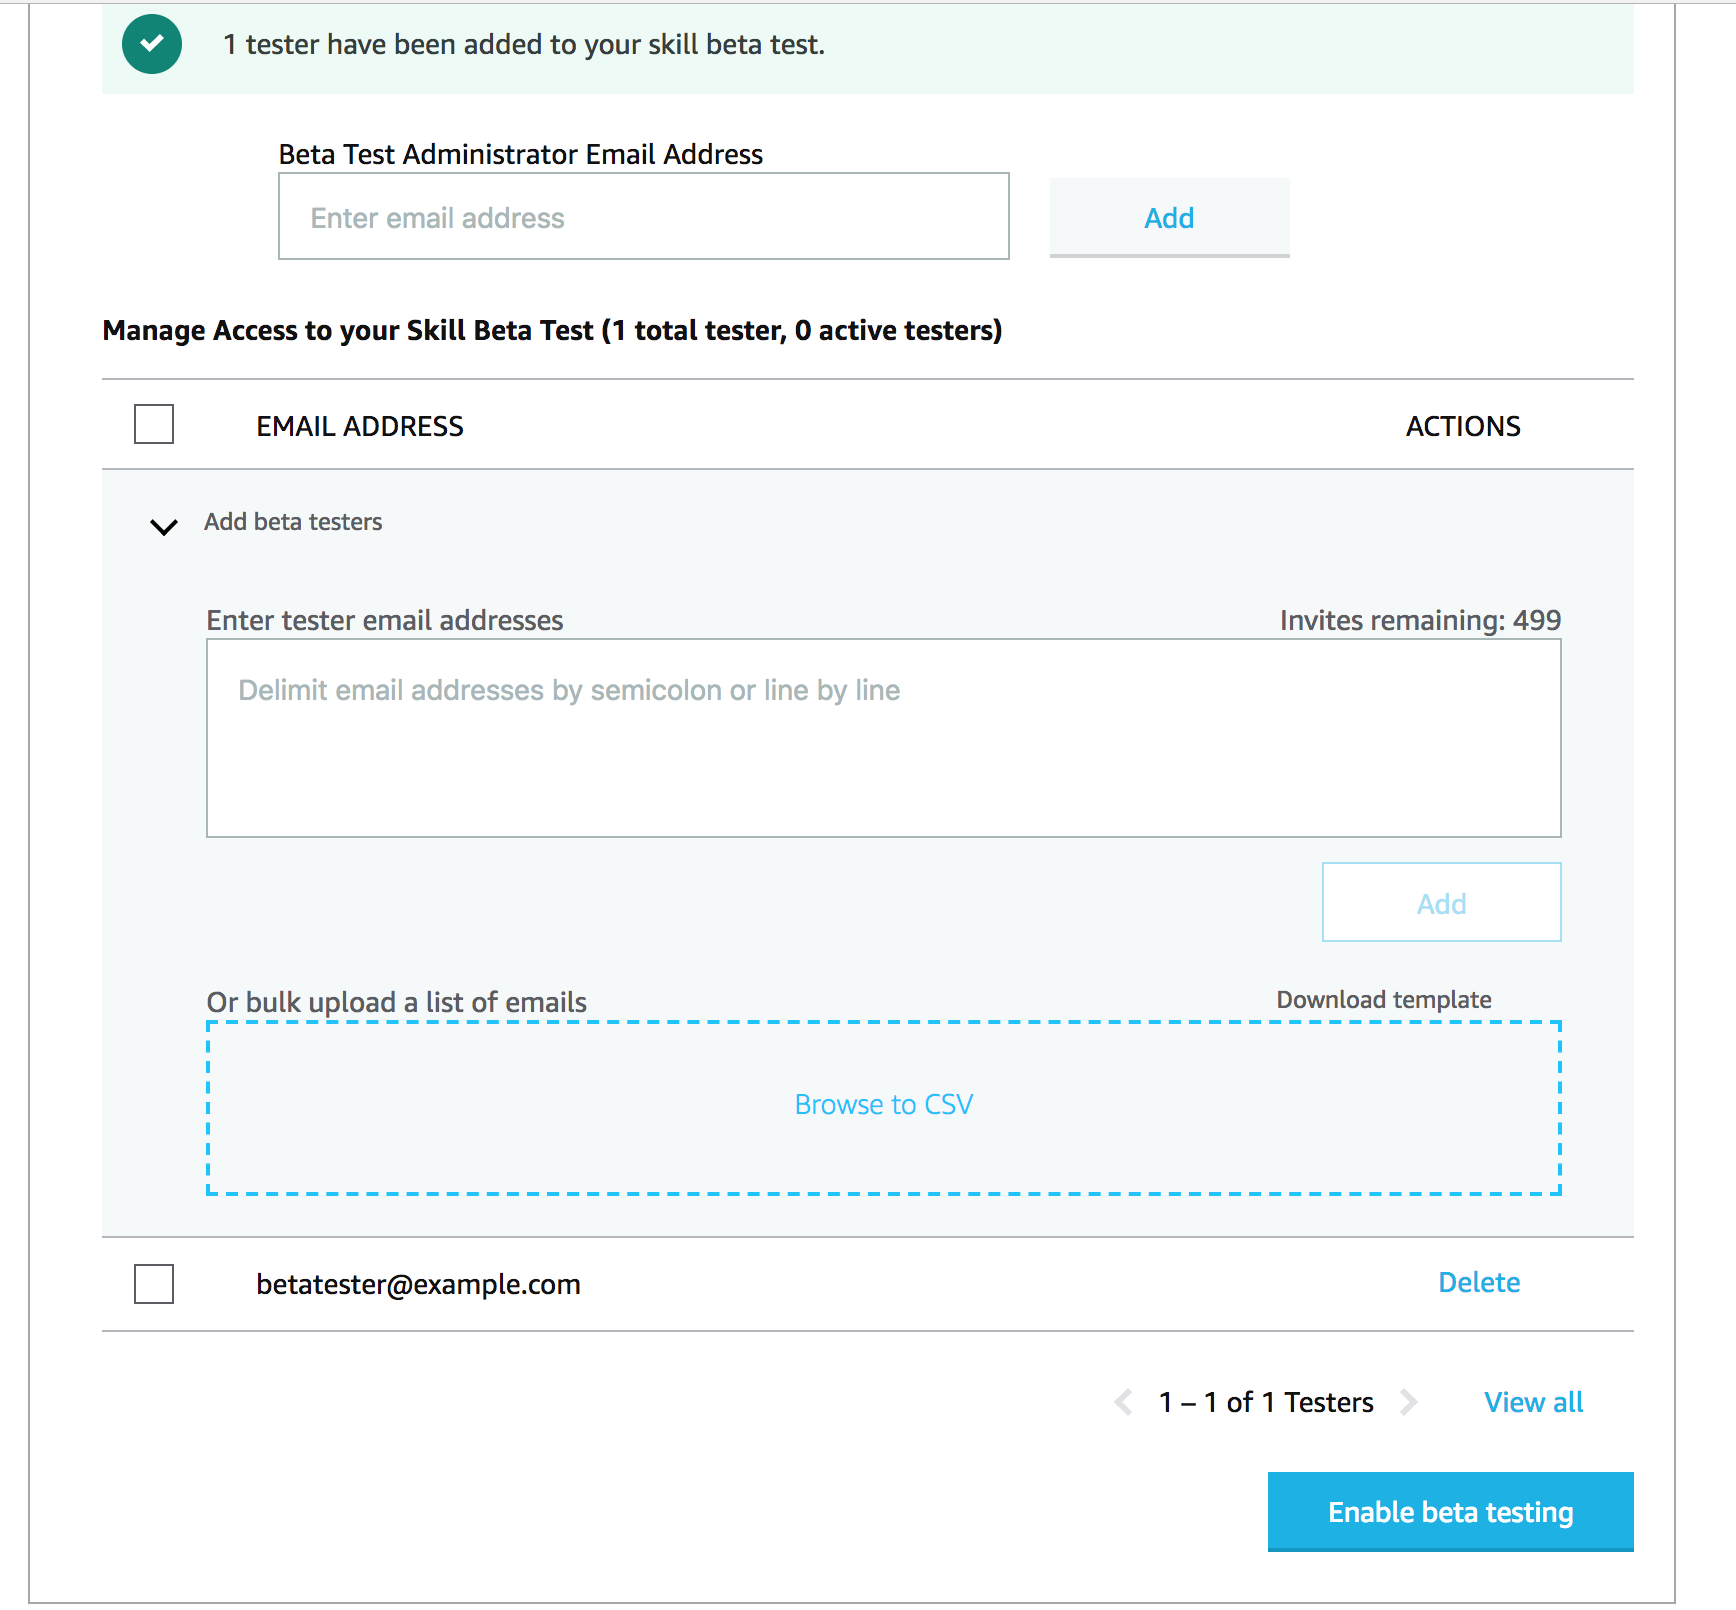
Click on the Enable beta testing button. Now the beta testing has been activated, and an invitation has been sent to the tester email address:
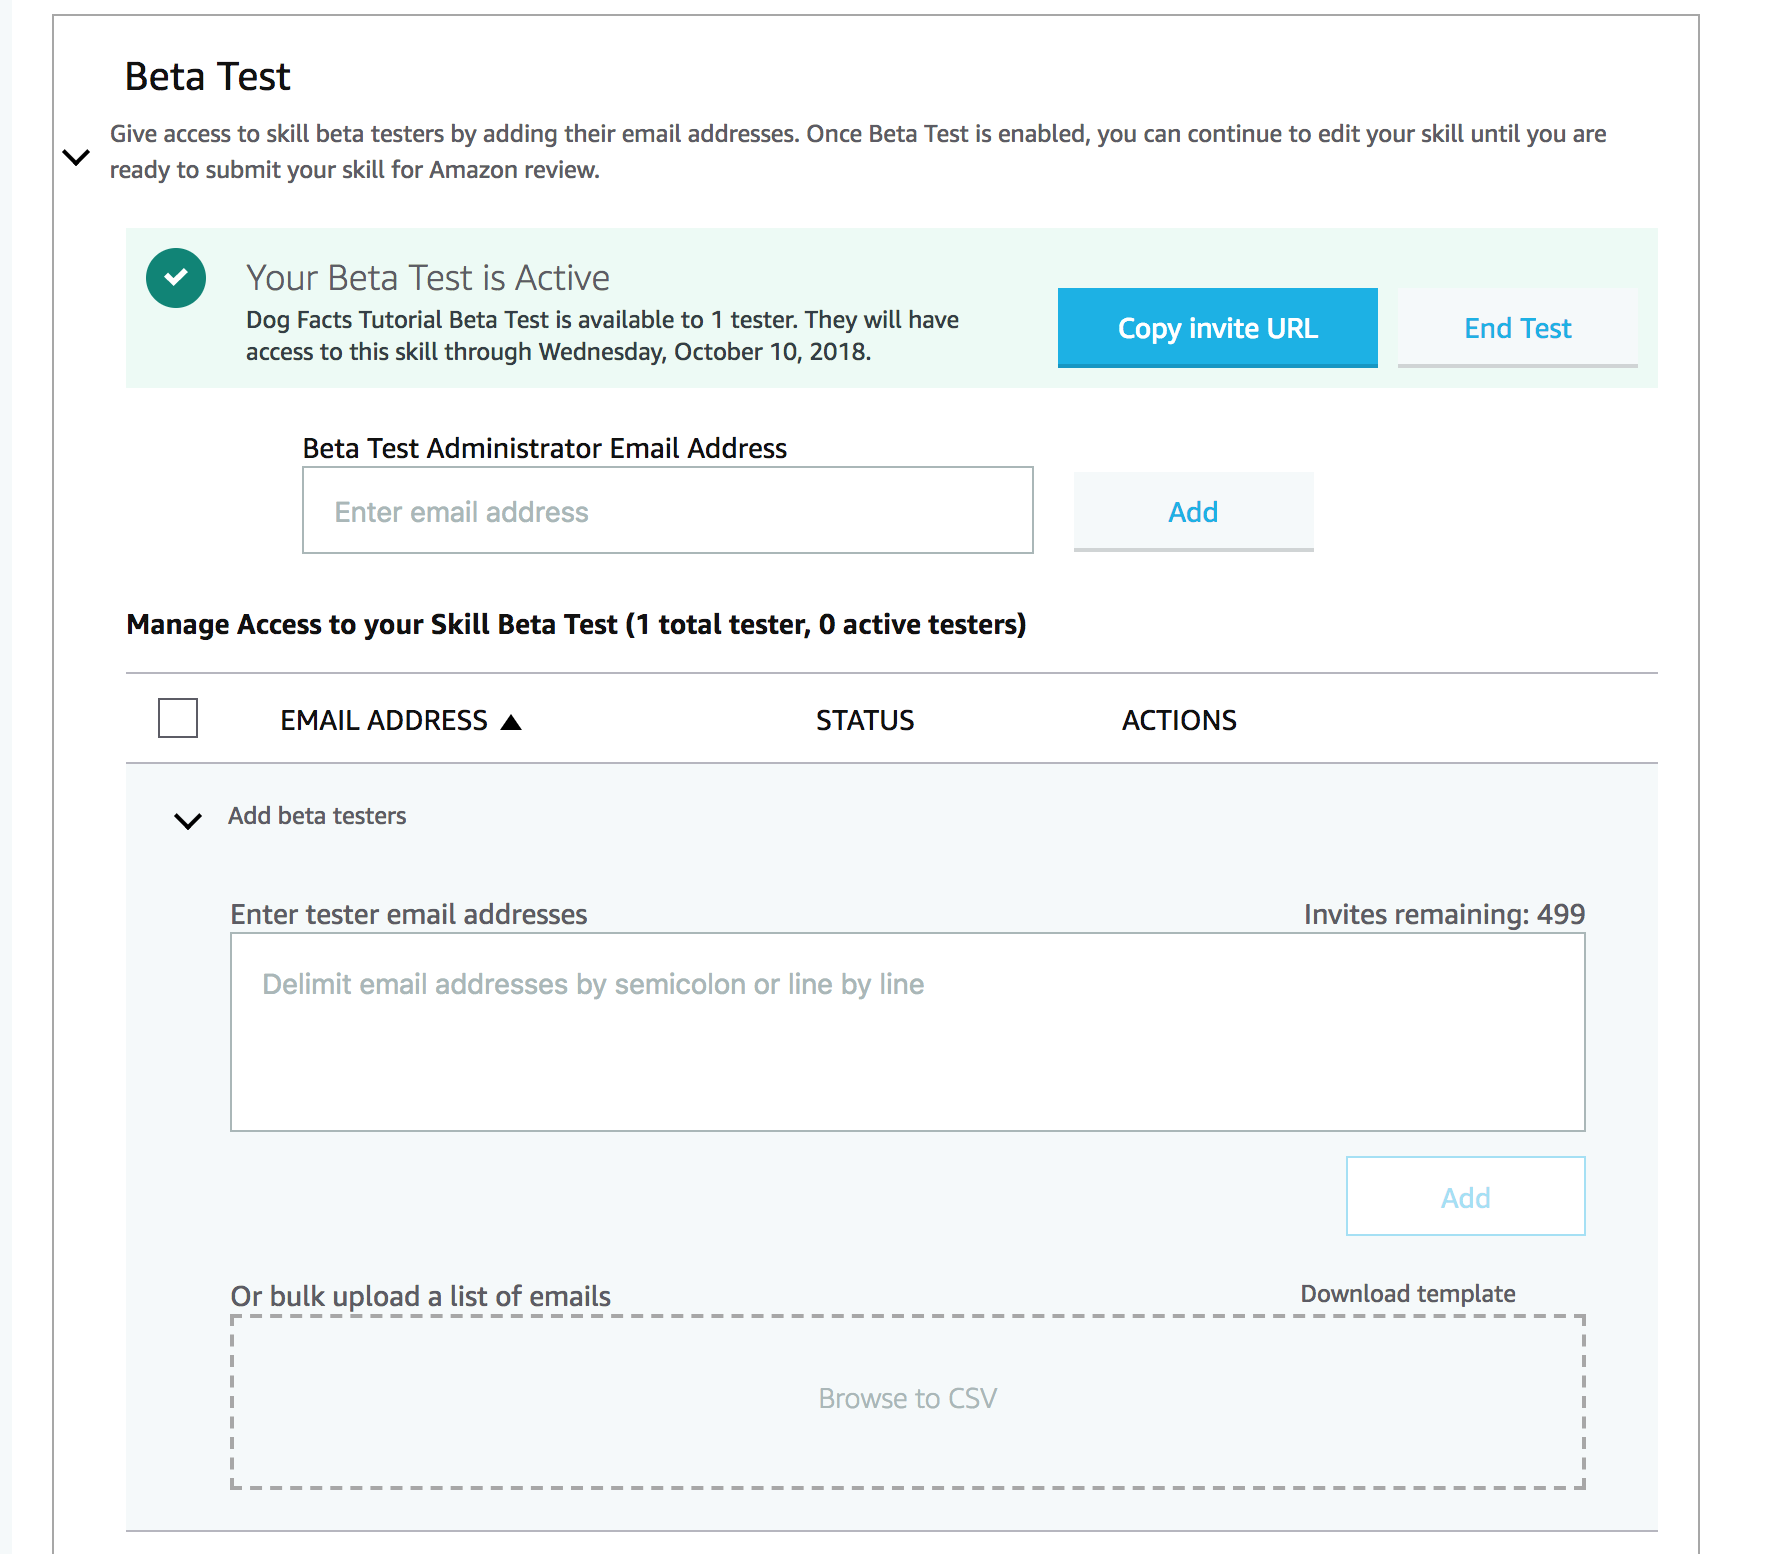
That is it. Your beta testers receive an email with the instructions on how to enable your Skill on their devices!
Testing a Google Action on Google Home and in Google Assistant App
It is the same process that we’ve just gone though with Amazon, but it’s done on Dialogflow.
For you to invite beta testers (or yourself) to install the Google Action on their devices, you need to log in to Dialogflow Console.
From your dashboard you need to go to the Integrations section:
Click on Integration settings. In the popup window click on the Test button:
The next screen opens in the separate tab. Go to the Release section there:
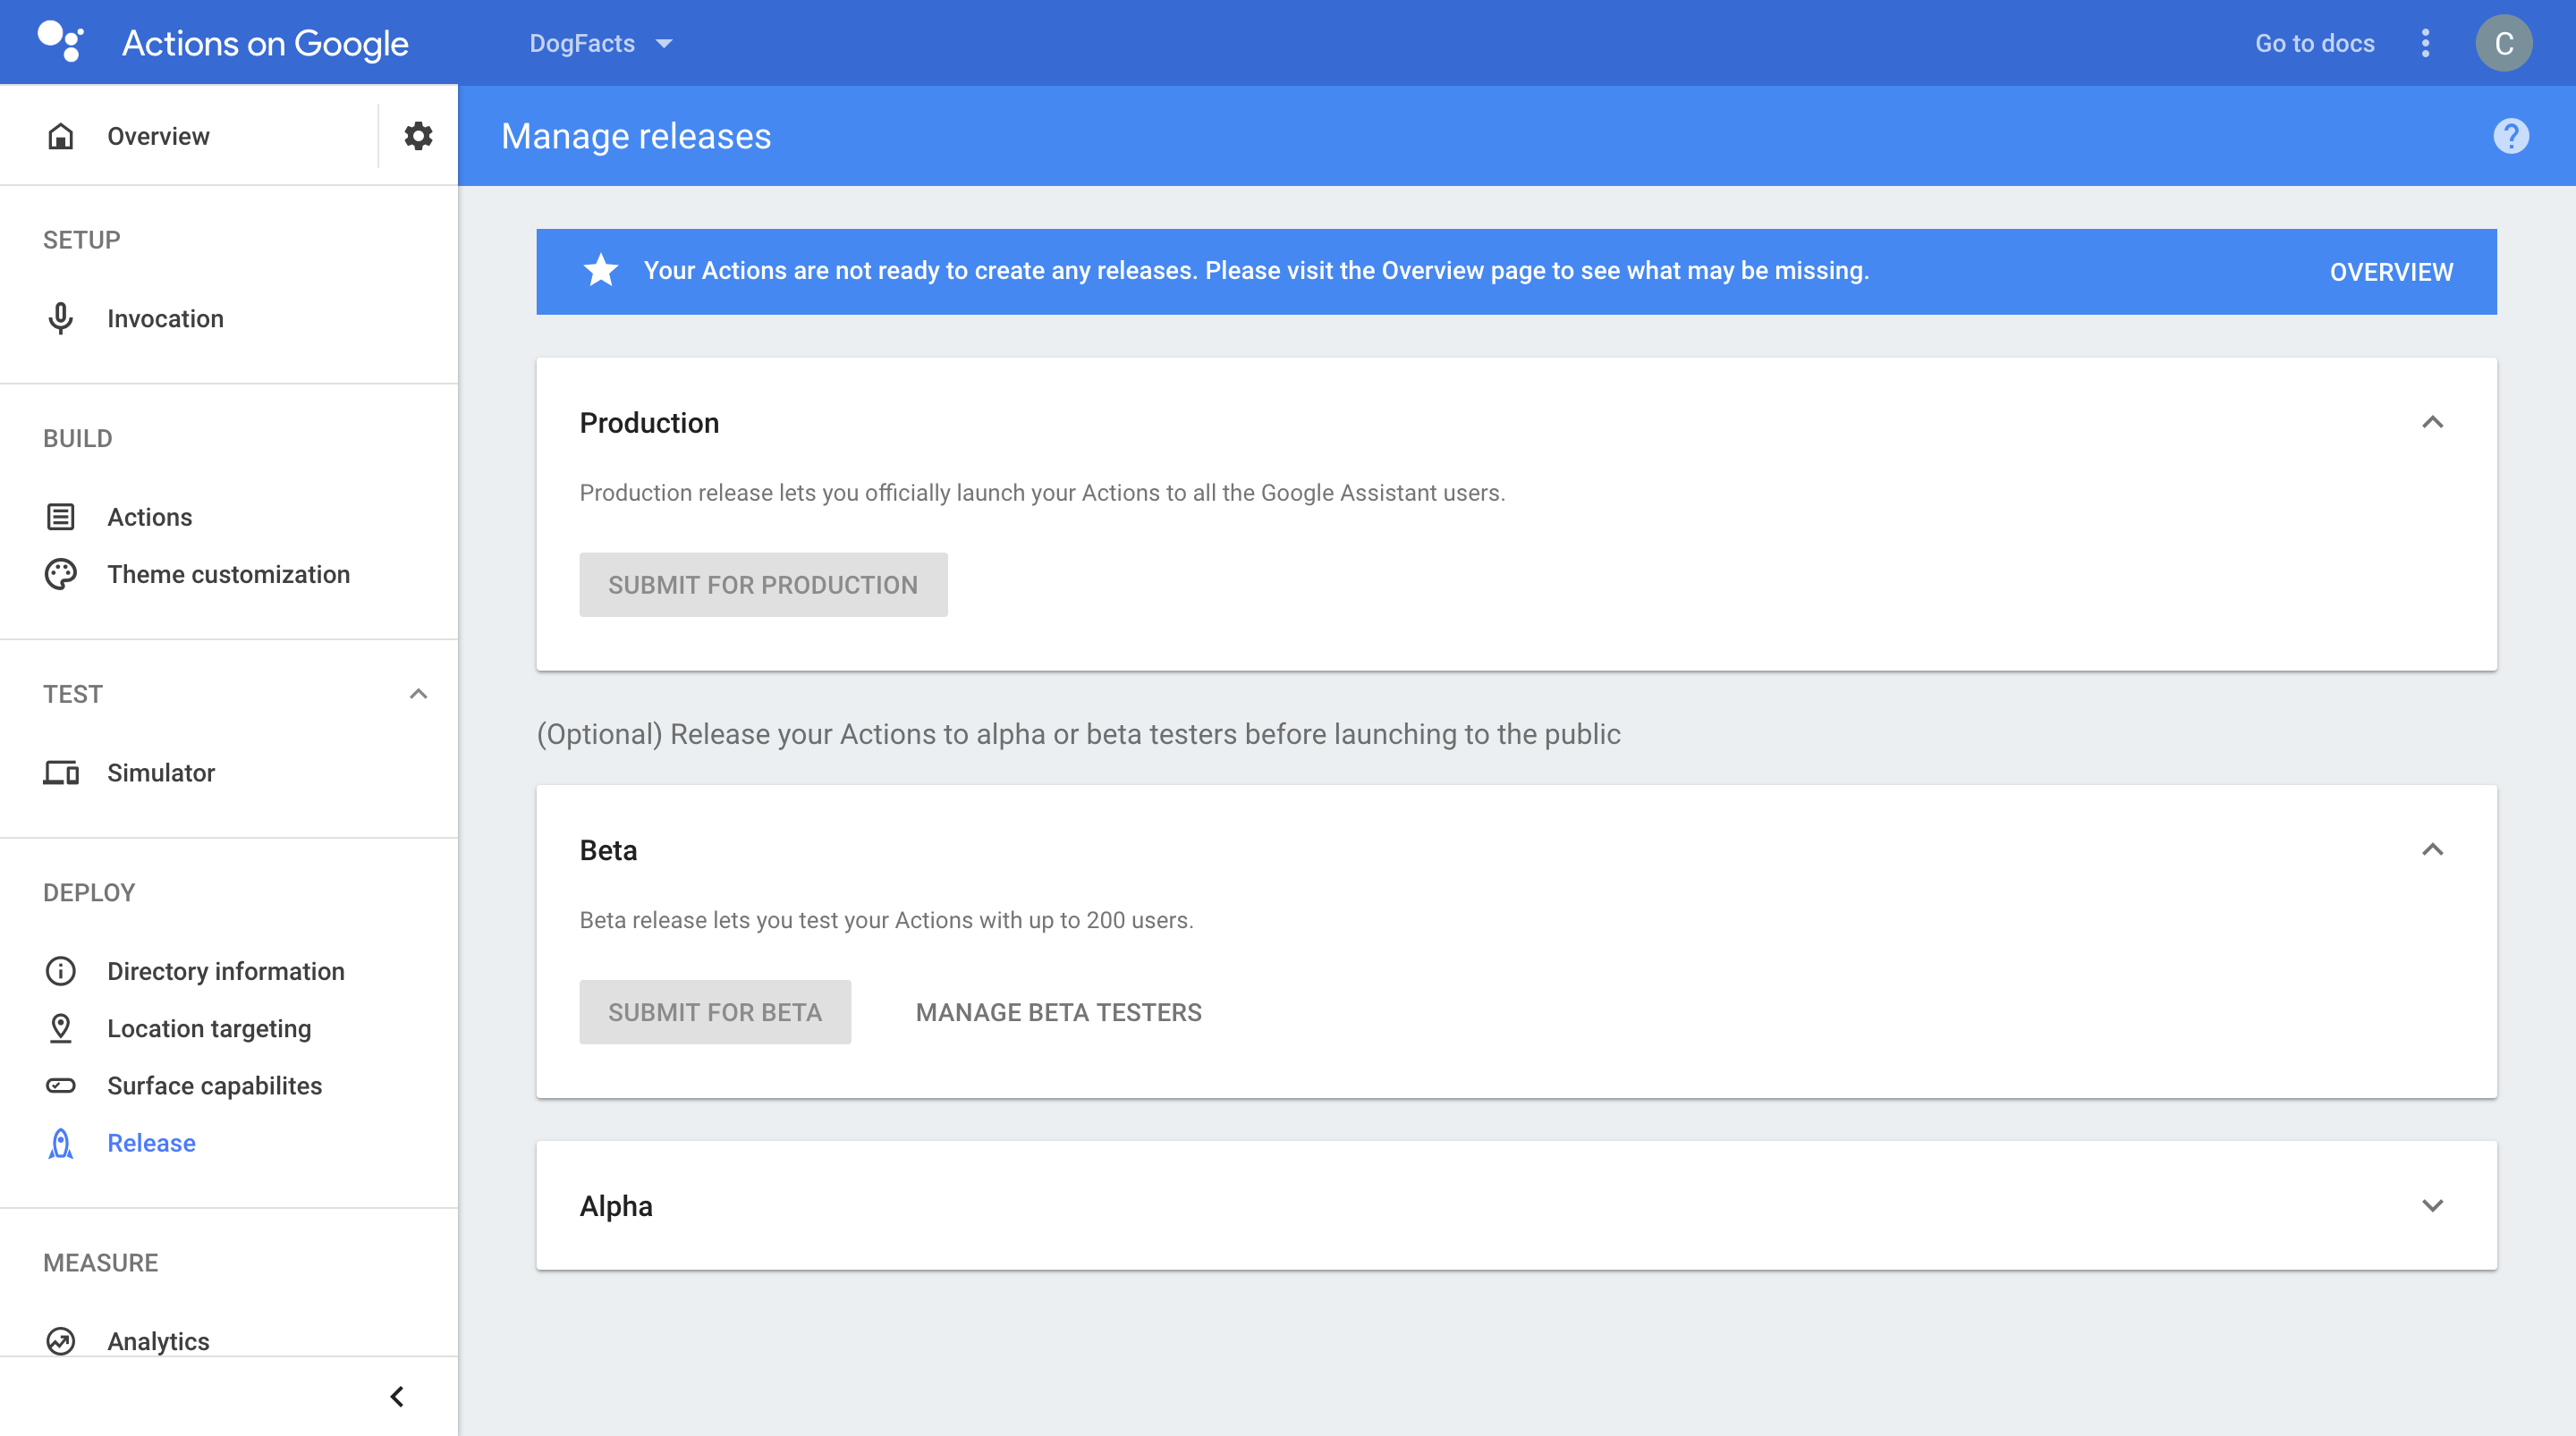
Click on the arrow next to Beta card. There you can open the following dialog by clicking on the Manage Beta Testers:
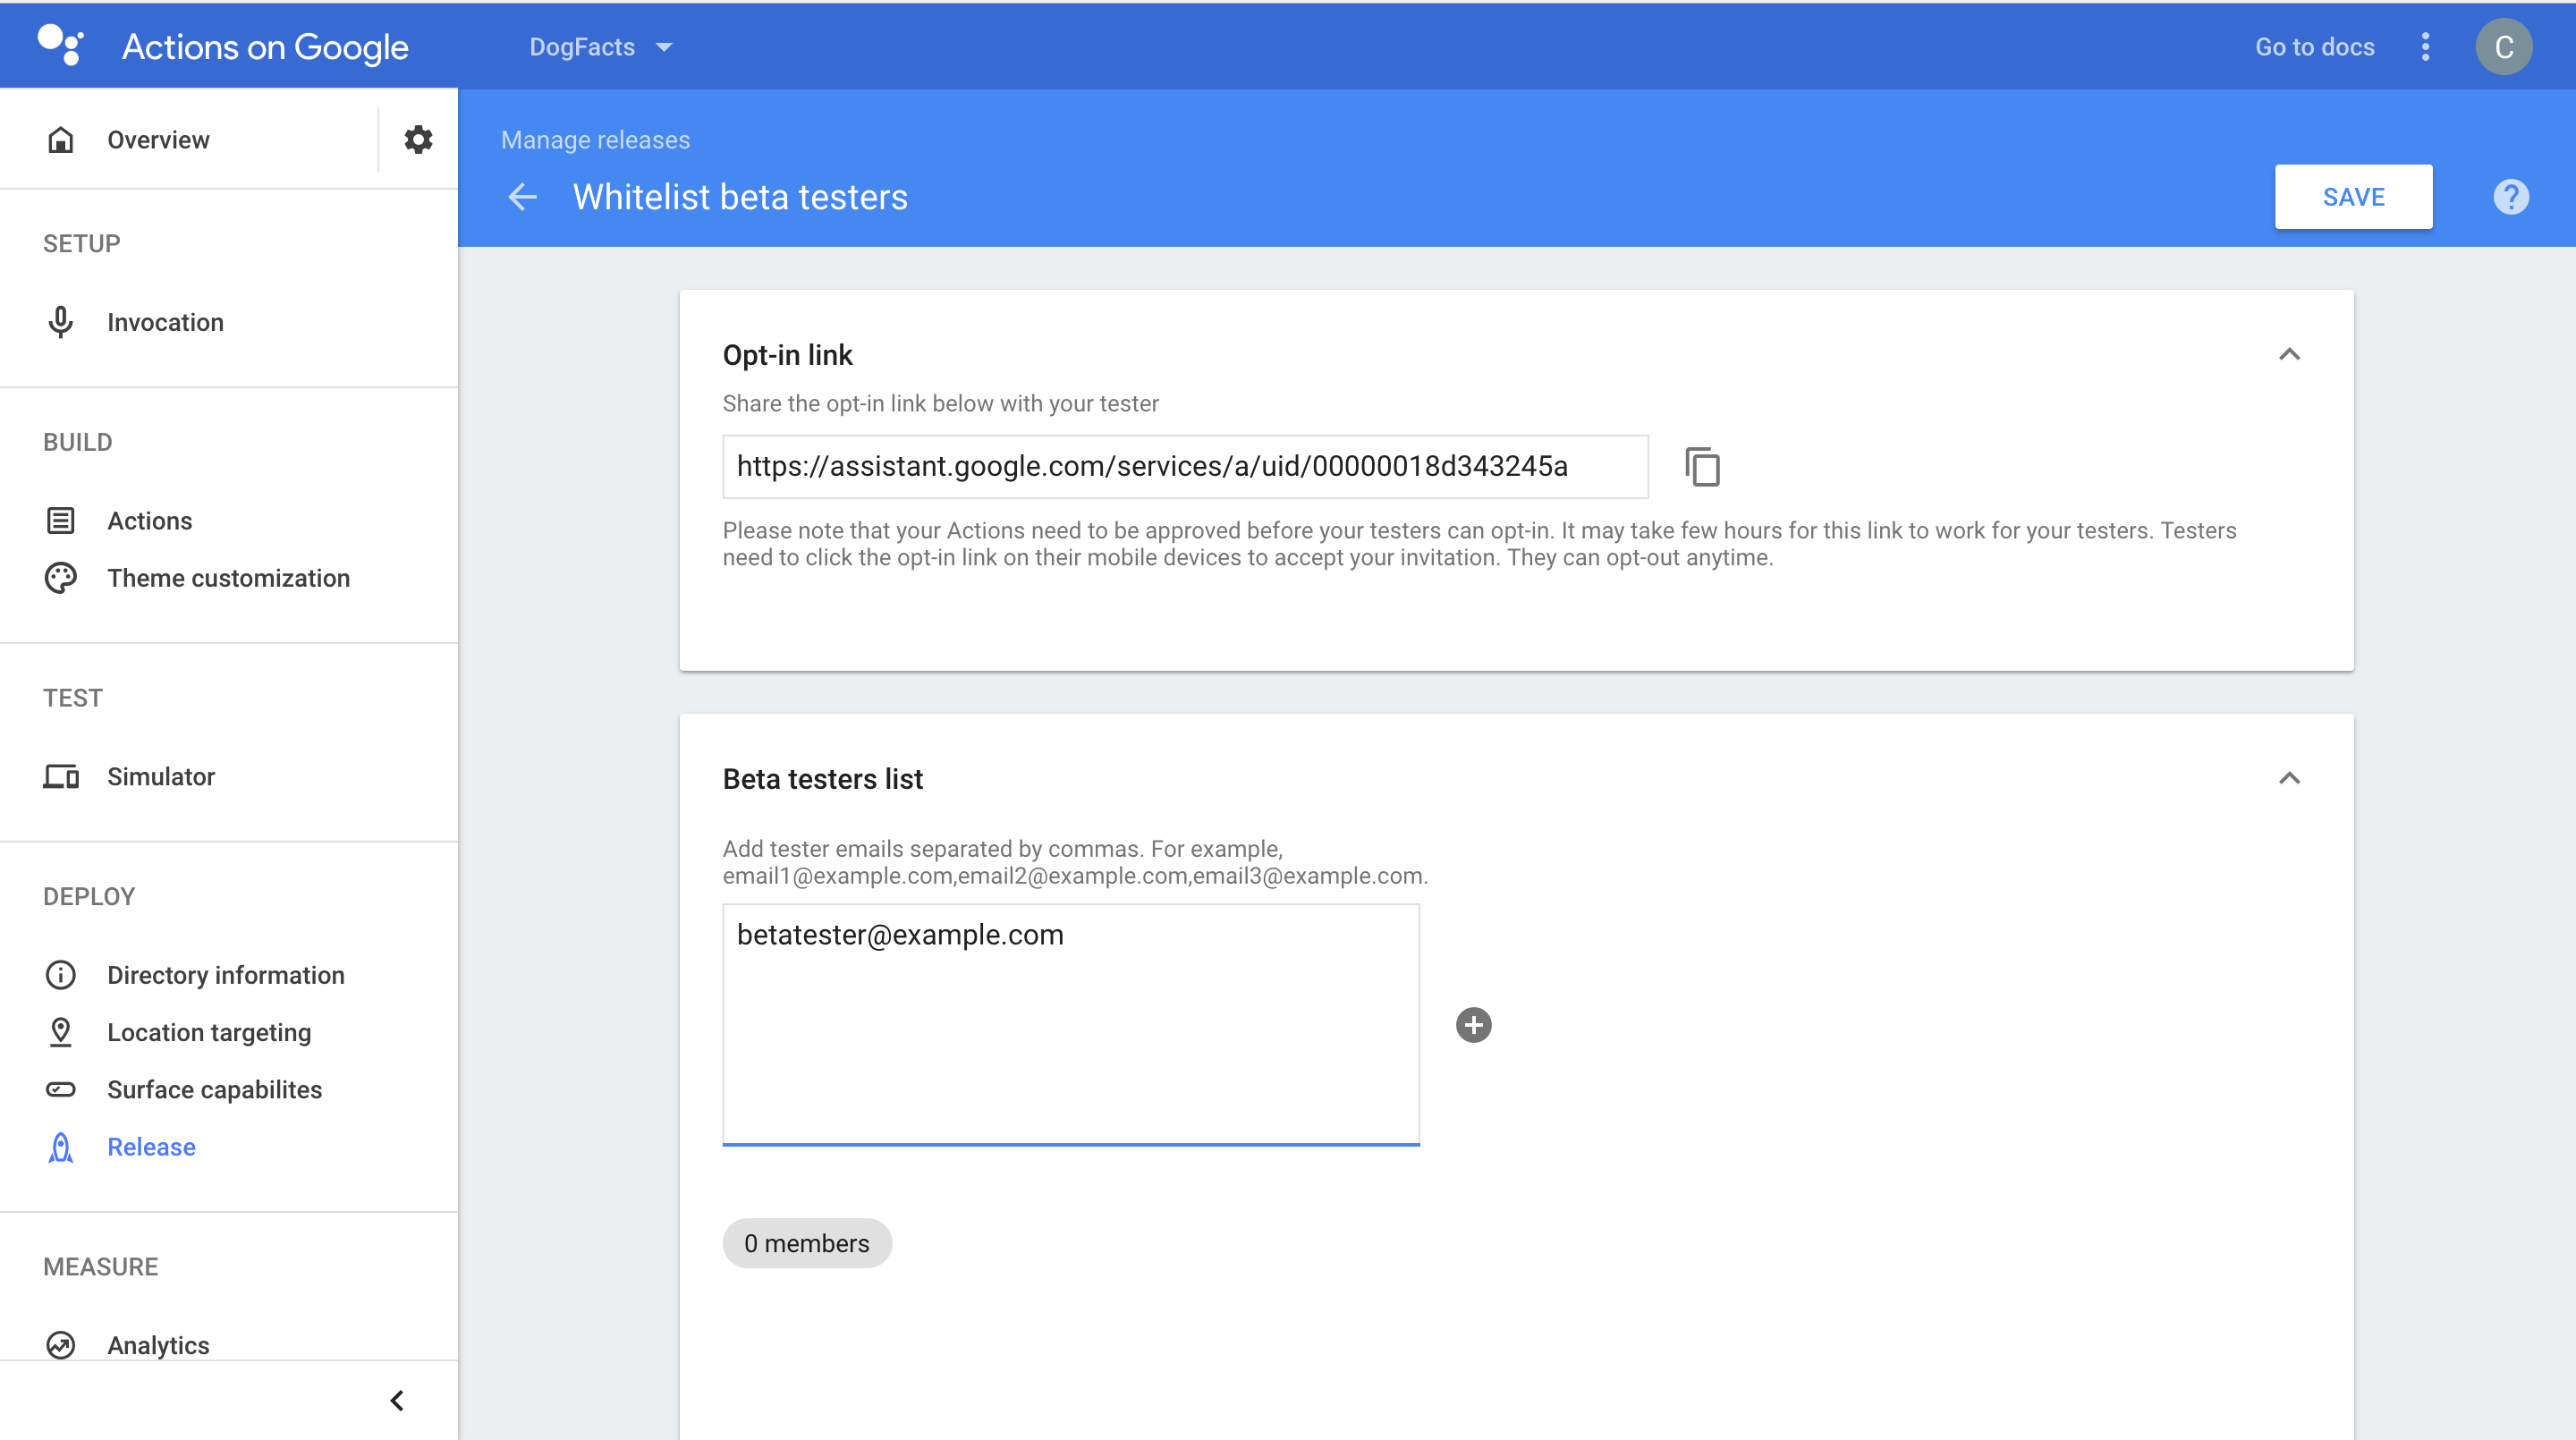
Add email addresses of your testers, click on the plus button and then on the Save button in the top right of the screen.
That’s it! Your users receive an email from Google with the instructions on how to enable the Action on their devices.
Next Steps
You have developed a voice application on BotTalk and deployed it as an Alexa Skill and an Action on Google. You learned how to test your application both on the simulator and on physical devices.
If you want to learn some advanced topics - like displaying visual interfaces - head over to the next chapter.